Atmospheric Technology
23
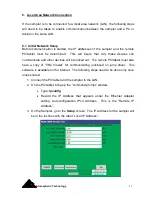
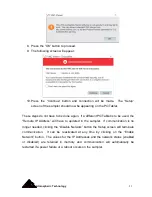
8. Press the “OK” button to proceed.
9. The following screen will appear:
10. Press the “Continue” button and connection will be made. The “Setup”
screen of the sampler should now be appearing on the PC/Tablet.
These steps do not have to be done again. If a different PC/Tablet is to be used, the
“Remote IP Address” will have to updated in the sampler. If communication is no
longer needed, clicking the “Disable Network” button the Setup screen will terminate
communication. It can be reactivated at any time by clicking on the “Enable
Network” button. The values for the IP Addresses and the network status (enabled
or disabled) are retained in memory and communication will automatically be
restarted if a power failure or a reboot occurs on the sampler.
Summary of Contents for 8000
Page 2: ......
Page 4: ...ii Atmospheric Technology ...
Page 8: ...2 Atmospheric Technology ...
Page 14: ...8 Atmospheric Technology ...
Page 18: ...12 Atmospheric Technology ...
Page 30: ...24 Atmospheric Technology ...
Page 39: ...Atmospheric Technology 33 Appendix A Schmatics ...
Page 40: ...34 Atmospheric Technology ...
Page 41: ...1 Model 2200V11 Interface Board Schematic 1 sch 7 ...
Page 42: ......
Page 43: ...Model 2200V11 Interface Board Schematic 2 sch 2 7 ...
Page 44: ......
Page 45: ...Model 2200V11 Interface Board Schematic 3 sch 3 7 ...
Page 46: ......
Page 47: ...Model 2200V11 Interface Board Schmatic 4 sch 4 7 ...
Page 48: ......
Page 49: ...Model 2200V11 Interface Board Schematic 5 sch 5 7 ...
Page 50: ......
Page 51: ...Model 2200V11 Interface Board Schematic 6 sch 6 7 ...
Page 52: ......
Page 53: ...Model 2200V11 Interface Board Schematic 7 sch 7 7 ...
Page 54: ......
Page 55: ...Atmospheric Technology 49 Appendix B Manual for Mass Flow Controller ...
Page 56: ......


