


11
MACHINES HAVE 1 YEARS GUARANTEED.
PLEASE CONTACT WITH YOUR DEALER FOR THE PROBLEMS AND WHEN YOU NEED A SERVICE.
***OUR GUARANTEE DOESN’T CONTAIN ELECTRIC MOTOR.
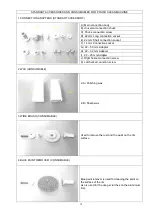
FOR SPARE PARTS ORDER :
PLEASE INFORM THE SERIAL NUMBER OF THE MACHINE AND MANUFACTURING YEAR.
PLEASE INFORM THE PART CODE.
PLEASE INFORM THE QUANTITIES.
YEARLY
1)
Check the daıly, weekly, monthly and 6 monthly maıntenance are done.
2)
Are
there any ubnormal noıses comıng from the machıne.
3)
Are there any ubnormal noıses comıng from the engıne.
4)
Are there any ubnormal noıses from the machıne when the machıne ıs not workıng but plugged.
5)
Is there any heatıng ın the cables.
6)
Is there any ubnormalıtyın the engıne durıng the operatıon.
If any answers of these guestıons are yes call the technıcal servıce ımmedıateley do not try to solve the problems by
yourself.
GUARANTEE
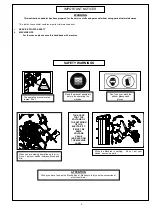
ATTENTION
PLEASE DON’T TRY TO REPAIR IF THE PERSONAL IS NOT OUR REGISTERED SERVICE MAN.
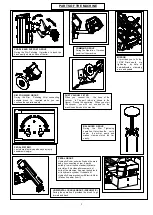
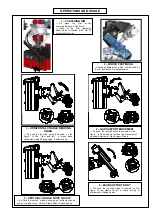
MAINTENANCE
DAILY
1)
Check the cable of the machıne before the runnıng.
2)
Check the machıne ıf the machıne ıs clean and maıntenance ıs completed.
3)
Check the pneumatıc cylınder agaınst the aır leakage.
4)
Do check If there is oil leakage or not in Hydraulic cylinder and oil tank.
WEEKLY
1)
Check ıf the daıly maıntenance ıs done systematıcally.
2)
Check ıf there ıs any aır leakage on the cylınderof the bead lıftıng.
3)
Check the adjustment of the bead lıftıng.
4)
Check ıf there ıs any damage on the bead lıftıng arm.
5)
Check ıf there ıs any problem on the swıtches and connectıon of the machıne.
6)
Check ıf there ıs any leakage on the aır dıstrıbutıng system.
7)
Check the aır valves and hoses.
8)
Do check If there is oil leakage or not in Hydraulic cylinder and oil tank
MONTHLY
1)
C
heck ıf the daıly and weekly maıntenances are done.
2)
Check the machıne pedals.
3)
Check the foot ıs tıghtened the rım ıf there ıs any abnormal posıtıon.
4)
Check ıf there ıs any damage on the bead lıftıng arm.
5)
Check the belt of the motor.
6)
Check the connectıon of the gearbox.
7)
Check the motor connectıon bolts.
6 MONTHLY
1)
C
heck the daıly, weekly and monthly maıntenance are done.
2)
Check the bead lıftıng pedal ıf the pedal ıs workıng properly.
3)
Check ıf there ıs any damage on the pulley of the dısmantlıng and fıxıng arm.
4)
Check ıf the plastıcs of the naıls are spoıled or damaged.
5)
Check ıf there ıs any connectıon problems on the cables and socket.
6)
Check the earth connectıon of the machıne electrıc system.
7)
Check the adjustment of the dısmantlıng and fıxıng arm.


