CL3800 / CL3700 / CL3100 User Manual
28
Connecting Up - CL3100
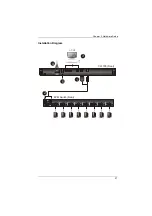
Refer to the example installation diagram below as you perform the following
steps:
1. Plug one end of the KVM cable into the KVM ports located in the CPU
section on the rear of the CL3100.
Note:
The CL3100 supports speakers only. It does not support a
microphone. Connect the KVM cable’s speaker jack (green) to the
CL3100’s audio port.
2. Plug the other end of the KVM cable into the Console Section of a KVM
switch.
3. If you are installing an external console, plug your keyboard, mouse,
monitor, and speakers (microphone not supported) into their respective
ports on the Console Section of the CL3100.
4. Plug one end of the CL3100’s power cord into the CL3100’s power socket,
and plug the other end into a power source.
5. Turn on the power to LCD Console.
6. Power on your PC.
Summary of Contents for CL3100
Page 1: ...Short Depth WideScreen LCD Console CL3800 CL3700 CL3100 User Manual www aten com...
Page 26: ...CL3800 CL3700 CL3100 User Manual 16 This Page Intentionally Left Blank...
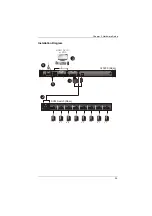
Page 37: ...Chapter 2 Hardware Setup 27 Installation Diagram 5 3 4 1 CL3700 Rear HDMI 2 KVM Switch Rear...
Page 39: ...Chapter 2 Hardware Setup 29 Installation Diagram 5 3 4 1 CL3100 Rear VGA 2 KVM Switch Rear...
Page 40: ...CL3800 CL3700 CL3100 User Manual 30 This Page Intentionally Left Blank...
Page 52: ...CL3800 CL3700 CL3100 User Manual 42 This Page Intentionally Left Blank...
Page 60: ...CL3800 CL3700 CL3100 User Manual 50 This Page Intentionally Left Blank...

