Chapter 8. User Management
150
5. When you have finished making your choices, click
Save
.
6. In the confirmation popup that appears, click
OK
.
Note:
In any of the columns, you can use Shift-Click or Ctrl-Click to select a
group of ports to configure. Clicking to cycle through the choices on
any one of the selected ports causes all of them to cycle in unison.
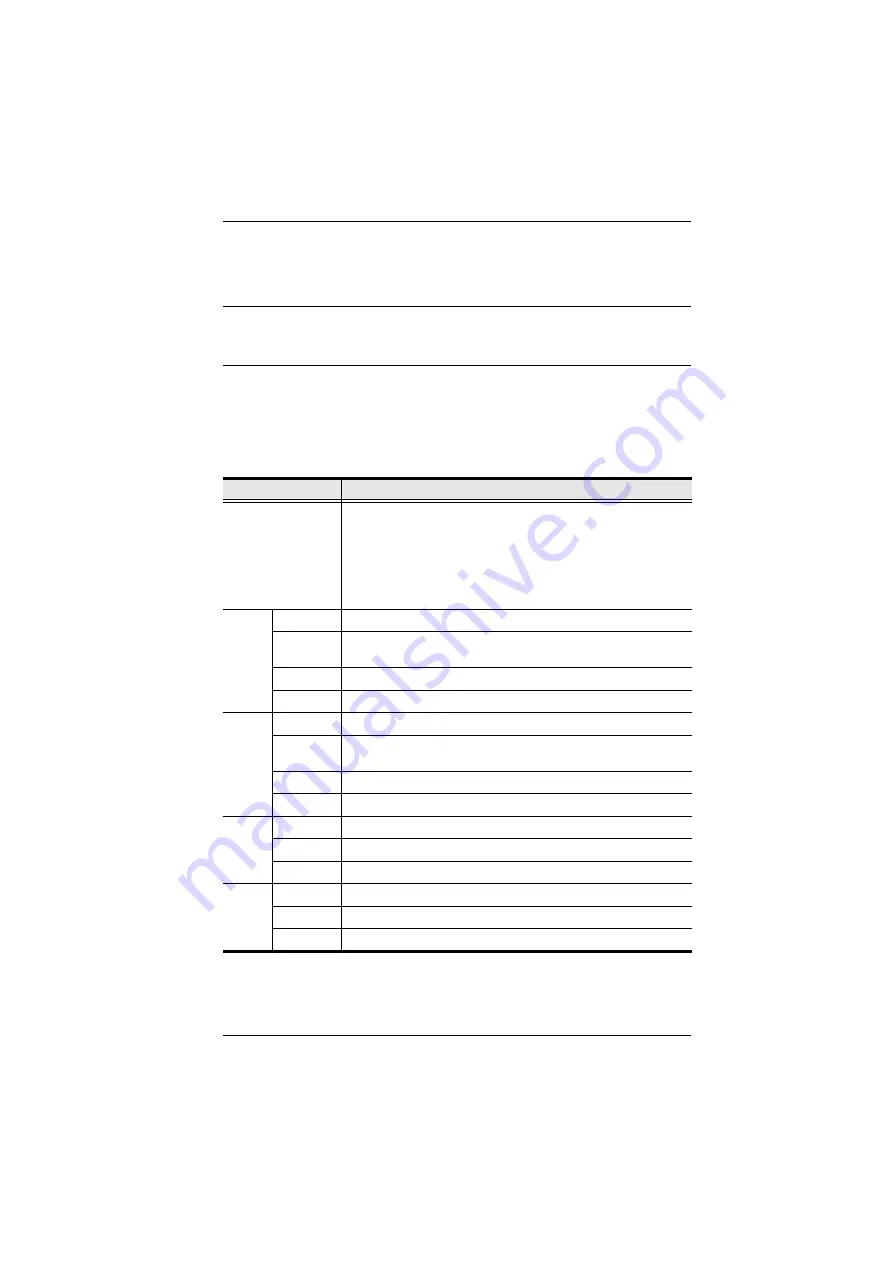
Filters
There are five filters at the top of the columns that allow you to expand or limit
the scope of the ports that are displayed in the
Name
column, as described in
the following table:
Filter
Description
Name
To filter on the port name, key in the name then press
Enter
.
Only the ports whose names correspond to what you have keyed
in appear in the list.
Wildcards (? for single characters; * for multiple characters) and
the keyword
or
are supported. E.g., h*ds would return hands and
hoods; h?nd would return hand and hind, but not hard; h*ds or
h*ks would return hands and hooks.
Access All
All ports appear in the list.
Full
Access
Only ports configured as Full Access ports appear in the list.
View Only
Only ports configured as View Only ports appear in the list.
No Access
Only ports configured as No Access ports appear in the list.
USB
All
All ports appear in the list.
Full
Access
Only ports configured as Full Access USB ports appear in the
list.
Read Only
Only ports configured as Read Only USB ports appear in the list.
No Access
Only ports configured as No Access USB ports appear in the list.
Config
All
All ports appear in the list.
Permitted
Only ports configured as Permitted appear in the list.
Restricted
Only ports configured as Restricted appear in the list.
PON
All
All ports appear in the list.
Permitted
Only ports configured as Permitted appear in the list.
Restricted
Only ports configured as Restricted appear in the list.

