background image

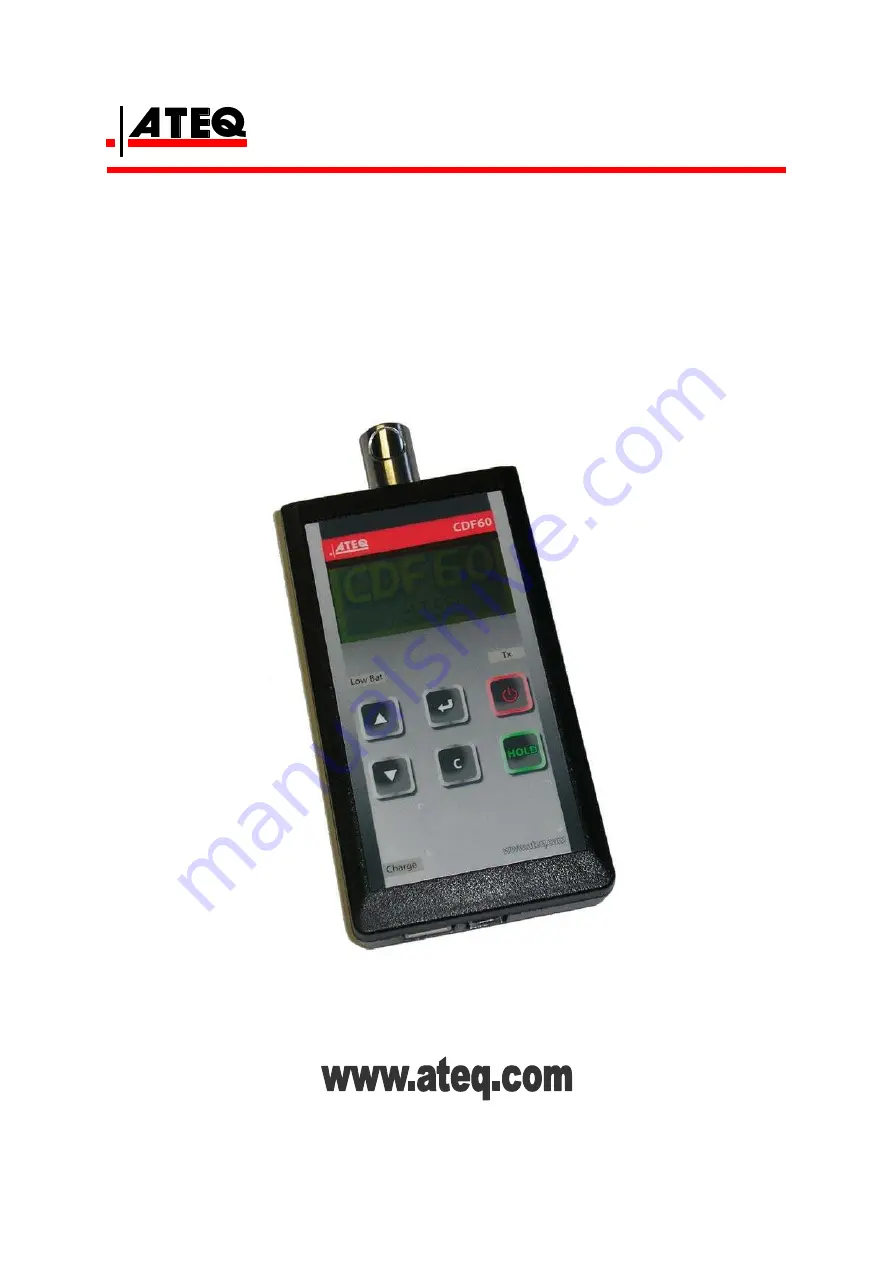
 USER 

MANUAL 


ATEQ CDF60 

Version 1.0 


Reference: UM-23900B-U 

Summary of Contents for CDF60

Page 1: ...USER MANUAL ATEQ CDF60 Version 1 0 Reference UM 23900B U...

Page 2: ......

Page 3: ...REVISION OF THE CDF60 USER MANUAL Edition Revision Reference Date week year Chapters updated First edition UM 23900A U 35 2007...

Page 4: ......

Page 5: ...that the electrical main is earthed disconnect the electrical connections to the equipment before maintenance cut the air supply for any kinds of operation on the pneumatic assembly do not open the i...

Page 6: ......

Page 7: ...ents CALIBRATION This may be carried out on site or in our offices ATEQ is attached to the COFRAC and delivers a certificate following a calibration TRAINING COURSES In the framework of partnership wi...

Page 8: ......

Page 9: ...e you complete satisfaction during many long years of operation In order to maximise the life expectancy and reliability of your ATEQ instrument we recommend that you install this instrument on a secu...

Page 10: ......

Page 11: ...ector first input 6 Chapter 2 USER INTERFACES 1 KEYS 7 1 1 Start Information key 7 1 2 Cancel key 7 1 3 HOLD key 7 1 4 Enter key 8 1 5 Navigation keys 8 2 OTHERS ITEMS 9 2 1 LCD display 9 2 2 Lights 9...

Page 12: ...e 26 1 5 Protection cover option 26 1 6 Hard case option 26 1 7 Needle valve option 26 2 SAFETY INFORMATIONS 27 3 RECYCLING 28 Chapter 6 ERROR MESSAGES 1 ERROR MESSAGES 29 Chapter 7 PC INSTALLATION 1...

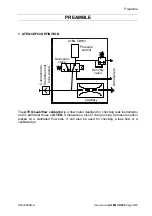
Page 13: ...e Pressure sensor ATEQ CDF60 Security valve Capillary Auto zero valve The ATEQ Leak flow calibrator is a flow meter destined for checking leak instruments and in particular those of ATEQ It measures a...

Page 14: ...13 hPa 20 C No linearity Hysteresis Repeatability T drift Long time drift 90 days 40 ml min 2 5 RV 0 1 ml min 2 RV 0 1 ml min 0 01 ml min RV Read value Instrument adjusted in our metrology laboratory...

Page 15: ...rding a portable case The instrument has a pneumatic quick connector Staubl kind for the connection to the flow to be measured The instrument has three electrics connectors 1 connector for the battery...

Page 16: ...ttery charging Jack connector 2 2 USB CONNECTOR Allows the connection to a PC Type B USB connector 2 3 RS232 CONNECTOR Allows the connection to a printer with a RS232 connection RJ45 type connector Fo...

Page 17: ...s the displaying of the program version the flow range and the battery level Press and hold the key to display the battery level Switching off the instrument the press and lengthy hold this key is swi...

Page 18: ...ss 1 second allows acceding to the special cycles menu 2nd mode press and hold 3 seconds allows acceding to the parameters menu 1 5 NAVIGATION KEYS KEY FUNCTION Scroll up or increase numeric values Sw...

Page 19: ...2 2 LIGHTS Three DEL indicate the instrument state LOW BAT Battery level when this is on the battery level becoming too low for reliable operation indicating that the battery must be recharged before...

Page 20: ...Chapter 2 User Interfaces UM 23900B U User manual ATEQ CDF60 Page 10 40...

Page 21: ...ics connections before the start up of the CDF60 Switches on the instrument When this is on the battery level becoming too low for reliable operation the LOW BAT light will light on The instrument sta...

Page 22: ...ture and atmospheric pressure 4 0 0 0 c m 3 m i n A I R S T D C O N D FLOW 09 36 TEMP 25 8 C ATM P 1010 5 hPa To switch from the simple mode to the extended mode press the UP or the DOWN keys Display...

Page 23: ...6 TEMP 25 8 C ATM P 1010 5 hPa The PARAMETER menu is displayed By using the UP and DOWN key select FILTER parameter PARAMETER FILTER 0 5 s FLOW UNIT cm3 min STD COND YES Then press the ENTER key to mo...

Page 24: ...u is displayed By using the UP and DOWN key select PRESS UNIT parameter PARAMETER FILTER 1 0 s FLOW UNIT cm3 min STD COND YES Then press the ENTER key to modify the parameter the cursor moves on the r...

Page 25: ...TER 1 0 s FLOW UNIT cm3 min STD COND NO Then press the ENTER key to modify the parameter the cursor moves on the right PARAMETER FILTER 1 0 s FLOW UNIT cm3 min STD COND NO By using the UP and DOWN key...

Page 26: ...ER menu is displayed By using the UP and DOWN key select GAZ parameter PARAMETER FLOW UNIT cm3 min STD COND NO GAZ AIR Then press the ENTER key to modify the parameter available the gas list is displa...

Page 27: ...R menu is displayed By using the UP and DOWN key select TEMP UNIT parameter PARAMETER STD COND YES GAZ AIR TEMP UNIT CELSIUS Then press the ENTER key to modify the parameter the cursor moves on the ri...

Page 28: ...cm3 min AIR STD COND FLOW 09 36 TEMP 25 8 C ATM P 1010 5 hPa The PARAMETER menu is displayed By using the UP and DOWN key select BACK LIGHT parameter PARAMETER PRESS UNIT Pa BACK LIGHT 100 AUTO OFF 0...

Page 29: ...min Then press the ENTER key to modify the parameter the cursor moves on the right PARAMETER GAZ AIR TEMP UNIT CELSIUS AUTO OFF 05 min By using the UP and DOWN key to modify the switch off delay valu...

Page 30: ...using the UP and DOWN key select RS232 parameter PARAMETER TEMP UNIT CELSIUS AUTO OFF 05 min RS232 Then press the ENTER key to enter into the RS232 links parameters configuration menu RS232 BAUDRATE 5...

Page 31: ...min cm3 s cm3 h in3 min in3 s in3 h V Standard conditions Yes Temperature V Atmospheric pressure V Gas Air V Helium V Nitrogen V Other V Temp Unit Celsius V Fahrenheit V Kelvin V Back light 0 100 V Au...

Page 32: ...ter into the parameters menu by short press on the ENTER key 4 0 0 0 c m 3 m i n A I R S T D C O N D 17 61 Select the AUTO ZERO function by using the UP and DOWN keys validate with the ENTER key SPECI...

Page 33: ...he ENTER key 4 0 0 0 c m 3 m i n A I R S T D C O N D 09 36 Select the PRINT function by using the UP and DOWN keys SPECIAL CYCLE AUTO ZERO PRINT SENSOR DISPLAY Frame format sent on the USB or RS232 po...

Page 34: ...on the ENTER key 4 0 0 0 c m 3 m i n A I R S T D C O N D FLOW 15 26 TEMP 23 3 C ATM P 1004 9 hPa Select the SENSOR DISPLAY function by using the UP and DOWN keys validate with the ENTER key SPECIAL CY...

Page 35: ...tage supply It has no power switch and works as soon as it is plugged in It is protected against surges and short circuits via a thermal fuse Do not use any other type of fuse Moreover this supply can...

Page 36: ...This cover in rubber material allows protect the CDF60 and absorb impacts option 1 6 HARD CASE OPTION Hard case to put away the CDP60 instrument and its accessories 1 7 NEEDLE VALVE OPTION Needle valv...

Page 37: ...he charger while it is inside a carrying case Connect the charger to a proper power source The voltage requirements are found on the product case and or packaging Do not use the charger if the cord be...

Page 38: ...e dustbin These components must be collected and recycled The crossed out wheeled dustbin means that within the EU the product must be taken to separate collection at the product end of life This appl...

Page 39: ...press on the CANCEL key FLOW OUT OF RANGE Over Flow Press C to return AUTO ZERO The applied negative flow is too high Reduce the negative flow and press on the CANCEL key FLOW OUT OF RANGE Under Flow...

Page 40: ...Chapter 6 Error messages UM 23900B U User manual ATEQ CDF60 Page 30 40...

Page 41: ...nnections for update can be carried out by two ways USB or RS232 following the user preferences 1 1 USB CONNECTION 1 1 1 Windows XP installation 1 Start the installation program USB_VIRTUAL_232_XP EXE...

Page 42: ...rt of your PC and on the CDF60 device 6 Switch on the CDF60 device 7 When the CDF60 device is detected its installation begins The opposite window appears select No not this time and click on Next 8 S...

Page 43: ...3 40 10 When this window appears click on Continue Anyway 11 The drivers are installed 12 The ATEQ RS232 Emulation communication port is created this port will be used for each communication between t...

Page 44: ...site window appears 4 Cliquer sur Suivant 5 The Serial emulation port drivers will be installed at the end the opposite window appears 6 Click on Finish 7 Connect the USB cable on the PC USB port and...

Page 45: ...rate 19200 Bits count 8 Parity even 1 3 RS232 CABLE DIAGRAM 1 6 5 9 SubD 9 pins 8 4 1 RJ45 8 pins Pin 1 Not used Pin 1 Not used Pin 2 RXD Data reception Pin 2 Not used Pin 3 TXD Data emission Pin 3 N...

Page 46: ...Chapter 7 PC installation UM 23900B U User manual ATEQ CDF60 Page 36 40...

Page 47: ...pe CDF60 Dimensions H x L x P mm 152 x 83 x 36 Battery Lithium ion 12 6 V DC Autonomy About 24 hours Electrical connexions Power supply concentric Jack Communication USB and RJ45 RS232 Pneumatics conn...

Page 48: ...__________________________ ________________________________________________________________________ ________________________________________________________________________ ___________________________...

Page 49: ...ctor 6 Flow ranges 4 Flow unit 14 G Gaz 16 H Hold 7 hold key 7 I I key 7 Installation 6 L Lights 9 Low bat light 9 M Measurements characteristics 4 Measurements print 23 Menus structure 21 N Navigatio...

Page 50: ...Index UM 23900B U User manual ATEQ CDF60 Page 40 40...

Page 51: ......

Page 52: ...This document is the exclusive property of ATEQ It may not be communicated reproduced or used without prior consent...

Reviews: