www.atestgaz.pl
In case of improper operation of the system recheck all wiring and connections or contact
the system provider /equipment manufacturer.
The gas monitoring system can be approved for operation only after passing results of all
aforementioned checks and verifications.
7.5
Configuration of gas detectors
Reliable operation of gas detector needs preliminary configuration of the device parameters. The
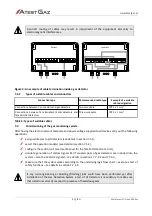
configuration is performed with the use of two buttons
(CONFIG) that are available after opening of the
device housing (see Figure 1). These buttons enable also displaying of the detector settings.
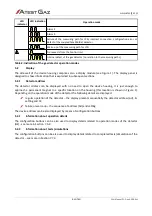
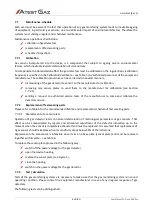
Information about the detector settings is displayed on side wall of the device housing (see Figure 1).
7.5.1
Assigning addresses to gas detectors
Depress the arrow buttons
(see Figure 1) and hold them about one second to enter the mode of
address assignment (the ‘Ad’ message appears on the device display). Release the buttons with the ‘Ad’
message active and the message starts blinking slowly – the desired address can now be set by means of
the arrow buttons
. Finally, depress the both arrow buttons
simultaneously to confirm the address
and store it into the device (the setting continues blinking for about two seconds). Finally, the device quits
the procedure of address assignment.
Should the selected address is not confirmed and stored, the old address remains intact and after 15
seconds the detector quits the mode of address assignment.
The default address is 99.
7.5.2
Operation modes of gas detectors
The two possible operation modes can be pre-set:
the detector is operates as an independent device,
the detector is coupled with the Teta MiniDet device (default setting).
Depress the arrow buttons
(see figure 1) and hold them about two seconds to enter the procedure that
enables selection of the operation mode (the ‘HE’ message appears on the device display). Release the
buttons with the ‘HE’ message active and the message starts blinking slowly – the desired operation mode
can now be set by means of the arrow buttons
. There are two possible options where:
‘0’ means independent operation of the detector,
‘1’ stands for collaboration with the Teta MiniDet device.
Simultaneous depressing of the both buttons confirms the selection and the operation mode is stored in the
detector memory (the setting continues blinking for about two seconds). Finally, the device quits the
procedure of the operation mode selection.
Omission to confirm the selected operation mode leaves the previous selection intact in the device memory
after 15 seconds the detector quits the procedure of operation mode selection.
When the gas detector is configured for independent operation but the Teta MiniDet device
is connected anyway, an error message appears (indicated by the LPG LED).
s. 14|20
User Manual: POD-046-ENG R01


