® Copyright ATH-Heinl GmbH & Co. KG, All rights reserved / Misprints and technical changes reserved / As of: 2020-10
Manufacturer ATH-Heinl GmbH & CO.KG
- 7 -
1.3
Operation
1.3.1 Self test
After it is switched on, the device carries out a self
test and then automatically switches to “dynamic”
mode
1.3.2 Wheel assembly
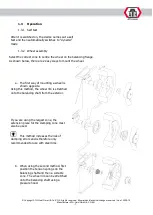
Select the correct cone to centre the wheel on the balancing flange.
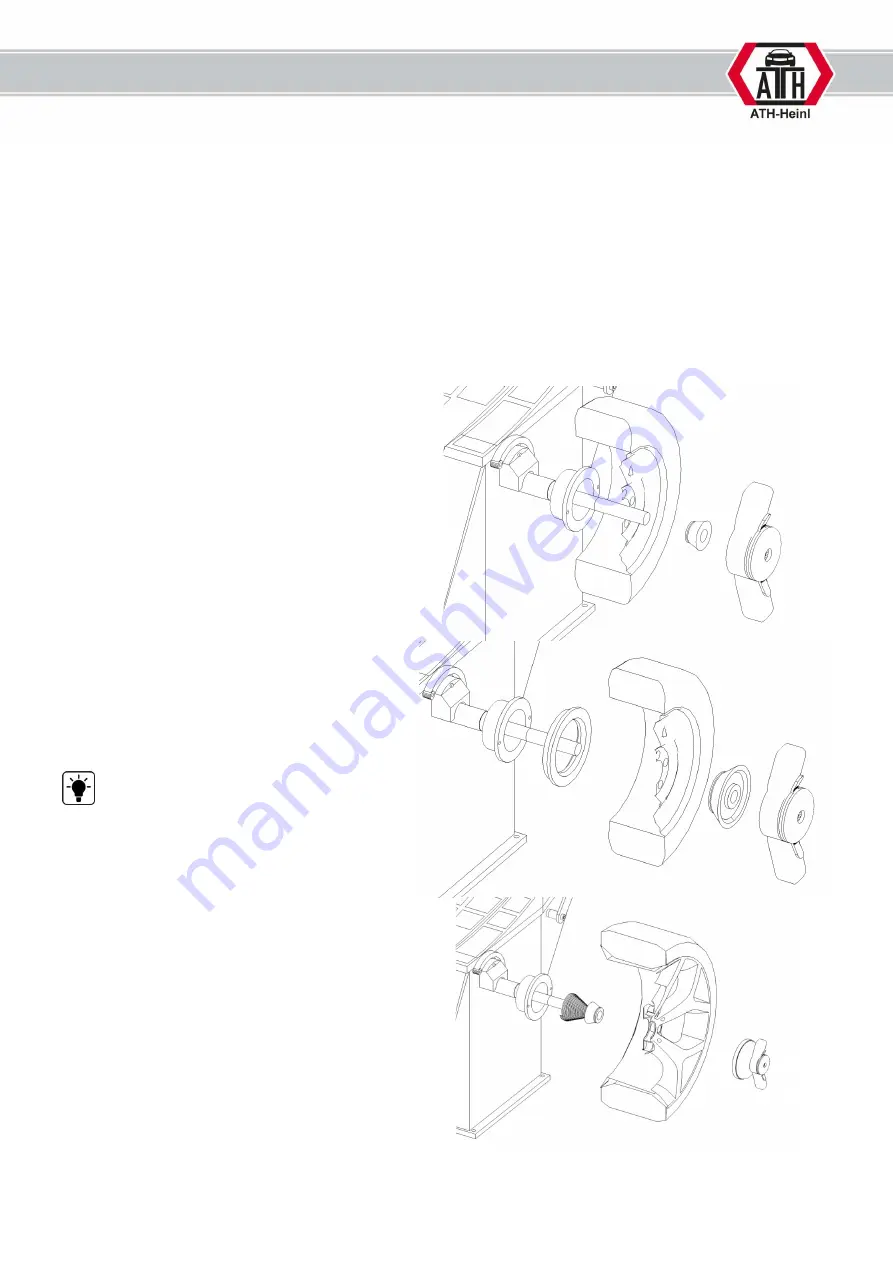
As shown below, there are 2 easy ways to mount the wheel.
a.
The first way of mounting a wheel is
shown opposite.
Using this method, the wheel rim is stretched
onto the balancing shaft from the exterior.
If you are using the largest cone, the
extension piece for the clamping cone must
also be used.
This method increases the risk of
clamping errors and is therefore only
recommended for use with steel rims.
b.
When using the second method, first
position the tension springs on the
balancing shaft and then a suitable
cone. The wheel rim can be stretched
onto the balancing shaft using a
pressure hood.
Summary of Contents for W142
Page 3: ...BEDIENUNGSANLEITUNG ATH W142 ...
Page 59: ...OPERATING INSTRUCTIONS ATH W142 ...
Page 115: ...MANUEL D UTILISATION ATH W142 ...
Page 171: ...NÁVOD K OBSLUZE ATH W142 ...
Page 227: ...MANUAL DE INSTRUCCIONES ATH W142 ...
Page 283: ...BEDIENINGSHANDLEIDING ATH W142 ...
Page 339: ...INSTRUKCJA OBŁSUGI ATH W142 ...
Page 395: ...NÁVOD NA OBSLUHU ATH W142 ...

