background image


AA280 

VIA® KT333 Motherboard 

USER’S MANUAL


Athlon® Processor Motherboard 

Rev. 1.0A 

Summary of Contents for AA280

Page 1: ...AA280 VIA KT333 Motherboard USER S MANUAL Athlon Processor Motherboard Rev 1 0A...

Page 2: ...AA280 Motherboard...

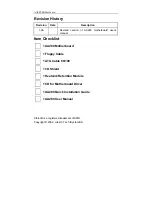
Page 3: ...therboard user s manual Item Checklist 1 AA280 Motherboard 1 Floppy Cable 1 ATA Cable 66 100 1 I O Shield 1 Heatsink Retention Module 1 CD for Motherboard Driver 1 AA280 Quick Installation Guide 1 AA2...

Page 4: ...AA280 Motherboard...

Page 5: ...ricity If one is not available discharge static electricity by touching the metal case of a safely grounded object before working on the motherboard 3 Place components on a level grounded antistatic p...

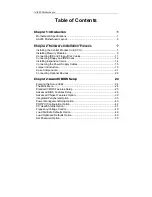
Page 6: ...onnecting Floppy and IDE Drives 12 Installing Expansion Cards 14 Connecting the Power Supply Cables 15 Jumper Introduction 19 Case Components 21 Connecting Optional Devices 22 C C Ch h ha a ap p pt t...

Page 7: ...AA280 Motherboard Save Exit Setup Option 51 Exit Without Saving 51...

Page 8: ...AA280 Motherboard...

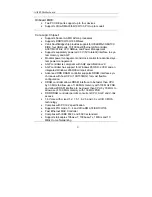
Page 9: ...em bus Cache Memory Processor integrated level 1 and level 2 cache System Memory Three 184 pin DIMM sockets 90 degree tin plated contact Supports DDR Double Data Rate SDRAM at 200 266 333 MHz Supports...

Page 10: ...oller has support for Windows 95 OSR 2 VXD and an integrated Windows 2000 98 miniport driver Advanced DDR DRAM controller supports DRAM interface syn chronous with host CPU 100 133MHz for most flexibl...

Page 11: ...2 Supports ACPI PCI power management Complies with PC99 standard Supports Wake On LAN function and remote wake up Supports auxiliary power on internal reset Half full duplex capability RAID Optional...

Page 12: ...One PS 2 mouse connector One PS 2 keyboard connector Two PWM fan controlled output headers Four USB Ports 2 ports on back panel 2 ports via motherboard 2X5 header for front panel One game port One RJ...

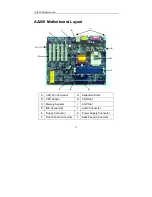
Page 13: ...t L F D C K B A G J I E H A CPU Fan Connector G Expansion Slots B CPU Socket H CNR Slot C Memory Sockets I AGP Slot D IDE Connectors J Audio Connector E Floppy Connector K Power Supply Connector F Fro...

Page 14: ...gnal Name Pin Signal Name 1 HD_LED_P 2 PWR_SLP 3 HD_LED_N 4 PWR_SLP 5 RST_SW_N 6 PWR_SW_P 7 RST_SW_P 8 PWR_SW_N 9 RSVD 10 KEY USB2 Pin Signal Name Pin Signal Name 1 VCC 2 VCC 3 DATA0 4 DATA1 5 DATA0 6...

Page 15: ...above the socket so that its marked corner pin1 matches the corner near the base of the lever 3 Place the CPU into the socket If you cannot insert the CPU easily check its orientation and attempt to r...

Page 16: ...ink Installation 1 Read the related CPU heat sink user s manual for more detailed in stallation procedures 2 Connect the CPU fan power cable to the CPU fan connector on the motherboard CPU fan power c...

Page 17: ...ds 2 Match the notches on the contact edge of the memory module to the ridge in the memory socket 3 Insert the memory module vertically into place When properly in serted the white retaining clips mov...

Page 18: ...64 Mbit 1Mx16x4 banks 64 MBytes 128 MBytes 192 MBytes 128 Mbit 4Mx8x4 banks 256 MBytes 512 MBytes 786 MBytes 128 Mbit 2Mx16x4 banks 128 MBytes 256 MBytes 384 MBytes 256 Mbit 8Mx8x4 banks 512 MBytes 1...

Page 19: ...ector Pin1 is marked with a white triangle Connecting the IDE ribbon cable into the motherboard The side of the cable with the red stripe should be inserted into the Pin1 side of the IDE connector Pin...

Page 20: ...E drive to your motherboard Floppy Disk Drive 1 Mount the drive into the case 2 Connect the floppy disk ribbon cable and power cable to the FDD 3 Connect the FDD ribbon cable to the motherboard FDD co...

Page 21: ...1 Mount the drive into the case 2 Connect the IDE disk ribbon cable and power cable to the IDE device 3 Connect the IDE ribbon cable to the motherboard IDE connector IDE1 or IDE2 refer to the previous...

Page 22: ...ion card into the motherboard 2 Remove the slot cover from the chassis case where the expansion card will be placed 3 Press the expansion card firmly into the expansion slot of the motherboard 4 Secur...

Page 23: ...nnectors to support the Pentium 4 processor Connect the power connectors to the motherboard power connec tors The plastic clips on the connectors should lock into the plastic tabs on the motherboard c...

Page 24: ...nd PS 2 Mouse Connector This connector supports a standard PS 2 keyboard and PS 2 mouse 2 Parallel Port Devices such as a printer can be connected to the parallel port Parallel Port 25 pin Female PS 2...

Page 25: ...jack to this connector to access a network 5 USB Connector Before connecting a device to the USB connectors determine if the device has a standard USB interface Make sure your computer Operating Syst...

Page 26: ...ne out jack audio devices such as a stereo or tape player to the line in jack and a microphone to the MIC in jack 7 Serial Connector Devices such as a mouse or modem can be connected to the serial por...

Page 27: ...AA280 Motherboard 19 Jumper Introduction JP1 JP4 JP3 Jumper Settings The following graphic shows a jumper without a cover and with a cover OFF ON 1 2...

Page 28: ...Clear content of CMOS JP3 BIOS Protect This jumper allows you to protect the BIOS from being accidentally updated JP3 Jumper setting Description 1 2 Write protect disable 2 3 Write protect enable JP4...

Page 29: ...l Name 1 2 3 GROUND 12V SENSE CASFAN1 Auxiliary Case Cooling Fan Connect the case cooling fan connector to this header Pin Signal Name 1 2 3 GROUND 12V SENSE SJ1 Single Color LED Header This header al...

Page 30: ...r allows the user to install auxiliary front oriented microphone and lineout ports for easier access Pin Signal Name Pin Signal Name 1 3 5 7 9 AUD_MIC AUD_BIAS AUD_F_R REVD AUD_F_L 2 4 6 8 10 AUD_GND...

Page 31: ...is in a power saving mode any modem signal automatically resumes the system SIR1 Serial Infrared Port The mainboard supports a Serial Infrared SIR data port Infrared ports allow the wireless exchange...

Page 32: ...s you to select and modify your computer system To navigate through the menu use the arrow keys to select among the items and press Enter to accept or enter the sub menu Phoenix AwardBIOS CMOS Setup U...

Page 33: ...Features Item Help Date mm dd yy Tue July 11 2002 Time hh mm ss 12 8 59 IDE Primary Master None IDE Primary Slave None IDE Secondary Master None IDE Secondary Slave None Drive A 1 44M 3 5 in Drive B...

Page 34: ...250 Security Option Setup Menu Level Allows you to choose the VIRUS warning feature for IDE Hard Disk boot sector protection If this function is enabled and someone attempts to write data into this ar...

Page 35: ...specified under the First Second and Third boot devices Swap Floppy Drive If you have two floppy diskette drives in your system this item allows you to swap the assigned drive letters so that drive A...

Page 36: ...chnology system is a diagnostics technology that monitors and predicts device performance S M A R T software resides on both the disk drive and the host computer The disk drive software monitors the i...

Page 37: ...keys to navigate through the menu and use the PgUp and PgDn to select the desired value for each item Phoenix AwardBIOS CMOS Setup Utility Advanced Chipset Features Item Help DRAM Clock Drive Control...

Page 38: ...k Precharge to Active Trp 3T Active to Precharge Tras 6T Active to CMD Trcd 3T DRAM Burst Length 4 DRAM Queue Depth 4 Level DRAM Command Rate 2T Command Menu Level Move Enter Select PU PD Value F10 Sa...

Page 39: ...set for odd and even addresses and the next byte of memory can be accessed while the current byte is being refreshed Precharge to Active This item is used to designate the minimum Row Precharge time...

Page 40: ...ure Size 125 MB AGP Mode 4X AGP Driving Control Auto x AGP Driving Value DA AGP Fast Write Disabled AGP Master 1 WS Write Disabled AGP Master WS Read Disabled Menu Level Move Enter Select PU PD Value...

Page 41: ...Driving Control is set to Manual use this item to set the AGP current driving value AGP Fast Write This item lets you enable or disable the caching of display data for the video memory of the proces...

Page 42: ...ate through the menu and use the PgUp and PgDn to select the desired value for each item PCI 1 2 Master 0 WS Write When enabled writes to the PCI bus are executed with zero wait states providing faste...

Page 43: ...OnChip USB Controller All Enabled USB keyboard Support Disabled IDE HDD Block Mode Enabled Menu Level Move Enter Select PU PD Value F10 Save ESC Exit F1 General Help F5 Previous Values F6 Fail Safe D...

Page 44: ...creen Phoenix AwardBIOS CMOS Setup Utility VIA OnChip IDE Device Item Help OnChip IDE Channel0 Enabled OnChip IDE Channel1 Enabled IDE Prefetch Mode Enabled Primary Master PIO Auto Primary Slave PIO A...

Page 45: ...is best or select a PIO mode from 0 4 IDE Primary Secondary Master Slave UDMA Each IDE channel supports a master device and a slave device This mainboard supports Ul traDMA technology which provides...

Page 46: ...Esc to return to the Integrated Peripherals screen VIA SuperIO Device Scroll to this item and press Enter to view the following screen Phoenix AwardBIOS CMOS Setup Utility VIA SuperIO Device Item Help...

Page 47: ...ART 2 Mode is set to either ASKIR or IrDA This item enables you to determine the infrared function of the onboard infrared chip The options are Full and Half default Full duplex means that you can tra...

Page 48: ...uspend Type S1 POS Power Management Option User Define HDD Power Down Disable Suspend Mode Disable Video Off Option Suspend Off Video Off Method DPMS Support MODEM Use IRQ 3 Soft Off by PWRBTN Instant...

Page 49: ...d if no Power Management events occur for a specified length of time Full power function will return when a Power Man agement event is detected Options are from 1 Min to 1 Hour and Disable Video Off O...

Page 50: ...WOL WOM Resume Disabled RTC Alarm Resume Disabled x Date of Month 4 x Resume Time hh mm ss 0 0 0 IRQs Activity Monitoring Press Enter Menu Level Move Enter Select PU PD Value F10 Save ESC Exit F1 Gene...

Page 51: ...When set to Off any PCI device set as the Master will not power on the system PowerOn by PCI Card Use this item to enable PCI activity to wakeup the system from a power saving mode WOL WOM Resume Use...

Page 52: ...abled IRQ12 PS 2 Mouse Enabled IRQ13 Coprocessor Enabled IRQ14 Hard Disk Enabled IRQ15 Reserved Disabled Menu Level Move Enter Select PU PD Value F10 Save ESC Exit F1 General Help F5 Previous Values F...

Page 53: ...Value F10 Save ESC Exit F1 General Help F5 Previous Values F6 Fail Safe Defaults F7 Optimized Defaults PNP OS Installed Setting this option to Yes allows the PnP OS instead of BIOS to assign the syst...

Page 54: ...ve for the ISA expansion card Use the second item Reserved Memory Length to set the amount of reserved memory Press Esc to close the Memory Resources sub menu PCI VGA Palette Snoop This item is design...

Page 55: ...CORE 2 5V 3 3V 5V 12V Voltage Battery Current System Temp Current CPU Temp CPUFAN1 CASFAN1 Menu Level Move Enter Select PU PD Value F10 Save ESC Exit F1 General Help F5 Previous Values F6 Fail Safe D...

Page 56: ...ility Frequency Voltage Control Item Help Auto Detect DIMM PCI Clk Enabled Spread Spectrum Enabled CPU Host PCI Clock Default Menu Level Move Enter Select PU PD Value F10 Save ESC Exit F1 General Help...

Page 57: ...l fail safe defaults for a specific option select and display that option and then press F6 Load Optimized Defaults Option This option opens a dialog box that lets you install optimized defaults for a...

Page 58: ...ifferentiates between upper and lower case characters Press Enter after you have typed in the password If you are de leting a password that is already installed press Enter when the password dialog bo...

Page 59: ...s N to return to the main menu Exit Without Saving Highlight this item and press Enter to discard any changes that you have made in the Setup Utility and exit the Setup Utility When the Exit Without S...

Reviews: