AT500NC Manual
Rev-10/17
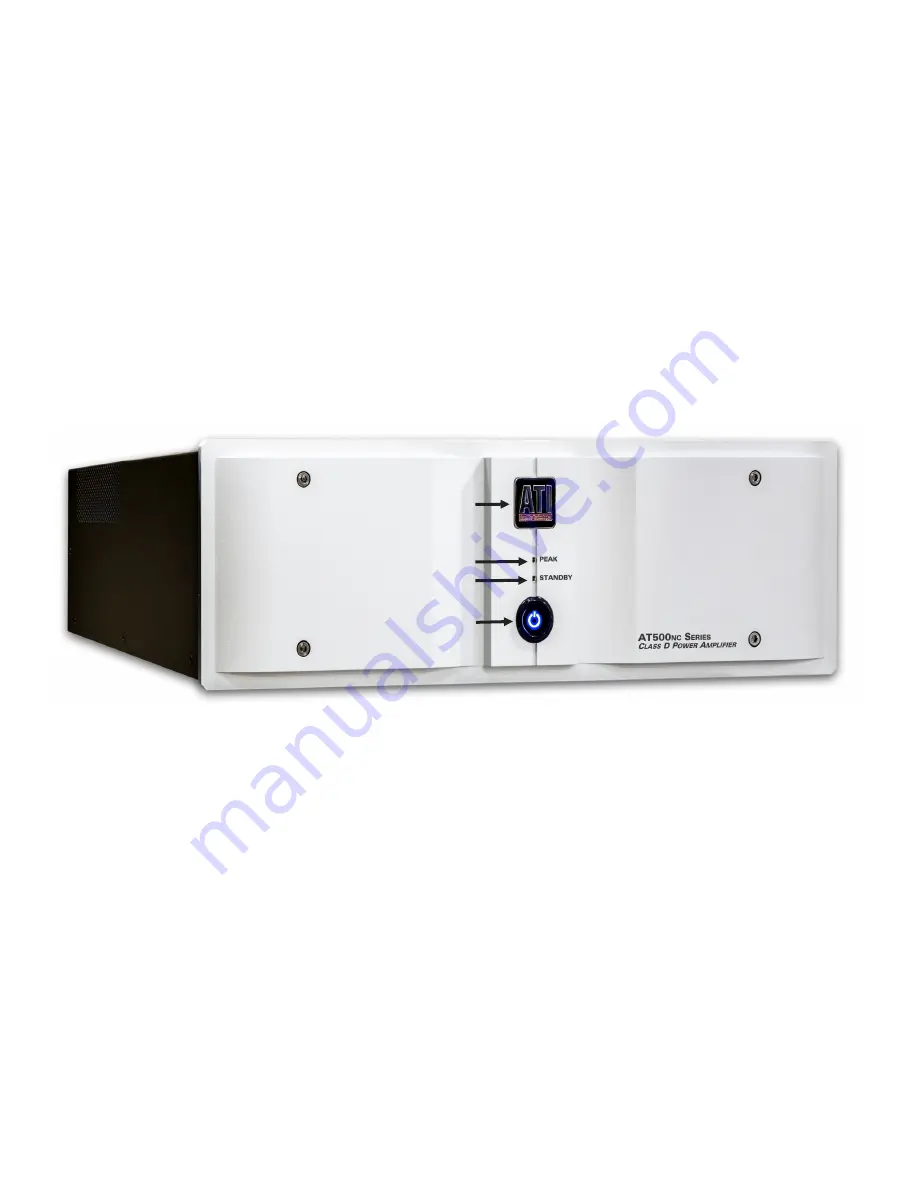
1. ATI LOGO.
2. PEAK POWER LED.
Illuminates RED when any amplifi-
er channel reaches full output.
3. STANDBY LED.
When the
MAIN POWER
switch is
pressed, the
STANDBY LED
illuminates until the amplifier
has completed the turn-on process and enters the playback
mode. When the playback mode is reached, the
STANDBY
LED
turns off. After 10 minutes (approximately) with no
input signal, the
STANDBY LED
illuminates indicating the
amplifier has entered
SLEEP
MODE
. While in
SLEEP
MODE
, internal processes are scaled back reducing power
consumption. When a signal is again present at any of the
inputs, the
STANDBY LED
will turn off and playback re-
sumes instantaneously.
4. ILLUMINATED POWER SWITCH.
When the amplifier
is plugged in and idle, the
ILLUMINATED POWER
SWITCH
pulses slowly and dimly. When the
ILLUMI-
NATED POWER SWITCH
is depressed, the illumination
of the switch becomes constant, the
STANDBY LED
illumi-
nates and the amplifier begins the turn-on process. When the
turn-on process is complete, the
ILLUMINATED POWER
SWITCH
brightens fully, the
STANDBY LED
turns off
and the amplifier begins playback.
Front Panel Layout
4
Handles and Rack Mounting
The AT500
NC
Series amplifiers can be rack mounted
into a standard 19-inch rack with the addition of rack
ears and handles. There are four kits available for the
AT500
NC
amplifiers, two for the small, shallow chassis
amplifiers; AT522
NC
,
AT523
NC
,
AT524
NC
and
AT542
NC
and two for the large, deep chassis amplifi-
ers; AT525
NC
,
AT526
NC
,
AT527
NC
, AT528
NC
,
AT543
NC
and AT544
NC
. The kits are available in black
and silver to match the handles to the front panels. The
kits are available separately for an additional charge
and include instructions and hardware for proper
mounting of the parts to the amplifier.
To order, call your dealer or ATI and order SKU # /
Model “NC RMK”. You will need to specify which
model and color of AT500
NC
you own so we can pro-
vide you with the correct length of rack ear and the cor-
rect color of handle and hardware.
Owner’s Guide Conventions
For clarity purposes, references to buttons and LED’s
will be shown in bold capital letters.
1
2
3
4


