Step
Action
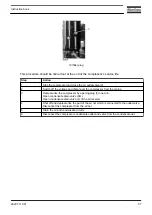
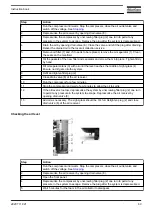
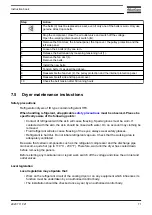
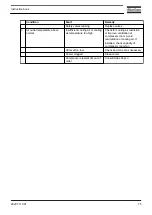
The belts (3) must be replaced as a set, even if only one of the belts is worn. Only use
genuine Atlas Copco belts.
1
Stop the compressor, close the air outlet valve and switch off the voltage.
Open the isolating (disconnector) switch (IG).
2
Remove the front door, the internal panel, the top cover, the pulley protection and the
left side panel.
3
Loosen the 4 bolts (2) by one turn.
4
Release the belt tension by loosening tensioning nut (1).
5
Remove the fan duct (4).
Remove the belts.
6
Install the new belts.
7
Tension belts (3) as described above.
8
Reassemble the fan duct (4), the pulley protection and the internal protection panel.
9
Reassemble left side and top panel cover.
10
Check the belt tension after 50 running hours.
7.5
Dryer maintenance instructions
Safety precautions
Refrigeration dryers of ID type contain refrigerant HFC.
When handling refrigerant, all applicable
must be observed. Please be
specifically aware of the following points:
• Contact of refrigerant with the skin will cause freezing. Special gloves must be worn. If
contacted with the skin, the skin should be rinsed with water. On no account may clothing be
removed.
• Fluid refrigerant will also cause freezing of the eyes; always wear safety glasses.
• Refrigerant is harmful. Do not inhale refrigerant vapours. Check that the working area is
adequately ventilated.
Be aware that certain components such as the refrigerant compressor and the discharge pipe
can become quite hot (up to 110 °C - 230 °F). Therefore, wait until the dryer has cooled down
before removing the panels.
Before starting any maintenance or repair work, switch off the voltage and close the air inlet and
outlet valves.
Local legislation
Local legislation may stipulate that:
• Work on the refrigerant circuit of the cooling dryer or on any equipment which influences its
function must be undertaken by an authorised control body.
• The installation should be checked once a year by an authorised control body.
Instruction book
2920 7119 21
71
Summary of Contents for G 15L
Page 1: ...INSTRUCTION BOOK OIL INJECTED ROTARY SCREW COMPRESSORS G 18 G 22 G 15L ...
Page 2: ......
Page 86: ......
Page 87: ......

