background image

- 22 -

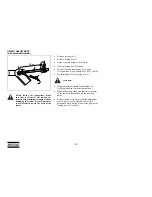
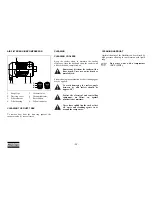
HEIGHT ADJUSTMENT
(with adjustable towbar)

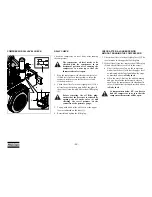
Remove spring pin (1).

Release locking nut (2).

Adjust required height of the towbar.

Tighten locking nut (2) by hand.

Secondly tighten locking nut (2) using an 

extension tube (3) and handforce of 45 N/ 100 lbf.

Fix locking nut (2) with spring pin (1).

Height adjustment should be undertaken on 

levelled ground and in coupled condition.

When readjusting, make sure that the front point 

of the towbar is horizontal with the coupling 

point.

Before starting a trip, ensure that the adjustment 

shaft is secure, so that stability and safety is 

guaranteed while driving. If necessary, tighten the 

locking nut (2). See above.

Before towing the compressor, make

sure that the joints of the towbar are

secured with maximum strength without

damaging the towbar. Be sure that there

is no clearance between the teeth of the

joints.

(3)

(1)

600 mm

(2)

Attention:

Summary of Contents for XAHS 38 Kd

Page 1: ...XAS 120 KD8 APP XAS 68 Kd APP XAS 135 KD8 APP XAS 48 G Kd APP XAS 90 G KD8 APP XAS 48 G Kd APP XAS 90 G KD8 APP XATS 68 Kd APP XATS 135 KD8 APP XAS 78 Kd APP XAS 160 KD8 APP XAS 88 Kd APP XAS 175 KD8 APP XAS 68 G Kd APP XAS 135 G KD8 APP Operator Manual for Portable Compressors English Engine Kubota V1505 Engine Kubota V1505 T ...

Page 2: ......

Page 3: ... ENERGY DIVISION www atlascopco com Printed matter N 2954 9520 01 12 2016 Operator Manual for Portable Compressors XAHS 38 Kd XAS 58 Kd XAS 68 Kd XAS 48 G Kd XATS 68 Kd XAS 78 Kd XAS 88 Kd XAS 68 G Kd Original instructions ...

Page 4: ...er s approval in writing Neglecting maintenance or making changes to the setup of the machine can result in major hazards including fire risk While every effort has been made to ensure that the information in this manual is correct Atlas Copco does not assume responsibility for possible errors Copyright 2016 Atlas Copco Airpower n v Antwerp Belgium Any unauthorized use or copying of the contents o...

Page 5: ...ructions 20 4 1 Parking towing and lifting instructions 20 4 1 1 Parking instructions 20 4 1 2 Towing instructions 21 4 1 3 Lifting instructions 23 4 2 Operating the compressor 24 4 2 1 Prevent low loads 24 4 2 2 Before starting 24 4 2 3 Control panel 25 4 2 4 During operation 26 4 2 5 Stopping procedure 26 4 2 6 Fault situations and protective devices 26 4 2 7 Generator option 27 5 Maintenance 28...

Page 6: ... 6 ...

Page 7: ...components Skill level 3 Electrical technician An electrical technician is trained and has the same qualifications as both the operator and the mechanical technician In addition the electrical technician may carry out electrical repairs within the various enclosures of the unit This includes work on live electrical components Skill level 4 Specialist from the manufacturer This is a skilled special...

Page 8: ...perature speeds etc 6 The machinery and equipment shall be kept clean i e as free as possible from oil dust or other deposits 7 To prevent an increase in working temperature inspect and clean heat transfer surfaces cooler fins intercoolers water jackets etc regularly 8 All regulating and safety devices shall be maintained with due care to ensure that they function properly They may not be put out ...

Page 9: ...mentation of the towing vehicle 3 If the unit is to be backed up by the towing vehicle disengage the overrun brake mechanism if it is not an automatic mechanism 4 Never exceed the maximum towing speed of the unit mind the local regulations 5 Place the unit on level ground and apply the parking brake before disconnecting the unit from the towing vehicle Unclip the safety break away cable or safety ...

Page 10: ...a common compressed air system fit an appropriate non return valve check valve between compressor outlet and the connected sand blasting or compressed air system Observe the right mounting position direction 11 Before removing the oil filler plug ensure that the pressure is released by opening an air outlet valve 12 Never remove a filler cap of the cooling water system of a hot engine Wait until t...

Page 11: ...too but the fact that no dust can be seen is not a reliable indication that dangerous invisible dust is not present in the air 26 Never operate the unit at pressures or speeds below or in excess of its limits as indicated in the technical specifications 27 Do not use aerosol types of starting aids such as ether Such use could result in an explosion and personal injury SAFETY DURING MAINTENANCE AND...

Page 12: ...es or sparks on a machine the surrounding components shall first be screened with non flammable material 17 Never use a light source with open flame for inspecting the interior of a machine 18 Disconnect battery clamp before starting electrical servicing or welding or turn battery switch in off position 19 When repair has been completed the machine shall be barred over at least one revolution for ...

Page 13: ...sons prohibit any other applications 3 National legislation requirements with respect to re inspection must be complied with 4 No welding or heat treatment of any kind is permitted to those vessel walls which are exposed to pressure 5 The vessel is provided and may only be used with the required safety equipment such as manometer overpressure control devices safety valve etc 6 Draining of condensa...

Page 14: ...he machine 4 Periodically check that all guards are in place and properly fastened all hoses cables and pipes inside are in good condition secure and are not rubbing there are no leaks all connection elements are properly secured all the wiring is secure and in good order 5 If an abnormal situation arises e g excessive vibration noise odour etc switch the circuit breakers to position 0 and stop th...

Page 15: ...specifications The compressor is equipped with a PE canopy PE is very robust can t corrode and will keep its shape and color during the full lifetime of the machine It is fully recyclable to keep the environmental impact as low as possible Its low weight below 750 kg makes it possible to tow it with a standard European driver s license The canopy has openings at the shaped front and rear end for t...

Page 16: ...aintained between the pre selected working pressure and the corresponding unloading pressure Cooling system The engine is provided with a liquid cooler and the compressor is provided with an oil cooler The top tank of the engine cooler is integrated in the cooler to reduce the amount of connections This results in higher general robustness and less engine failures The cooling air is generated by a...

Page 17: ...alves without connected hoses Runlamp Airfilter Compressor temperature too high Compressor oil level Rotation direction Read the instruction manual before starting Service every 24 hours Warning Part under pressure Do not stand on outlet valves Do not run the compressor with open doors Lifting device MAX MIN Use diesel fuel only 2 7 bar 39 psi Tyre pressure Service Engine coolant Sound power level...

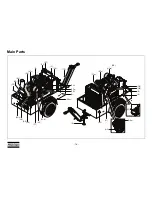
Page 18: ... 18 Main Parts OS GB B S FP OFe G SL EP FU FFp SR D DPec TB FCeo AFe OFce EB OC F FF ET E AFc RV SV FCft VV FT CE SB UV AOV AR CP DSe ...

Page 19: ...n EP Exhaust Pipe ET Expansion Tank F Fan FCeo Filler Cap engine oil FCft Filler Cap fuel tank FF Fuel Filter FFp Fuel pre filter FP Filler Plug Reference Name FT Fuel Tank FU Fuel Pump G Generator option GB Gear Box OC Oil Cooler OFce Oil Filter compressor element OFe Oil Filter engine OS Oil Separator RV Regulating Valve S Starting Motor SB Socket Box option SL Support Leg SR Speed Regulator SV ...

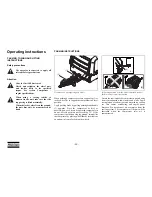
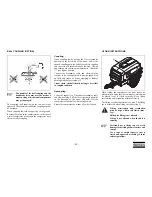
Page 20: ...ion of jockey wheel adjustable towbar B Rear end of compressor upwind Locate the rear end of the compressor upwind away from contaminated wind streams and walls Avoid recirculation of exhaust gas and warmed up cooling air This causes overheating and engine power decrease Do not obstruct air evacuation from the cooling system The compressor oil lifetime will be shortened when the compressor inlet a...

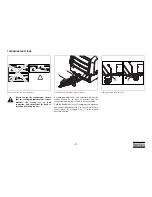
Page 21: ... towing eye end in a level position Push the hand brake lever 3 completely downwards and connect breakaway cable to the vehicle Secure jockey wheel 2 or support leg 1 in the highest possible position Towing position of jockey wheel Before towing the compressor ensure that the towing equipment of the vehicle matches the towing eye or ball connector and ensure that the hood is closed and locked prop...

Page 22: ...ed ground and in coupled condition When readjusting make sure that the front point of the towbar is horizontal with the coupling point Before starting a trip ensure that the adjustment shaft is secure so that stability and safety is guaranteed while driving If necessary tighten the locking nut 2 See above Before towing the compressor make sure that the joints of the towbar are secured with maximum...

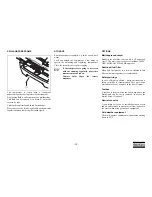
Page 23: ...ion Uncoupling Lower the support leg Disconnect breakaway cable and electrical plug Pull the lever vigorously upwards in the direction of the arrow and hold Lift the compressor off the ball of the towing vehicle Secure the compressor by means of a wheel chock LIFTING INSTRUCTIONS When lifting the compressor the hoist has to be placed in such a way that the compressor which must be placed level is ...

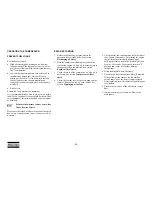
Page 24: ...g a battery 2 With the compressor standing level check the level of the engine oil Add oil if necessary up to the upper mark on the dipstick See section Engine oil level check 3 Check the level of the compressor oil Add oil if necessary See section Compressor oil level check 4 Check the coolant level at the level gauge on the radiator If necessary top up with coolant See section Topping up of cool...

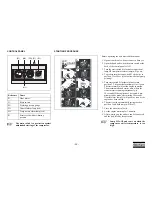
Page 25: ...ning continuously is 10 seconds If the engine does not catch a new attempt can be made after waiting 30 seconds General alarm lamp H1 will go out as soon as the engine has been started 6 The start switch automatically springs back to position 1 and both lamps will be off 7 Close the air outlet valve s 8 Let the engine warm up for 3 minutes 9 After warming up the air hose can be connected and the u...

Page 26: ...ff the thermocontact has closed again memory function When the engine is running the air outlet valves ball valves must always be in a fully opened or fully closed position The hood must be closed during operation and may be opened for short periods only Be aware not to touch hot parts when the hood is open Modifying the set point above the nominal working pressure can affect the correct working o...

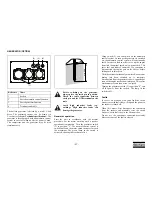
Page 27: ...er is disconnected the engine goes on for 60 secs before falling back to idle speed With the current continuously monitored a consumer having just been switched on is temporary disconnected from the generator to be re connected as soon as the engine reaches nominal speed This safety mechanism prevents load at too low speed Turning the generator switch 3 to position 0 cuts off the power from the so...

Page 28: ...rain condensate and water from spillage free frame see Spillage free frame Empty air filter vacuator valves see Air filter engine compressor Check engine oil level if necessary top up see Engine oil level check Check compressor oil level if necessary top up see Compressor oil level check Check coolant level see Coolant level check Check Fill fuel level after a day s work Check air intake vacuum in...

Page 29: ...oil based on the ambient temperatures in the actual operating area For ordering numbers refer to the spare parts list It is strongly recommended to use Atlas Copco branded lubrication oils for both compressor and engine If you want to use another brand of oil consult Atlas Copco Never mix synthetic with mineral oil Never mix oils of different brands or types Use only non toxic oils where there is ...

Page 30: ...oil level is too low remove the oil filler plug 2 and check if there is still oil in the vessel No oil in the vessel Top up the compressor with oil until the oil level is at the upper level as indicated on the label and follow the steps as described above in Daily check Oil in the vessel Start up the unit to warm up and give time for the thermostatic valve to open Stop the compressor with closed o...

Page 31: ...r only When charging batteries each cell must be open i e plugs and or cover removed PERIODIC BATTERY SERVICE Keep the battery clean and dry Keep the electrolyte level at 10 to 15 mm above the plates or at the indicated level top up with distilled water only Never overfill as this will cause poor performance and excessive corrosion If doubtful conditions are noticed or malfunctions arise keep in m...

Page 32: ... by high pressure cleaning in combination with liquid soap 1 Snap clips 5 Vacuator valve 2 Dust trap cover 6 Vacuum indicator 3 Filter element 7 Reset button 4 Filter housing 8 Yellow indicator 1 5 2 3 4 6 8 7 Remove any dirt from the coolers with a fibre brush Never use a wire brush or metal objects To avoid damaging the coolers angle between jet and coolers should be approx 90 Protect the electr...

Page 33: ...approved vessel includes ASME CRN MOM AS1210 and ML approval Additional fuel filter When bad fuel quality is a risk an additional fuel filter with water separator is recommended Safety cartridge In case of highly polluted dusty environments a safety cartridge is recommended This gives extra protection in case of a rupture in the filter element Toolbox A toolbox is located inside the bodywork above...

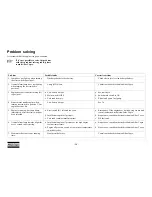
Page 34: ...ks engine when turning start switch to position 3 but engine does not fire Low battery output See 1a 5 Engine is running but shuts down immediately after the start switch has been released a Start switch S1 released too soon b Insufficient engine oil pressure c Fuel tank contains insufficient fuel a Restart once If the engine does not start stop at once and consult authorized technician Atlas Copc...

Page 35: ...tlas Copco 13 Compressor shuts down without apparent cause Consult authorized technician Atlas Copco 14 Air and oil mist expelled from air filter after stopping Consult authorized technician Atlas Copco 15 No air output Consult authorized technician Atlas Copco Generator option 16 No voltage at sockets a Generator not switched on b Circuit breakers are off a Switch generator on b Switch on circuit...

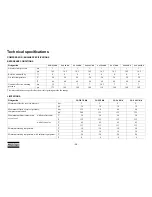
Page 36: ...0 20 20 20 20 20 F 68 68 68 68 68 68 68 68 Nominal effective working pressure bar 12 7 7 7 10 3 7 7 7 psi 175 100 100 100 150 100 100 100 Designation XAHS 38 Kd XAS 58 Kd XAS 68 Kd XAS 48 G Kd Minimum effective receiver pressure bar 2 2 2 2 psi 30 30 30 30 Maximum effective receiver pressure compressor unloaded bar 13 5 8 8 8 8 8 8 psi 200 125 125 125 Maximum ambient temperature at sea level witho...

Page 37: ...er pressure compressor unloaded bar 13 5 8 8 8 8 8 8 psi 200 125 125 125 Maximum ambient temperature at sea level without aftercooler C 50 50 50 50 F 122 122 122 122 with aftercooler C 45 45 45 45 F 113 113 113 113 Minimum starting temperature C 10 10 10 10 F 14 14 14 14 Minimum starting temperature with coldstart equipment C 20 20 20 20 F 4 4 4 4 ...

Page 38: ...1200 1800 2400 3000 1968 4 3936 8 5905 2 9842 7873 6 0 12 bar 25 psi Max allowable working pressure as a function altitude and ambient temperature Graphic represents working conditions for starting conditions please contact your Atlas Copco contact ALTITUDE m ALTITUDE ft TEMPERATURE F TEMPERATURE C All units ...

Page 39: ...3 5 2 5 cfm 80 120 135 90 with aftercooler l s 32 49 57 40 m3 min 1 9 2 9 3 4 2 4 cfm 77 117 132 87 Fuel consumption at 100 FAD kg h 6 44 6 44 6 44 6 44 lb h 14 2 14 2 14 2 14 2 at 75 FAD kg h 5 23 5 23 5 23 5 23 lb h 11 5 11 5 11 5 11 5 at 50 FAD kg h 3 87 3 87 3 87 3 87 lb h 8 5 8 5 8 5 8 5 at 25 FAD kg h 3 51 3 51 3 51 3 51 lb h 8 5 8 5 8 5 8 5 at unload kg h 2 57 2 57 2 57 2 57 lb h 5 7 5 7 5 ...

Page 40: ...r min 3000 3000 3000 3000 Engine shaft speed compressor unloaded r min 1850 1850 1850 1850 Free air delivery 1 without aftercooler l s 58 75 83 58 m3 min 3 5 4 5 5 0 3 5 cfm 135 160 175 135 with aftercooler l s 57 74 82 57 m3 min 3 4 4 4 4 9 3 4 cfm 132 158 173 132 Fuel consumption at 100 FAD kg h 6 44 6 44 6 44 6 44 lb h 14 2 14 2 14 2 14 2 at 75 FAD kg h 5 23 5 23 5 23 5 23 lb h 11 5 11 5 11 5 1...

Page 41: ...ed air temperature at outlet valves without aftercooler C 58 5 58 5 58 5 58 5 F 138 138 138 138 with aftercooler C 35 35 35 35 F 95 95 95 95 Sound pressure level Lp measured according to ISO 2151 under free field conditions at 7 m distance dB A 70 70 70 70 Sound power level Lw complies with 2000 14 EC dB A 98 98 98 98 Designation XATS 68 Kd XAS 78 Kd XAS 88 Kd XAS 68 G Kd ...

Page 42: ...78 78 78 78 78 78 78 in 3 07 3 07 3 07 3 07 3 07 3 07 3 07 3 07 Stroke mm 78 4 78 4 78 4 78 4 78 4 78 4 78 4 78 4 in 3 09 3 09 3 09 3 09 3 09 3 09 3 09 3 09 Swept volume l 1 498 1 498 1 498 1 498 1 498 1 498 1 498 1 498 cu in 91 4 91 4 91 4 91 4 91 4 91 4 91 4 91 4 Output according to ISO 9249 G at normal shaft speed kW 26 5 26 5 26 5 33 33 33 33 33 BHP 36 36 36 45 45 45 45 45 Load factor 100 100 ...

Page 43: ...4 Capacity of fuel tank l 60 US gal 16 Air volume at inlet grating approx 1 m3 s 0 93 cuft s 32 8 XAS 48 G XAS 68 G Voltage AC V 110 230 400 230 400 Rated output kVA 6 6 12 Model S16F T16F T20FS Protection Earth fault relay Earth fault relay IT relay Earth fault relay IT relay Sockets 1x 110V 1ph 32A 2x 110V 1ph 16A 1x 400V 3ph 10A 2x 230V 1ph 10A 2x 400V 3ph 16A 1x 230V 1ph 16A Protection rating ...

Page 44: ... 58 9 1140 44 9 1435 56 5 1435 56 5 2514 99 0 888 34 9 1171 46 1 3106 122 3 186 7 3 1346 53 0 1130 44 5 940 37 0 2306 90 8 2802 110 3 235 9 3 1346 53 0 1130 44 5 940 37 0 Weight maximum see indication on dataplate 9822 0106 00 Adjustable tow bar no brakes 9822 0105 00 Adjustable tow bar with brakes ...

Page 45: ... 44 5 940 37 0 2763 108 8 2765 108 9 446 17 6 2514 99 0 438 17 2 2514 99 0 1435 56 5 1435 56 5 1196 47 1 186 7 3 186 7 3 1229 48 4 Weight maximum see indication on dataplate 9822 0109 00 Fixed tow bar no brakes 9822 0108 00 Fixed tow bar with brakes ...

Page 46: ...7 0 845 33 3 940 37 0 1173 46 2 1720 67 7 1935 76 2 1931 76 0 1246 49 1 1091 43 0 1139 44 8 1066 42 0 2327 91 6 1720 67 7 2327 91 6 2325 91 5 Weight maximum see indication on dataplate 9822 0107 00 Box 9822 0110 00 Support mounted ...

Page 47: ... 47 1391 54 8 1091 43 0 1931 76 0 1720 67 7 2327 91 6 1168 46 0 940 37 0 860 33 9 2470 97 2 Weight maximum see indication on dataplate 9822 0122 00 Extended support mounted ...

Page 48: ...ts D Maximum permitted load on rear axle on dual axle units 8 Model 9 Working pressure 10 Speed 11 Engine power 12 Manufacturing year 13 CE mark in accordance with Machine Directive 89 392 EC 14 Register number or number of notified body Weight ready to operate see dataplate Air outlet valves 3 x 3 4 Tyre pressure bar 2 7 psi 39 Wheel bolt torque Nm 85 lbf ft 63 MADE IN BELGIUM A kg B kg C kg D kg...

Page 49: ... in the future is foreseen DISPOSAL OF MATERIALS Dispose of contaminated substances and material separately in accordance with locally applicable environmental legislation Before dismantling a machine at the end of its operating lifetime drain and dispose of all fluids of according the applicable local disposal regulations Remove the batteries Do not throw batteries into the fire explosion risk or...

Page 50: ... 50 Maintenance Log Compressor Customer Serial number Service hours Maintenance action Date By initials ...

Page 51: ... 51 Service hours Maintenance action Date By initials ...

Page 52: ... 52 Service hours Maintenance action Date By initials ...

Page 53: ... 53 Service hours Maintenance action Date By initials ...

Page 54: ...plies also with the requirements of the following directives and their amendments as indicated Directive on the approximation of laws of the Member States relating to Harmonized and or Technical Standards used Att mnt a Pressure equipment 97 23 EC X b Machinery safety 2006 42 EC EN ISO 12100 1 EN ISO 12100 2 EN 1012 1 c Simple pressure vessel 87 404 EEC X d Electromagnetic compatibility 2004 108 E...

Page 55: ......

Page 56: ......
Reviews: