XAHS365 Md
20
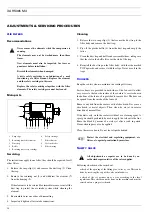
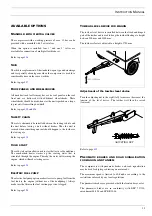
Compressor element air outlet temperature (S7)
Test the switch by immersing its sensing element in hot oil. The
contact of the switch (S7) must open at the preset temperature.
The setting of the switch can be adjusted by means of a slotted
screw protruding through the protecting glass of the temperature
indicator scale (TG).
The screw has a cap with two holes. A key, supplied with the
machine, can be applied through the holes in the slot to turn the
screw until the switch trips at the specified temperature.
Engine coolant temperature (S14)
Test the switch as described above. The contact of the switch
should close at the preset temperature.
Test the switch on a compressed air line. The contact of the switch
must close and open at the specified pressures.
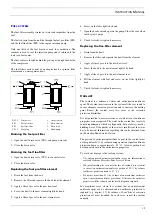
Test the switch by moving the float up and down. The contact of
the switch must open with the float in the lowest position and close
by lifting the float.
Make sure the toptank is filled sufficiently with coolant before
testing the coolant level sensor. Top up if necessary.
Test the sensor as follows:
– Shut down the unit before disconnecting the sensor. If the unit is
started, it will shutdown after 6 seconds and the engine coolant level
fault indicator lamp (H10) will light up.
– Reconnect the sensor correctly. The engine coolant level fault
indicator lamp (H10) will go out. Now the unit should start
normally, without a shutdown.
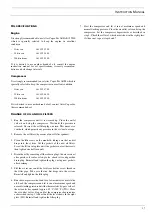
1. Stop the compressor. Disconnect the wires from the switch and
remove the latter with its coupling from the air intake chamber.
2. Fit the switch to a tee. Connect a vacuum gauge and a hose or
pipe to the tee.
3. Reconnect the wires to the switch and press the on/off push
button.
4. Create a vacuum with the mouth through the hose, while
observing the vacuum gauge and the filter servicing alarm
lamp. The lamp should light up when the vacuum has reached
the setting of the switch. Replace the switch if it does not
respond.
5. Reinstall the switch and reconnect the wires.
B
RAKE
ADJUSTMENT
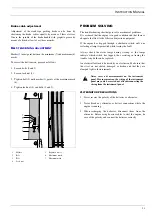
The compressors are equipped with a parking brake which acts on
the rear wheels.
Brake shoe adjustment
Brake shoe adjustment re-establishes the brake lining-to-drum
clearance and compensates for lining wear.
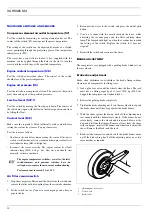
1. Jack up the rear axle until the wheels clear the floor. The jack
must have a lifting capacity of at least 2500 kg (5500 lb).
Support the compressor on wooden blocks.
2. Release the parking brake completely.
3. Tighten the brake adjusting nut (1) on the rear wheels to expand
the brake shoes until they drag against the brake drums.
4. With the shoes against the drums, back off the adjusting nuts
just enough until the drums rotate freely. If the drums do not
rotate freely, remove the wheels and drums and blow out the
dust and dirt from the linings. Remove all rust from the shoes
with sandpaper, reinstall the drums and wheels and adjust the
shoes. Remove the blocks and the jack.
5. Road-test the compressor and check if the brake drums warm
up. If the brakes drag, back off the adjusting nuts one or two
more notches as required.
The engine temperature switches, as well as the level
switches/sensors and pressure switches, have no
setting device; replace them in case of malfunctioning.
Test current not to exceed 1 A at 24 V.
1
Adjusting nut, brake shoe
2
Torsion axle
3
Brake cable
Brake adjust
Summary of Contents for XAHS365 Md
Page 2: ...XAHS365 Md 2 ...
Page 38: ......
Page 39: ...Printed in Belgium 10 2000 2927 1233 03 ...
Page 40: ...Instruction Manual for Portable Compressors XAHS365 Md ...


