background image

- 6 -

The manufacturer does not accept any liability for any
damage arising from the use of non-original parts and
for modifications, additions or conversions made
without the manufacturer’s approval in writing.

If any statement in this manual does not comply with
local legislation, the stricter of the two shall be
applied.

Statements in these safety precautions should not be
interpreted as suggestions, recommendations or
inducements that it should be used in violation of any
applicable laws or regulations.

GENERAL SAFETY PRECAUTIONS

1

The owner is responsible for maintaining the unit
in a safe operating condition. Unit parts and
accessories must be replaced if missing or
unsuitable for safe operation.

2

The supervisor, or the responsible person, shall at
all times make sure that all instructions regarding
machinery and equipment operation and
maintenance are strictly followed and that the
machines with all accessories and safety devices,
as well as the consuming devices, are in good
repair, free of abnormal wear or abuse, and are
not tampered with.

3

Whenever there is an indication or any suspicion
that an internal part of a machine is overheated,
the machine shall be stopped but no inspection
covers shall be opened before sufficient cooling
time has elapsed; this to avoid the risk of
spontaneous ignition of oil vapour when air is
admitted.

4

Normal ratings (pressures, temperatures, speeds,
etc.) shall be durably marked.

5

Operate the unit only for the intended purpose and
within its rated limits (pressure, temperature,
speeds, etc.).

6

The machinery and equipment shall be kept clean,
i.e. as free as possible from oil, dust or other
deposits.

7

To prevent an increase in working temperature,
inspect and clean heat transfer surfaces (cooler
fins, intercoolers, water jackets, etc.) regularly.
See the 

Preventive maintenance schedule for

the compressor

.

8

All regulating and safety devices shall be
maintained with due care to ensure that they
function properly. They may not be put out of
action.

9

Care shall be taken to avoid damage to safety
valves and other pressure-relief devices,
especially to avoid plugging by paint, oil coke or
dirt accumulation, which could interfere with the
functioning of the device.

10 Pressure and temperature gauges shall be checked

regularly with regard to their accuracy. They shall
be replaced whenever outside acceptable
tolerances.

11 Safety devices shall be tested as described in the

maintenance schedule of the instruction manual
to determine that they are in good operating
condition. See the 

Preventive maintenance

schedule for the compressor

.

12 Mind the markings and information labels on the

unit.

13 In the event the safety labels are damaged or

destroyed, they must be replaced to ensure
operator safety.

14 Keep the work area neet. Lack of order will

increase the risk of accidents.

15 When working on the unit, wear safety clothing.

Depending on the kind of activities these are:
safety glasses, ear protection, safety helmet
(including visor), safety gloves, protective
clothing, safety shoes. Do not wear the hair long
and loose (protect long hair with a hairnet), or
wear loose clothing or jewelry.

16 Take precautions against fire. Handle fuel, oil and

anti-freeze with care because they are
inflammable substances. Do not smoke or
approach with naked flame when handling such
substances. Keep a fire-extinguisher in the
vicinity.

Summary of Contents for XAS 185 DD7

Page 1: ...Atlas Copco Instruction Manual Engine Deutz D2011L03 XAS 97 DD XAS 185 DD7 Engine Deutz F3M2011 Instruction Manual for Portable Compressors English ...

Page 2: ......

Page 3: ...ATLAS COPCO PORTABLE AIR DIVISION www atlascopco com Printed matter N 9829 3095 00 11 2008 Instruction Manual for Portable Compressors XAS 97 DD XAS 185 DD7 ...

Page 4: ...tions additions or conversions made without the manufacturer s approval in writing While every effort has been made to ensure that the information in this manual is correct Atlas Copco does not assume responsibility for possible errors Copyright 2008 Atlas Copco Airpower n v Antwerp Belgium Any unauthorized use or copying of the contents or any part thereof is prohibited This applies in particular...

Page 5: ...system 20 3 2 Electric system 22 3 3 Markings and information labels 27 4 Operating instructions 28 4 1 Parking towing and lifting instructions 28 4 1 1 Parking instructions 28 4 1 2 Towing instructions 29 4 1 3 Spillage Free Instruction 30 4 1 4 Height adjustment 30 4 1 5 Lifting instructions 31 4 1 6 Anti Frost Device option 31 4 2 Starting Stopping 32 4 3 Before starting 32 4 3 1 Starting proce...

Page 6: ...cedure of brake cable adjustment 49 6 6 3 Brake cable adjustment 49 7 Problem solving 50 8 Available options 53 9 Technical specifications 54 9 1 Torque values 54 9 1 1 General torque values 54 9 1 2 Critical torque values 54 9 2 Settings of shutdown switches and safety valves 55 9 3 Compressor engine specifications 56 9 3 1 Reference conditions 56 9 3 2 Limitations 57 9 3 3 Altitude unit performa...

Page 7: ...ponents Skill level 3 Electrical technician An electrical technician is trained and has the same qualifications as both the operator and the mechanical technician In addition the electrical technician may carry out electrical repairs within the various enclosures of the unit This includes work on live electrical components Skill level 4 Specialist from the manufacturer This is a skilled specialist...

Page 8: ... kept clean i e as free as possible from oil dust or other deposits 7 To prevent an increase in working temperature inspect and clean heat transfer surfaces cooler fins intercoolers water jackets etc regularly See the Preventive maintenance schedule for the compressor 8 All regulating and safety devices shall be maintained with due care to ensure that they function properly They may not be put out...

Page 9: ...ing device must be applied and kept in good order 6 To lift heavy parts a hoist of ample capacity tested and approved according to local safety regulations shall be used 7 Lifting hooks eyes shackles etc shall never be bent and shall only have stress in line with their design load axis The capacity of a lifting device diminishes when the lifting force is applied at an angle to its load axis 8 For ...

Page 10: ... 14 All doors shall be shut during operation so as not to disturb the cooling air flow inside the bodywork and or render the silencing less effective A door should be kept open for a short period only e g for inspection or adjustment 15 Periodically carry out maintenance works according to the maintenance schedule 16 Stationary housing guards are provided on all rotating or reciprocating parts not...

Page 11: ...d such as work in progress do not supply voltage shall be attached to the fuse box or main switch 4 Before dismantling any pressurized component the compressor or equipment shall be effectively isolated from all sources of pressure and the entire system shall be relieved of pressure Do not rely on non return valves check valves to isolate pressure systems In addition a warning sign bearing a legen...

Page 12: ...unction properly 20 Maintenance and repair work should be recorded in an operator s logbook for all machinery Frequency and nature of repairs can reveal unsafe conditions 21 When hot parts have to be handled e g shrink fitting special heat resistant gloves shall be used and if required other body protection shall be applied 22 When using cartridge type breathing filter equipment ascertain that the...

Page 13: ...in accordance with the technical specifications Safety reasons prohibit any other applications 3 National legislation requirements with respect to re inspection must be complied with 4 No welding or heat treatment of any kind is permitted to those vessel walls which are exposed to pressure 5 The vessel is provided and may only be used with the required safety equipment such as manometer overpressu...

Page 14: ...ent The compressor casing houses two screw type rotors mounted on ball and roller bearings The male rotor driven by the engine drives the female rotor The element delivers pulsation free air Injected oil is used for sealing cooling and lubricating purposes Compressor oil system The oil is boosted by air pressure The system has no oil pump The oil is removed from the air in the air oil vessel at fi...

Page 15: ...quipped with low oil pressure and high oil temperature shut down switches Frame and axles The compressor engine unit is supported by rubber buffers in the frame The standard unit has a none adjustable towbar with support leg and one of the following towing eyes AC DIN ball ITA GB or NATO As an option the unit can be equipped with an adjustable towbar a jockey wheel and or overrun parking brake for...

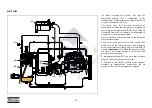
Page 16: ... 14 Main Parts SV A VI AR RV FP OLG AOV CP C AF VV FF FU CE F EP FT D FCeo FCft DPec DSe OFe OFce TB H DPft S E AFD ...

Page 17: ...n Plug Fuel Tank DSe Engine Oil Level Dipstick E Engine EP Exhaust Pipe F Fan FCeo Filler Cap engine oil FCft Filler Cap fuel tank FF Fuel Filter FP Filler Plug compressor oil FT Fuel Tank FU Fuel Pump Reference Name H Hood OFce Oil Filter compressor element OFe Oil Filter engine OLG Oil Level Gauge compressor element RV Regulating Valve S Starting Motor SV Safety Valve TB Towbar VI Vacuum Indicat...

Page 18: ... 16 COMPRESSOR REGULATING SYSTEM OVERVIEW BOV AF DP FN UV UA VH BDV CV AOV RV SR VV VI SV FR PG AR DP OLG SL FP SL OF CE DP TS F OCce E SC OS ...

Page 19: ...FN Flow Nozzle FP Filler Plug FR Flow Restrictor OCce Oil Cooler compressor element OF Oil Filter OLG Oil Level Gauge OS Oil Separator Reference Name PG Pressure Gauge RV Regulating Valve SC Safety Cartridge option SL Scavenge Line SR Speed Regulator SV Safety Valve TS Temperature Switch UA Unloader Assembly UV Unloader Valve VH Vent Hole VI Vacuum Indicator VV Vacuator Valve ...

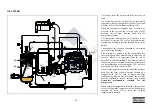
Page 20: ...r element The oil collects in the receiver and on the bottom of the separator element The air leaves the receiver via a flow nozzle FN which prevents the receiver pressure from dropping below the minimum working pressure specified in section Limitations even when the air outlet valves are open This ensures adequate oil injection and prevents oil consumption A temperature switch TS and a working pr...

Page 21: ...oil mixed with the compressed air leaves the compressor element and re enters the air receiver where it is separated from the air as described in section Air flow The oil that collects in the bottom of the oil separator element is returned to the system through a scavenging line SL which is provided with a flow restrictor FR The oil filter by pass valve opens when the pressure drop over the filter...

Page 22: ... 20 CONTINUOUS REGULATING SYSTEM UV UA VH RV SR AR CE ...

Page 23: ...peed control of the engine between maximum load speed and unloading speed the output of a screw compressor is proportional to the rotating speed 2 Air inlet throttling If the air consumption is equal to or exceeds the maximum air output the engine speed is held at maximum load speed and the unloading valve is fully open If the air consumption is less than the maximum air output the regulating valv...

Page 24: ...5 9 10 11 p 12V DC 5 Temp K1 General alarm Lamp tester 13 15 14 11 10 13 11 9 9 9 15 14 Auxiliary 3 3 3 3 8 18 16 15 4 3 2 1 3 2 1 0 32 33 31 30 5 10A 23 22 19 17 6 7 6 D D B M M1 K0 S2 S3 G2 G1 K4 F1 S1 K4 K3 S5 K1 H2 H1 K2 S4 K2 12 12 V1 h 12 12 12 12 12 12 12 K3 Y1 P1 K0 V2 10 13 The compressor is equipped with a negative earthed system ...

Page 25: ...arter Solenoid part of M1 K1 Shut down Relay K2 Blocking Relay K3 Override Start Relay K4 Start Relay M1 Starter Motor P1 Hourmeter S1 Contact Switch Off On Override start S2 Temperature Switch Engine S3 Oil Pressure Switch Engine S4 Lamptest Switch S5 Temperature Switch Compressor Y1 Fuel Solenoid Valve V1 Diode V2 Diode ...

Page 26: ...G1 G2 P2 B D D 7 6 2 85 86 30 87 8 3 3 3 3 9 9 9 2 16 11 87a 87 86 87 87 30 30 87a 85 15 10 30 30 13 14 87a K3 S5 K0 M1 M S6 K1 K5 30 30 30 87 87 86 85 86 85 86 85 87a 87a 5 10A Temp General alarm Lamptester 12V DC 0 p S1 0 1 2 3 2 3 4 2 1 1 17 12 12 12 12 12 12 12 12 12 12 12 12 87 30 3 4 Auxiliary ...

Page 27: ...ral Alarm Lamp K0 Starter Solenoid part of M1 M1 Starter Motor P1 Hourmeter P2 Glowplug S1 Contact Switch Off On Override start S2 Temperature Switch Engine S3 Oil Pressure Switch Engine S4 Lamptest Switch S5 Temperature Switch Compressor S6 Push Button Glowplug Y1 Fuel Solenoid Valve V1 Diode V2 Diode ...

Page 28: ...can release start switch S1 and it returns to position 1 Exciting the safety devices occurs no longer across line 3 but across line 2 to line 4 and this way to line 3 Engine is running normally Oil pressure contact S3 opens K3 no longer excited K3 changes over 13 11 engine cuts out because fuel solenoid Y1 no longer excited and lamp H2 goes on simultaneously Thermocontact S2 opens K3 no longer exc...

Page 29: ...o open air valves without connected hoses Compressor loaded Runlamp Airfilter Compressor temperature too high Rotation direction Inlet Outlet Compressor oil drain Read the instruction manual before starting Service every 24 hours Warning Part under pressure Do not stand on outlet valves Start Stop indication of switch Do not run the compressor with open doors Lifting device Use diesel fuel only 3 ...

Page 30: ...erated temporarily in an out of level position not exceeding 15 If the compressor is parked on sloping ground immobilize the compressor by placing wheel chocks available as option in front of or behind the wheels Locate the rear end of the compressor upwind away from contaminated wind streams and walls Avoid recirculation of exhaust air from the engine This causes overheating and engine power decr...

Page 31: ... Push the hand brake lever 3 completely downwards and connect breakaway cable 4 to the vehicle Secure jockey wheel 2 or support leg 1 in the highest possible position The jockey wheel is prevented from turning Adjustable towbar with jockey wheel and brakes Towing position of jockey wheel Before towing the compressor ensure that the towing equipment of the vehicle matches the towing eye or ball con...

Page 32: ... by hand Adjust required height of the towbar Tighten locking nut 2 by hand Fix locking nut 2 with spring pin 1 Height adjustment should be undertaken on levelled ground and in coupled condition When readjusting make sure that the front point of the towbar is horizontal to the coupling point Before starting a trip ensure that the adjustment shaft is secure so that the stability and safety is guara...

Page 33: ...l cooler to prevent freezing of the pneumatic tools at low ambient temperatures partial by pass As soon as the ambient temperature drops below 20 C 68 F it is recommended to open the valve and by pass the oil cooler The outlet air temperature will increase with 13 16 C 23 29 F and condensation in the air will be reduced It is also recommend to use the by pass valve in case the compressor is used a...

Page 34: ... for the type of fuel 5 In case of start up of the unit after running out of fuel pump up the fuel manually with the fuel hand pump before starting 6 Drain any water and sediment from the fuel filters until clean fuel flows from the drain cock 7 Drain leaking fluid from the frame 8 Press vacuator valves VV of the air filter to remove dust 9 Check the air filter vacuum indicators VI If the yellow p...

Page 35: ...ll go on 2 Check correct operation of alarm lamps H1 and H2 by pushing lamp test button S4 Both alarm lamps red should go on 3 Turn start switch S1 further clockwise into position 3 The starter motor will set the engine in motion The maximum allowed starter time where the starter motor is running continuously is 20 seconds If the engine does not catch a new attempt can be made after 30 seconds wai...

Page 36: ...on A FAULT SITUATIONS AND PROTECTIVE DEVICES A fault which occurs with the engine either oil pressure too low oil temperature too high or alternator voltage too low will always and immediately cause the engine to cut out and the control lamp H2 will light up By doing some simple checks it can be determined what it was that caused the engine to fail low oil level clogged up cooler slack alternator ...

Page 37: ...sor applications Maintenance schedule can be adapted depending on application environment and quality of maintenance PREVENTIVE MAINTENANCE SCHEDULE FOR THE COMPRESSOR Maintenance schedule Daily 50 hours after initial start up Yearly or every 500 hours Service pak XAS 97 DD XAS 185 DD7 2912 4393 06 Engine oil level Check Compressor oil level Check Fuel level Check Fill Air filter vacuator valves E...

Page 38: ... head and all its moving parts shaft Grease Joints of height adjustment adjustable towbar Check Grease Shutdown switches Check Pressure drop over separator element 2 Replace Fan V belt 3 Adjust Fuel tank Clean Compressor oil Change Compressor oil filter Replace Replace Air filter element 1 Replace Safety cartridges 1 option Replace Engine oil 3 4 5 Change Engine oil filter 3 Replace Fuel filter 3 ...

Page 39: ...from engine oil cooler see chapter Main Parts DPec Drain plug engine oil cooler 6 In case of poor fuel quality replace fuel filter more frequently 7 The valves need to be adjusted for the first time before 500 running hours 8 Option additional fuel filter heavy duty filter element 2914 8092 00 to be ordered separately Keep the bolts of the housing the lifting eye the towbar and the axle securely t...

Page 40: ... a fine suspension instead of allowing them to clog your filter and accumulate in the valve rocker cover area PAROIL releases excess heat efficiently whilst maintaining excellent bore polish protection to limit oil consumption PAROIL has an excellent Total Base Number TBN retention and more alkalinity to control acid formation PAROIL prevents Soot build up PAROIL is optimized for the latest low em...

Page 41: ...c oil To set correct oil levels proceed as in normal instruction COMPRESSOR OIL Mineral compressor oil PAROIL M Synthetic compressor oil PAROIL S Mineral engine oil PAROIL 15W40 Synthetic engine oil PAROIL 5W40 Liter US gal Order number can 5 1 3 1615 5947 00 can 20 5 3 1615 5948 00 barrel 210 55 2 1615 5949 00 Liter US gal Order number can 5 1 3 1615 5950 01 can 20 5 3 1615 5951 01 barrel 210 55 ...

Page 42: ...ine Operation Manual and if necessary top up with oil CHECK COMPRESSOR OIL LEVEL With the unit standing horizontal check the level of the compressor oil The pointer of the oil level gauge 1 must register in the upper extremity of the green range Add oil if necessary Never mix oils of different brands or types Use only non toxic oils where there is a risk of inhaling delivered air Before removing t...

Page 43: ...a drain pan Screw out the filler plug to speed up draining After draining place and tighten the drain plugs 3 Remove the oil filters 3 e g by means of a special tool Catch the oil in a drain pan 4 Clean the filter seat on the manifold taking care that no dirt drops into the system Oil the gasket of the new filter element Screw it into place until the gasket contacts its seat then tighten one half ...

Page 44: ... of the fuel tank Remove the drain plug Lift the towbar see chapter Main Parts TB and tilt the compressor approx 15 to remove all fuel dirt and water Clean the fuel tank and fix the drain plug handtight Refill the fuel tank with clean fuel Remove any dirt from the coolers with a fibre brush Never use a wire brush or metal objects 1 2 To avoid damaging the coolers angle between jet and coolers shou...

Page 45: ... cell once more if required add electrolyte Refit plugs and or cover Place the battery in the compressor RECHARGING A BATTERY Before and after charging a battery always check the electrolyte level in each cell if required top up with distilled water only When charging batteries each cell must be open i e plugs and or cover removed Apply with preference the slow charging method and adjust the charg...

Page 46: ...ASL SERVICE KITS A Service Kit is a collection of parts to fit a specific repair or rebuilding task It guarantees that all necessary parts are replaced at the same time which improves the uptime of the unit The order numbers of the Service Kits are listed in the Atlas Copco Parts List ASL COMPRESSOR ELEMENT OVERHAUL When a compressor element is due for overhaul it needs to be done by Atlas Copco T...

Page 47: ...pull out the knob adjust the regulating valve RV until a pressure of X bar e is reached see table 3 Check the minimum speed of the engine Adjust minimum speed stop screw if necessary 4 Open an outlet valve AOV just enough to let the engine E run at maximum speed The working pressure must be Y bar e see table adjust if necessary with regulating valve RV 5 Check the engine maximum speed Adjust the m...

Page 48: ... are specially designed for the application The use of non genuine air filters may lead to severe damage of engine and or compressor element Never run the compressor without air filter element 1 Snap clips 6 Vacuator valve 2 Dust trap cover 7 Vacuum indicator 3 Safety cartridge option 8 Reset button 4 Filter element 9 Yellow indicator 5 Filter housing 1 6 2 3 4 5 7 9 8 ...

Page 49: ...ssemble in reverse order of dismantling Make sure the vacuator valve 5 points down 4 Inspect and tighten all air intake connections 5 Reset the vacuum indicator AIR RECEIVER The air receiver 1 is tested according to official standards Regularly have inspections carried out in conformity with local regulations SAFETY VALVE Following checks must be carried out on the safety valve 2 a check of the op...

Page 50: ...es must be free from tension Lock the swivel cams of the wheel brake from the outside by means of a pin 4 mm 3 through the hole as shown in the Figure Turn the adjustable machine part inside the wheel till the wheel locks up Center the brake shoes by actuating the parking brake several times Turn the adjusting machine part anti clockwise until the wheel is running free in direction of travel appro...

Page 51: ...int that the brake is completely locked BRAKE CABLE ADJUSTMENT 1 With the towing eye pulled out in the outmost position and the hand brake lever in the downward position see Figure loosen the lock nuts 2 Turn adjusting nuts 3 clockwise until there is no slack in the brake mechanism The equalizer 5 must remain perpendicular to main brake cable 4 2 Apply the hand brake lever several times and repeat...

Page 52: ...ust be taken Problem Possible faults Corrective actions 1 Lamps H1 H2 do not light up when switching S1 to I and applying lamp test a Discharged or defective battery b Loose battery cable s or oxidised terminals c Loose connection or damaged wiring d Contact switch S1 defective e Circuit breaker F1 defective a Check electrolyte level and charge battery If no cells are shorted and battery is discha...

Page 53: ...e oil pressure c Fuel tank contains insufficient fuel a Release switch after engine oil pressure has built up above the minimum allowed value b Stop at once consult the Engine Operation Manual c Fill fuel tank 8 General alarm lamp H2 remains alight for over 5 seconds after starting a Insufficient engine oil pressure or too high engine oil temperature b Engine oil pressure switch S3 or compressor t...

Page 54: ...trictor in oil scavenging line SL clogged b Oil separator element OS defective c Oil level too high a Dismount clean and refit restrictor b Replace element c Check for overfilling Release pressure and drain oil to correct level 14 Compressor shuts down through a shutdown switch a Alternator V belt broken or slipping b Compressor overheating c Engine oil pressure too low d Engine temperature too hi...

Page 55: ... separator PD filter Aftercooler water separator PD QD filters Aftercooler water separator reheater Aftercooler water separator PD filter reheater Aftercooler water separator PD QD filters reheater Lubricator Anti frost device By pass Tool box Single Twin Safety Wheel chocks Safety cartridge Spark arrestor Safety chain CE ASME Hose reel Inlet shutdown valve Spillage free frame Exhaust particle fil...

Page 56: ...ead size Torque value Nm lbf ft M6 15 11 M8 39 29 M10 78 58 M12 135 100 M14 210 155 M16 345 255 Assemblies Torque value Nm lbf ft Wheel nuts 80 59 10 0 Bolts axle beams 80 59 10 Bolts towbar axle 80 59 10 Bolts towbar bottom 80 59 10 Bolts towing eye towbar 80 59 10 Bolts lifting eye flywheel housing 205 151 20 Bolts engine drive housing M12 80 59 10 Bolts engine drive housing M14 125 92 10 Bolts ...

Page 57: ...SAFETY VALVES Designation XAS 97 DD XAS 185 DD7 Engine oil pressure bar e 1 2 psi 17 4 Engine oil temperature C 127 133 F 260 270 Compressor temperature C 116 120 F 241 248 Safety valve opening pressure EC type bar e 10 5 ASME type psi 160 ...

Page 58: ... The inlet conditions are specified at the air inlet grating outside the canopy Designation XAS 97 DD XAS 185 DD7 Absolute inlet pressure bar e 1 psi 14 5 Relative air humidity Air inlet temperature C 20 F 68 Nominal effective working pressure bar e 7 psi 102 ...

Page 59: ...185 DD7 Minimum effective receiver pressure bar e 4 psi 58 Maximum effective receiver pressure compressor unloaded bar e 9 psi 130 Maximum ambient temperature at sea level 1 no aftercooler C 45 F 113 with aftercooler C 40 F 104 Minimum starting temperature C 10 F 14 Minimum starting temperature with coldstart equipment2 C 20 F 4 Altitude capability see curves ...

Page 60: ...nction altitude and ambient temperature 4 0 bar e 58 psi 5 0 bar e 73 psi 6 0 bar e 87 psi 7 0 bar e 102 psi 16 405 13 124 9 843 6 562 3 281 0 5000 4000 3000 2000 1000 0 10 0 10 20 30 40 50 14 32 50 68 86 104 122 ALTITUDE IN M ALTITUDE IN FT TEMPERATURE IN F TEMPERATURE IN C ...

Page 61: ...7 American ANSI PTC9 Designation XAS 97 DD XAS 185 DD7 Engine shaft speed normal and maximum r min 2750 Engine shaft speed compressor unloaded r min 1850 Free air delivery 1 no aftercooler l s 89 cfm 189 with aftercooler l s 84 cfm 178 Typical oil content of compressed air mg m3 5 oz 1000 cu ft 0 005 Engine oil consumption maximum g h 37 oz h 1 3 Compressed air temperature at outlet valves no afte...

Page 62: ...D2011L03 F3M2011 Coolant Oil Number of cylinders 3 Bore mm 94 in 3 7 Stroke mm 112 in 4 4 Swept volume l 2 332 cu in 142 3 Output acc to ISO 9249 G at normal shaft speed kW 36 hp 48 3 Load factor 50 Designation XAS 97 DD XAS 185 DD7 Capacity of oil sump Initial fill l 8 5 US gal 2 25 Refill max 1 l 6 US gal 1 59 Capacity of cooling system l US gal ...

Page 63: ...pacity of fuel tank l 80 US gal 21 1 Air volume at inlet grating approx 1 m3 s 1 2 cuft s 42 4 without brakes towbar fixed adjustable Length mm 2827 in 111 3 Width mm 1410 1410 in 55 5 55 5 Height mm 1258 1258 in 49 5 49 5 Weight ready to operate kg 890 lb 1962 with brakes towbar fixed adjustable Length mm 2970 3302 3470 in 117 130 137 Width mm 1410 1410 in 55 5 55 5 Height mm 1258 1258 in 49 5 49...

Page 64: ... 62 Dataplate 1 Company code 2 Model 3 Unit serial number 4 Working pressure 5 Speed 6 Engine power 7 Manufacturing year 1 2 3 4 5 6 7 ...

Page 65: ...aterials for recycling in the future is forseen DISPOSAL OF MATERIALS Dispose contaminated substances and material separately according to local applicable environmental legislations Before dismantling a machine at the end of its operating lifetime drain all fluids and dispose of according the applicable local disposal regulations Remove the batteries Do not throw batteries into the fire explosion...

Page 66: ... 64 Maintenance Log Compressor Customer Serial number Service hours Maintenance action Date By initials ...

Page 67: ......

Page 68: ...www atlascopco com Atlas Copco Instruction Manual ...

Reviews: