12
F. Install columns
Lay down two columns on the installation site parallel, position the power side
column according to the actual installation site. Usually, it is suggested to install
power side column on the front-right side from which vehicles are driven to the lift.
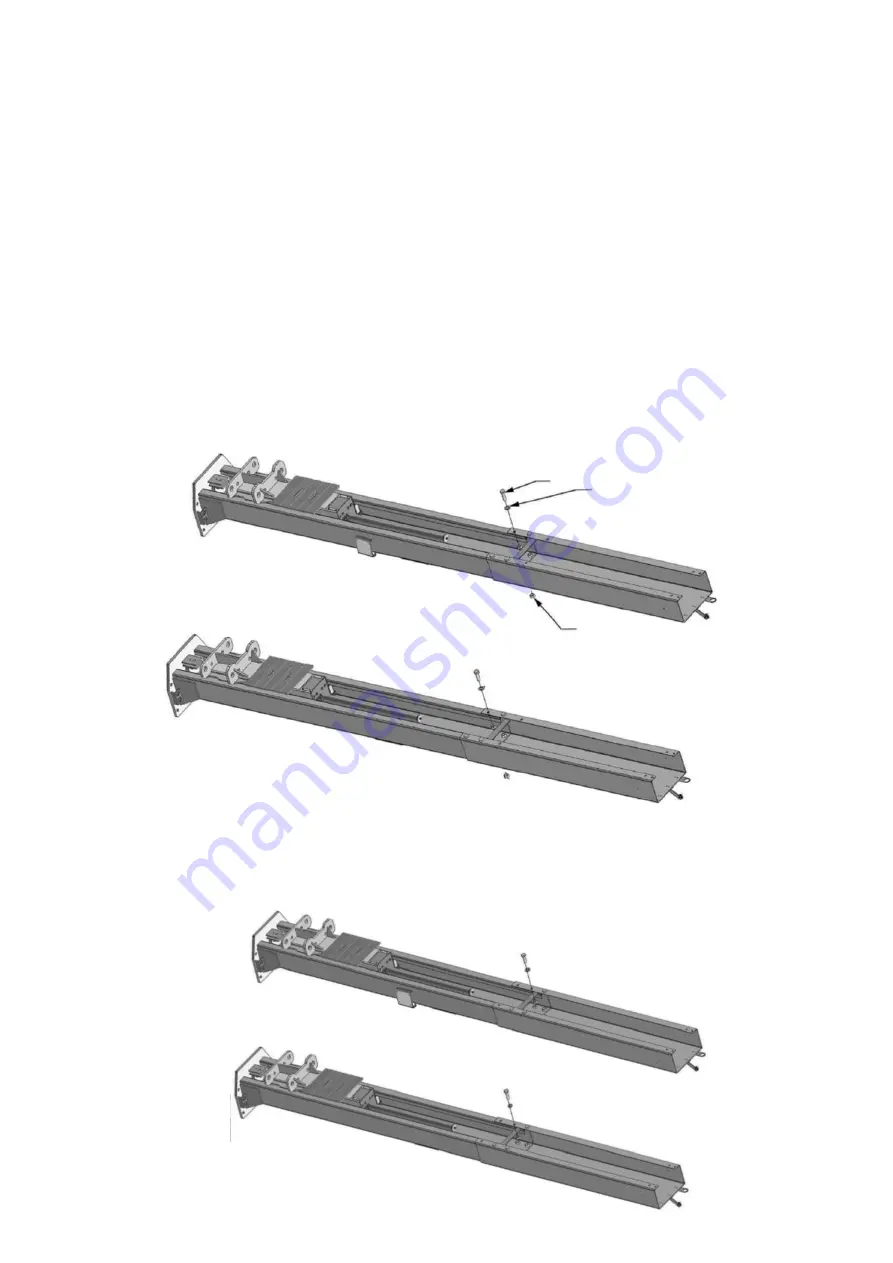
This lift is designed with 2-section columns. Adjustable height according to the
ceiling height and connect the inner and extension columns.
For PV10PX installation: When the ceiling height is over 175
¼”
, use high setting. When
the ceiling height is between 157
½”
-175
¼”
, use low setting. It is not allowable to
install when the ceiling height is less than 157
½”
.
1, High setting installation, the lower hole of extension column is connected
with inner column, see Fig.18
2, Low setting installation, the upper hole of extension column is connected with
inner column, see Fig.19
22
23
21
High setting
Fig.18
Low setting
Fig.19
Summary of Contents for Atlas PV-10HPX
Page 1: ...1 Model PV10PX Revised 05 25 2021 ...
Page 10: ...10 D Install parts of extension columns See Fig 16 Fig 16 24 26 20 42 25 37 41 ...
Page 18: ...18 K Raise the carriages up by hand so they are locked at the same level See Fig 26 Fig 26 ...
Page 22: ...22 Install power unit See Fig 30 Fig 30 ...
Page 30: ...30 IV EXPLODED VIEW Model 211SAC Fig 43 ...
Page 38: ...38 4 5 POWER UNIT EXPLODED VIEW 220V 60Hz Single Phase Fig 48 ...


