Loeki and Bello User Guide
4. Operation
No part of this User Guide may be reproduced, stored in a retrieval system, or published, in any form or by any means, electronic,
mechanical, photocopying, recording or otherwise, without the prior written permission of Atlas Revalidatie Techniek BV.
© 2008 Atlas Revalidatie Techniek B.V.
9
4.1.2
Adjusting the height of the seat
•
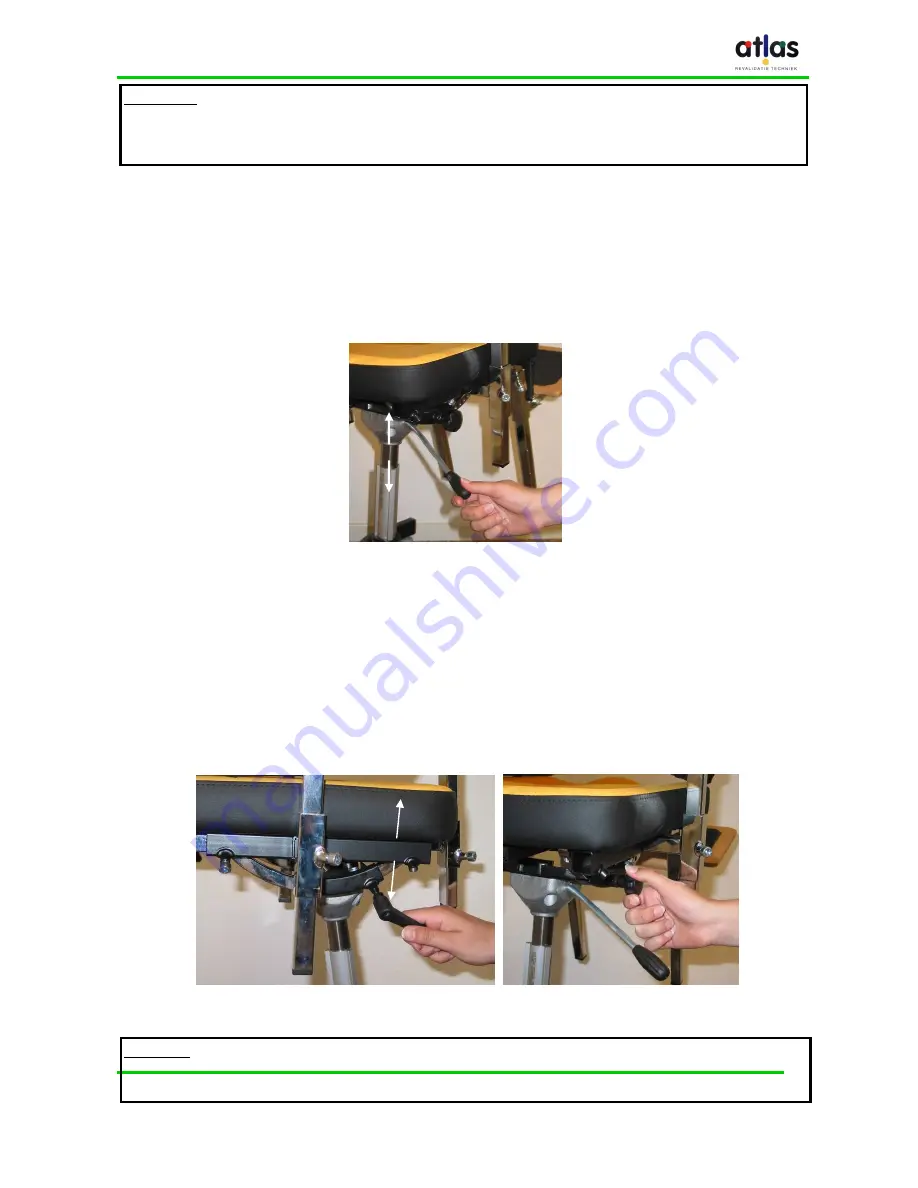
The lever for adjusting the height of the seat is located at the bottom of the seat (see illustration
4).
•
Hold the chair steady with one hand and with the other hand move the lever up or down to set
the seat to the desired height. Depending on the weight of the child, additional pressure may be
required to move the seat up or down.
•
The seat’s height must be adjusted so that the child is seated at a good working height for the
supervisor, is seated at the same height as the other children or, for example, can be properly
positioned at a table.
4.1.3
Adjusting the seating angle (Bello only)
•
The clamp for adjusting the seating angle is located to the left below the seat (see illustration
5A) and the adjusting screw is located to the right (see illustration 5B).
•
First loosen the clamp for adjusting the seating angle. Then, while holding the backrest in
position with one hand, pull out the seating angle locking knob. Tilt the seat into the desired
position at a point where the locking knob springs back into its locking position. Retighten the
clamp and verify that the seating angle is properly secured by pushing firmly on the seat and the
backrest.
•
If required, a passive or active seating posture can be achieved using the seating angle
adjustment mechanism. A change in seating posture is also a positive experience for the child.
Attention:
The initial settings or important changes to the seating posture may only be made by specially
trained personnel. The highchair may only be adjusted by parents or carers after elaborate
instruction and careful study of this guide.
Illustration 4:
Adjusting the seat’s height.
Attention:
Make sure to hold the chair firmly while unlocking the seating angle to prevent the chair from tilting
too far.
Illustration 5A:
The clamp for adjusting the seating angle.
Illustration 5B:
The knob for adjusting the seating angle.


