background image

Installation Guide

8

AT-HDR-M2C

© 2017 Atlona Inc. All rights reserved. “Atlona” and the Atlona logo are registered trademarks of Atlona Inc. All other brand names and trademarks or registered 

trademarks are the property of their respective owners. Pricing, specifications and availability subject to change without notice. Actual products, product images, and 

online product images may vary from images shown here.

Version 1

atlona.com 

 408.962.0515 

 877.536.3976

Summary of Contents for AT-HDR-M2C

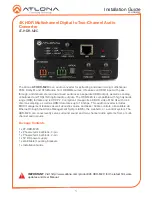
Page 1: ... a separate HDMI output as well as analog unbalanced and TOSLINK digital audio outputs The HDR M2C is compatible with high dynamic range HDR formats and is HDCP 2 2 compliant It supports 4K UHD video 60 Hz with 4 4 4 chroma sampling as well as HDMI data rates up to 18 Gbps This audio converter includes EDID management features as well as audio volume and bass treble controls all available via Ethe...

Page 2: ... with the tip of a pencil or a paperclip to toggle between static IP and DHCP mode See page 5 for more information 6 DC 5V Connect the included 5V DC power supply to this power receptacle 7 FW Connect a mini USB cable to this port to update the firmware 8 L R Connect a 3 pin Phoenix connector from this port to a two channel audio output device 9 OPTICAL Connect an optical audio cable from this TOS...

Page 3: ...cal Area Network LAN 5 Connect the green Phoenix block to the AUDIO OUT connector 6 Connect the orange Phoenix block to the DC 5V connector Installation Audio Connector Power Connector GND GND R L The AT HDR M2C provides analog audio output of two channel audio using a 3 pin Phoenix terminal 1 Use wire strippers to remove a portion of the cable jacket 2 Remove at least 3 16 5 mm from the insulatio...

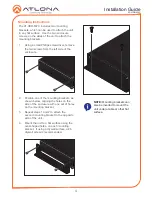
Page 4: ...ure 2 Position one of the mounting brackets as shown below aligning the holes on the side of the enclosure with one set of holes on the mounting bracket 3 Repeat steps 1 and 2 to attach the second mounting bracket to the opposite side of the unit 4 Mount the unit to a flat surface using the oval shaped holes on each mounting bracket If using a drywall surface a 6 drywall screw is recommended NOTE ...

Page 5: ...ss the webGUI 1 Set the IP mode of the AT HDR M2C By default the AT HDR M2C is set to DHCP mode Static IP mode Press and hold the recessed button with the tip of a pencil or paper clip until the PWR indicator blinks twice DHCP mode Press and hold the button until the PWR indicator blinks four times 2 Connect an Ethernet cable from the LAN port on the AT HDR M2C to the Local Area Network LAN 3 Use ...

Page 6: ... using the OPTICAL connector The OPTICAL connector only supports two channel LPCM audio To hear a multichannel audio source connect an HDMI cable from the HDMI OUT port on the AT HDR M2C to the sink device No multichannel audio on the HDMI output Make sure that the HDMI cable is connected from the sink device to the HDMI OUT port on the AT HDR M2C Two channel audio is not heard on the output Make ...

Page 7: ...Installation Guide 7 AT HDR M2C Notes ...

Page 8: ...Atlona Inc All other brand names and trademarks or registered trademarks are the property of their respective owners Pricing specifications and availability subject to change without notice Actual products product images and online product images may vary from images shown here Version 1 atlona com 408 962 0515 877 536 3976 ...

Reviews: