AT-OMNI-121 / AT-OMNI-122
51
Configuring Audio Output
In addition to passing audio directly from the encoder to the decoder, both the AT-OMNI-121 and AT-OMNI-122
provide two additional audio options
•
HDMI audio can be de-embedded and output to two-channel analog audio.
•
Two-channel analog audio can be embedded and output over HDMI.
This section covers both methods. If using a single-channel decoder, only a single
AUDIO IN
and
AUDIO OUT
port
will be available.
De-embedding audio will extract the HDMI audio and automatically downmix to two-channel analog audio, using the
included captive-screw connectors.
De-embedding Audio
1.
Connect the power supply to the DC 48V connector on the decoder.
2.
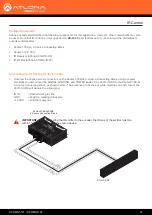
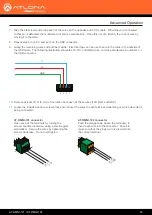
Connect the included 5-pin captive screw connectors to the
AUDIO OUT
ports. Refer to
for wiring information.
3.
Login to AMS. Refer to
Accessing Decoders in AMS (page 19)
4.
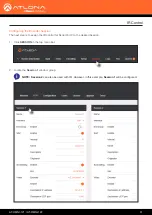
Select the decoder in AMS.
5.
Click
HDMI OUTPUT
in the menu bar.
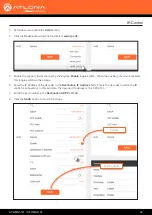
6.
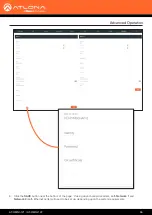
Scroll down to the
Audio
section.
7.
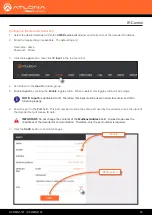
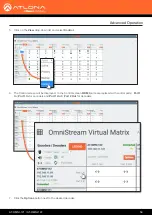
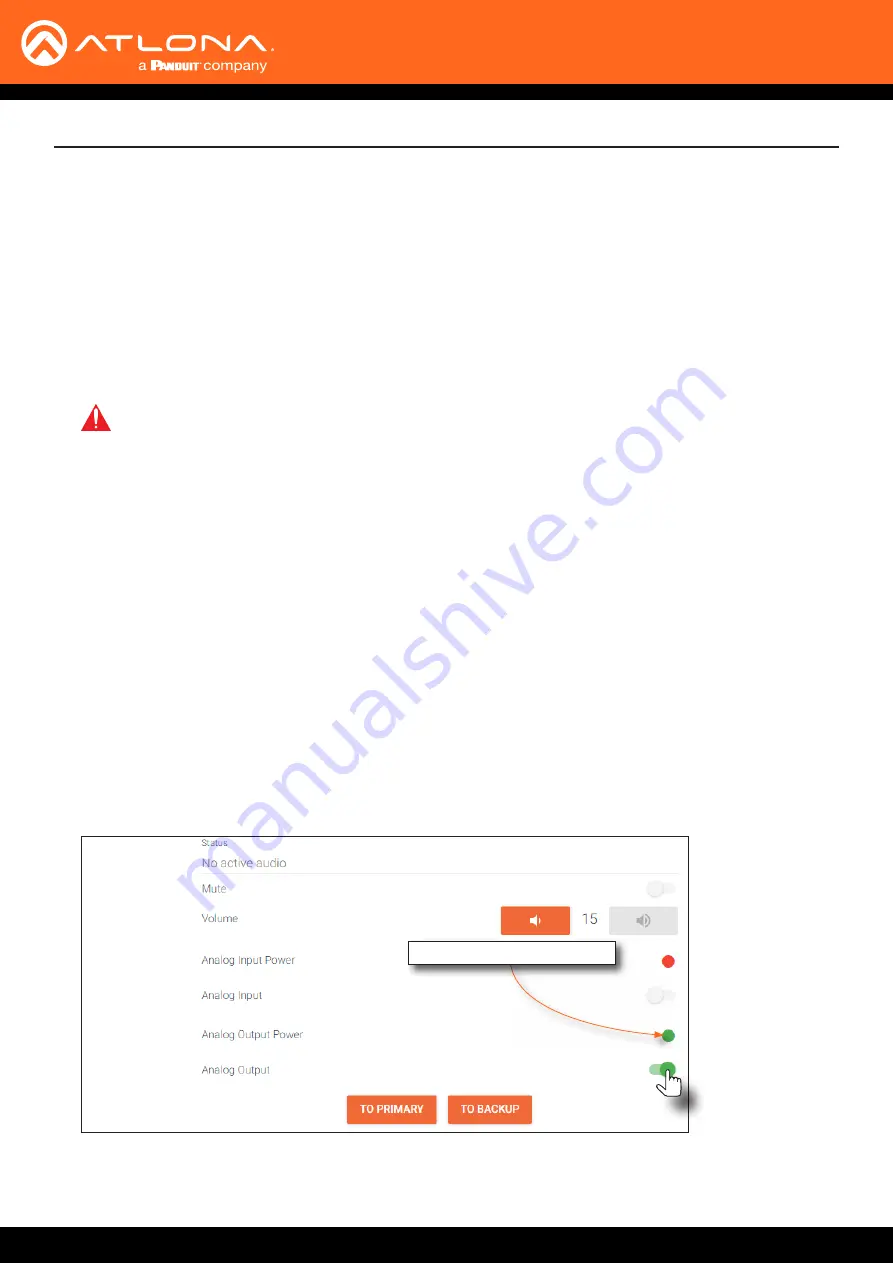
Click the
Analog Output
toggle switch to enable it. When enabled, the toggle switch will be green. Also note
that the
Analog Output Power
indicator, above the toggle switch, will be green. This indicates that the external
power supply is connected to the decoder.
IMPORTANT:
When using analog audio inputs on the OmniStream decoder, the decoder must be
powered using the 48V power supply (AT-PS-48083-C). This power supply is sold separately and
can be purchased from Atlona.
8.
Audio from the source will now be heard on the
ANALOG OUT
port of the decoder. Note that when audio is de-
embedded, it will not longer be audible using the HDMI OUT port on the decoder.
External power supply connected
Advanced Operation

