Armadillo-J
Startup Guide ver.2.03
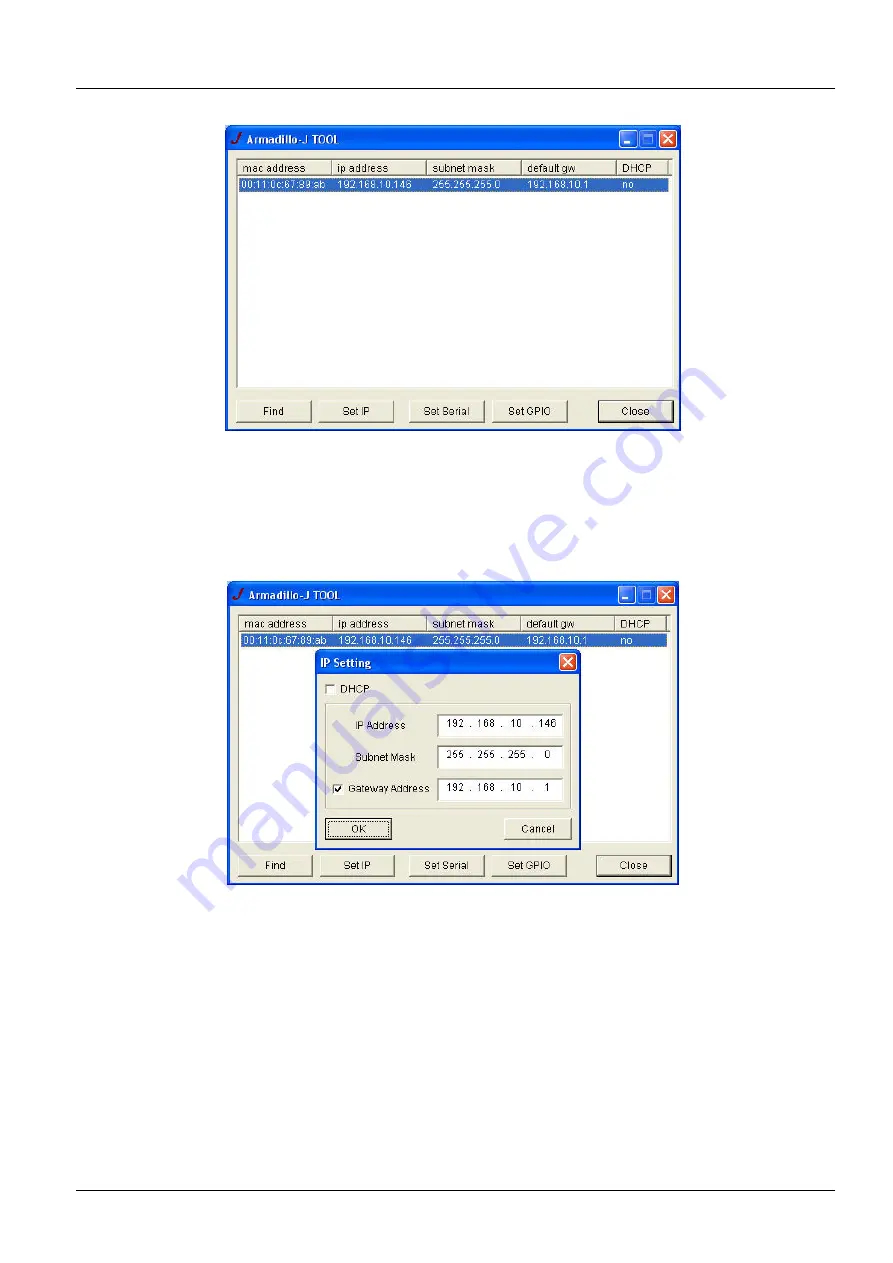
Figure 4-2 Screen after Searching
4.3.
Changing Network Settings
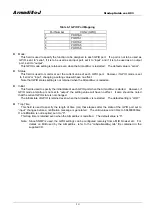
Select from the list the Armadillo-J whose internal settings you want to change and press the “Set IP”
button or double-click it on the list to display the “Set IP Dialog”.
Figure 4-3 Network Configuration Dialog
Set the network parameters in the dialog and then click “OK” to execute the changes.
(For details about setting these values, consult with your network manager).
Note1: Some time is required to complete the changes to the settings after the “OK” button is clicked. Be
careful not to power off the Armadillo-J before it has completed, as the settings may not be saved.
Note2: If DHCP is selected, the previous IP address of the Armadillo-J will still be displayed. This is because
the assignment of the new IP address by the DHCP server has not yet been performed. Wait for
approximately 10 seconds after changing the settings and then try the “Search” button again. The new
IP address will be displayed.
4.4. Exiting Armadillo-J Configuration Tool
Click the “Close” button or ”×” button on the upper right side of the screen to exit Armadillo-J Configuration Tool.
7


