Atmel AVR2052
19
8200M-AVR-11/11
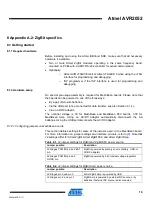
8 Appendix A-2: ZigBit specifics
8.1 Getting started
8.1.1 Required hardware
Before installing and using the Atmel BitCloud SDK, make sure that all necessary
hardware is available:
•
Two or more Atmel ZigBit modules, operating in the same frequency band,
mounted on PCBs with a UART RS-232 controller for serial communication
•
Optionally:
o
Atmel AVR JTAGICE mkII or Atmel JTAGICE 3 when using the JTAG
interface for programming and debugging
o
ISP programmer if the ISP interface is used for programming and
debugging
8.1.2 Hardware setup
No special pre-usage assembly is required for MeshBean boards. Please note that
the boards can be powered in one of the three ways:
•
By a pair of AA-size batteries;
•
Via the USB port (once connected for data transfer, see also Section
•
Via an AC/DC adaptor.
The nominal voltage is 3V for MeshBean and MeshBean 900 boards, 3.3V for
MeshBean Amp. Using an AC/DC adaptor automatically disconnects the AA
batteries. Using the USB port disconnects the AC/DC adaptor.
8.1.2.1 Configuring jumpers on MeshBean boards
This section defines settings for some of the jumpers used on the MeshBean board.
For more information on jumper settings and interface pin-outs, refer to
. Note that
J2 settings differ for Atmel ZigBit, Atmel ZigBit 900, and Atmel ZigBit Amp.
Table 8-1.
J2 jumper settings for ZigBit and ZigBit 900: power source.
Jumper position
Description
J2 bridges POWER pin and BAT
pin
ZigBit is powered by primary source (battery, USB, or
AC/DC adapter)
J2 bridges POWER pin and
DC/DC pin
ZigBit is powered by 3.6V internal voltage regulator
Table 8-2.
J2 jumper settings for ZigBit Amp: power source.
Jumper position
Description
J2 bridges pin 2 and pin 3
Atmel ZigBit Amp is powered by USB
J2 bridges pin 2
and pin 1
ZigBit Amp is powered by external DC source, or by
batteries if external DC source is disconnected


