6
by placing a well-lit and defined bull’s-eye target with at least a 6-inch
black, 100 yards from a sand bagged and well supported rifle. Using the
100-yard distance to target will give a convenient zero but other distances
can be used. It will, however, require more adjustment during live fire to
achieve a 100 yd. zero. Sighting thru the bore with the action open center
the black bull’s-eye in your rifles bore. You would like the black circle of
the bull’s-eye centered in the scopes field of view with the crosshair in the
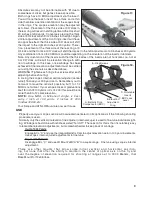
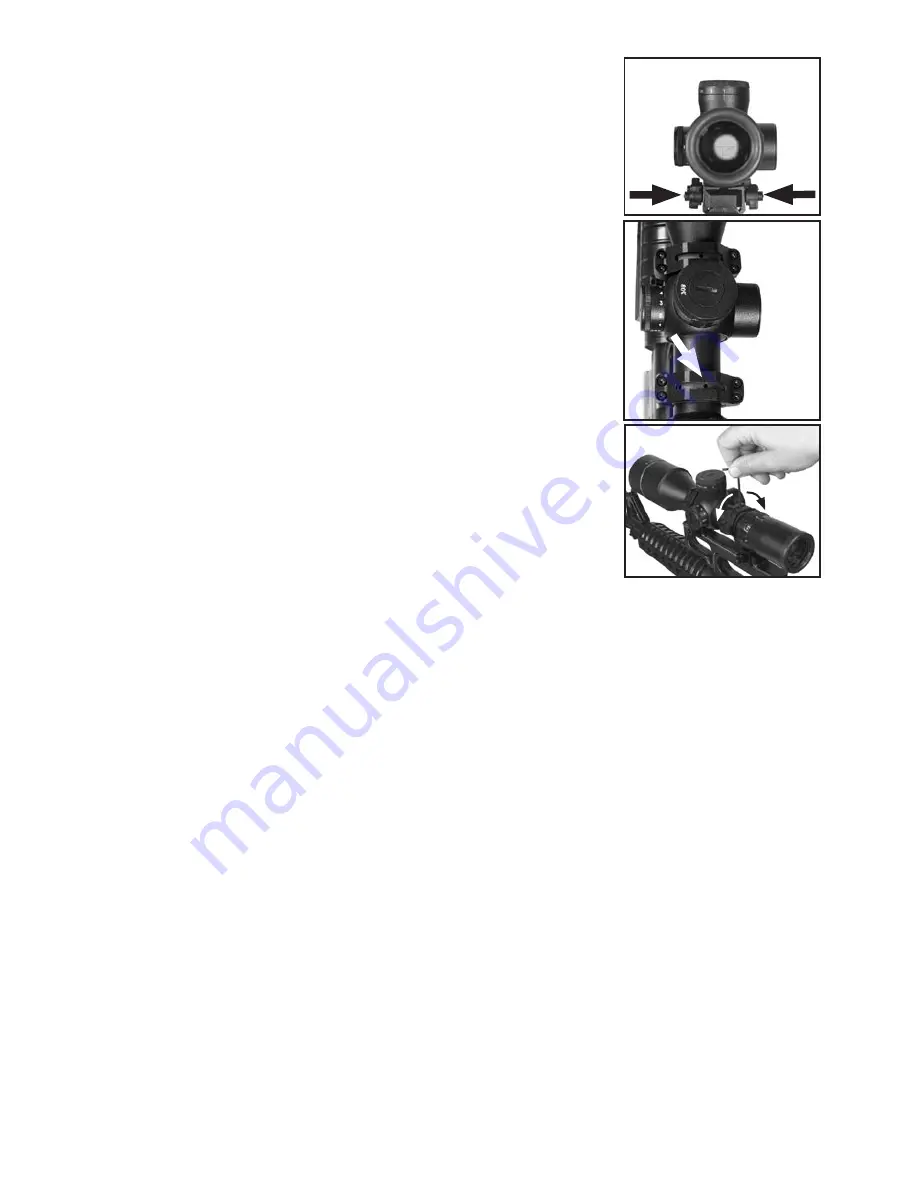
center of the bull. If it is not, first use the side nuts that secure the rings to
the bases to adjust the scope to zero windage
(Fig.12)
.
Alternately loosening and tightening the side nuts while checking the
bores alignment will move the scope crosshair accordingly:
Looking from behind the scope in normal shooting position.
Loosening the rear rings left side nut and then retightening the right side
will move the crosshair to the left. Reversing this procedure will move the
crosshair to the right.
Adjustment using the front rings screws will result in the opposite.
Loosening the front rings left side nut and tightening the right will move the
crosshair to the right.
Next check the elevation for zero. If the crosshair is not centered adjust it
by rotating the a centric inserts via the following method:
Use the slot milled into the top half of each ring to access the holes drilled
thru the insert
(Fig.13)
. Move the inserts radially to achieve the above
described scope picture by inserting a round rod into the holes drilled in
the insert
(Fig.14)
. The shank (blunt end) of a 9/64 drill works perfectly.
When the reticle is centered, tighten the ring screws exerting torque on
the short end of the supplied allen wrench. It is not necessary to use the
leverage of the long arm to tighten the screws any more than an additional
1/8 turn.
sIGht IN yOur rIFle
Chances are your rifle will not shoot to your bore sighted zero or to the zero you desire. This is primarily
due to the rifles recoil impulse prior to the bullets departing the barrel. Recoil for RH twist barrels tends
to carry the shot up and to the left. If you are more than 1 inch in any direction from the center of the bull
or from your desired zero, adjust the scope using the rings insert mechanism or the rings side nuts as
described above. It is always best to loosen the top halves of the ring just enough to allow free rotation or
pivoting of the inserts so that stress is not introduced by any changes. Once you have zeroed your, wind-
age retighten the side nuts and proceed to fine-tune the elevation. Both rings have 10 MOA adjustment
via the insert. You will note that each insert has a thick and a thin side that allow a centric orientation of
the scopes body in the rings. The scope’s elevation may be adjusted as follows:
Placement of the thick side at 6 O’clock in the rear ring will result in raising the crosshair 10 inches at 100
yards. Conversely placing the thick side at 12 O’clock will lower it 10 inches. Again similar adjustments
of the front ring’s insert will have an opposite effect; the thick side at 6 O’clock will lower the impact 10
inches at 100 yards. Therefore, placement of the thick side of the rear ring at 6 O’clock and the front’s at
12 O’clock will raise the impact a maximum of 20 inches at 100 yards. Any combination from 0 to 20 MOA
is possible depending on the orientation of the inserts in tandem.
Note:
Any orientation of the inserts such that the thick sides of the inserts are not vertical, i.e., not at 12 or
6 O’clock, will result in a windage change in addition to elevation. In this case, once elevation has been
achieved a final windage adjustment must be carried out using the side nuts as described above.
Once your basic zero is set you can now use the scopes internal adjustments to fine tune impact to any
shooting condition with the confidence that your optics are free of accuracy robbing parallax and stress.
MaINtaINING yOur rIFlescOPe:
Your rifle scope is waterproof and shockproof. However, you should never try to take apart or clean it
internally (it will void your warranty). If your scope ever does need any repair or adjustment, it should be
returned to ATN’s service department. Optical surfaces will perform their best if they are wiped clean
from time to time with a lens tissue or with optical quality lens paper like those for eyeglasses or camera
lenses. Maintain the metal surfaces of your rifle scope by removing any dirt or sand with a soft brush so
as to avoid scratching the finish. Wipe down the scope with a slightly wet cloth and follow with a dry cloth.
Finally, going over the tube with a silicone treated cloth will restore luster and protect the scope against
corrosion. Be careful not to touch the lenses with the silicone cloth.
Figure 12
Figure 13.
Figure 14
.

