2-21
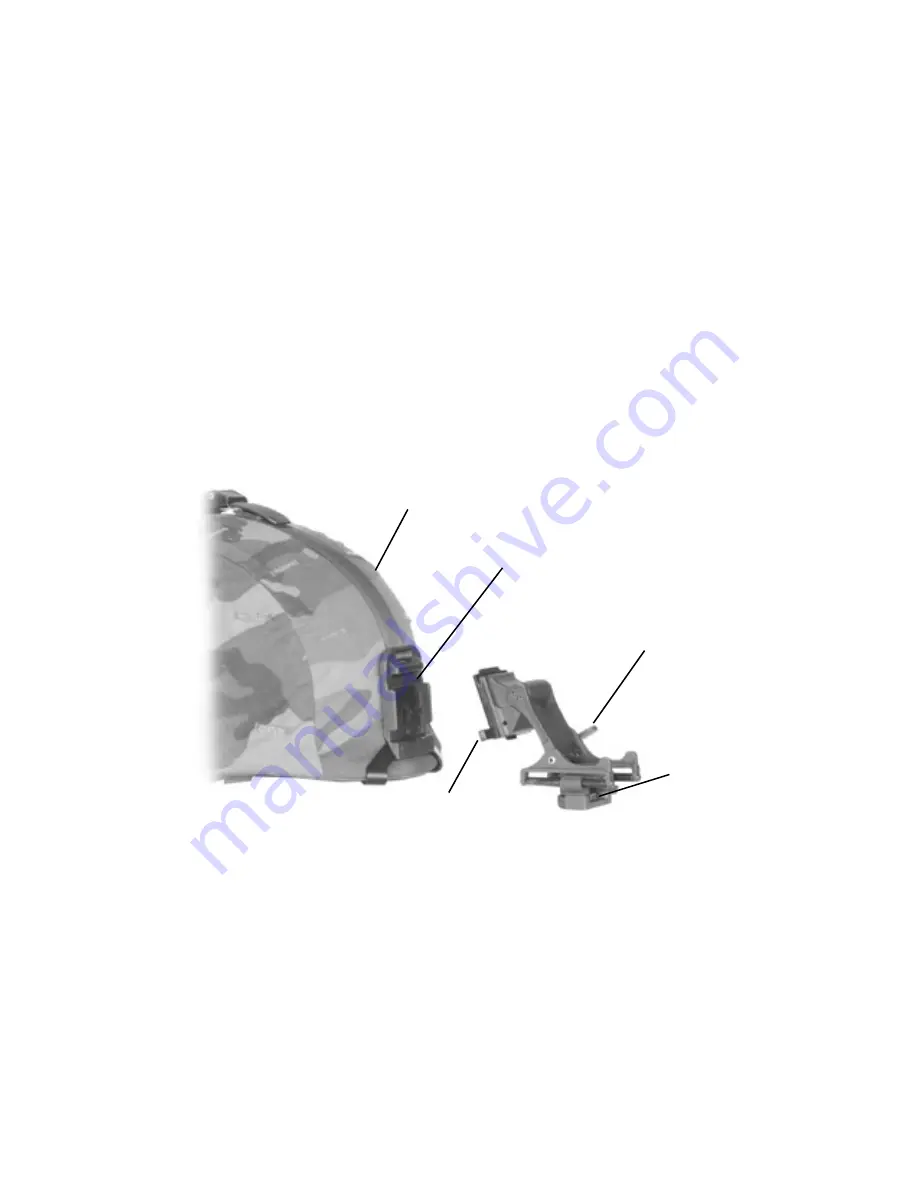
2. If the mount assembly and clip/strap assembly are connected,
remove the mount assembly. to do this, push the release lever at
the top center of the mount and slide the two assemblies apart.
3. adjust the clip/strap assembly to fit the helmet size being used.
4. With the catch in the most extended position, place the strap over
the top of the helmet, center and hook the rear bracket onto the
rear of the helmet. Center the front bracket hook on the front of the
helmet and hold it in place.
5. With the buckle lever open, take up the slack in the clip/strap as-
sembly using the catch. Close the buckle lever.
6. If the paSGt helmet has its cloth cover and camouflage strap
installed, it will be necessary to slide the camouflage strap up (at
about a 30°-45° angle) at the front of the helmet (see Figure 2-10).
Figure 2-10. quick Disconnect Helmet Mount Features
7. Disengage the nape strap latch on the left side of the nape strap.
8. Don the helmet. Do not fasten the helmet chinstrap.
9. engage the nape strap at the nape strap latch. tension the nape
strap for a stable fit, then install and tension the helmet chin-strap.
the brow of the helmet should be parallel to the ground and the
helmet stable on the head.
10. to install the mount assembly into the clip/strap assembly,
place its top flange to the top groove of the mounting clip and then
Socket
Mounting
Clip
Tilt
Adjustment
Helmet
Release Lever
Summary of Contents for PVS-7
Page 8: ...iii ...
Page 9: ...1 1 chapter 1 introduction ...
Page 14: ...1 6 Figure 1 1 PVS 7 Components 1 2 5 4 6 8 9 14 10 11 3 13 12 15 16 18 17 ...
Page 22: ...1 14 ...
Page 23: ...2 1 chapter 2 operating instructions ...
Page 52: ...2 30 8 Return to storage area Figure 2 14 PVS 7 Shipping storage case ...
Page 53: ...3 1 chapter 3 maintenance instructions ...
Page 62: ...INFO 2 For note ...
Page 63: ...INFO 3 16032011 ...


