2
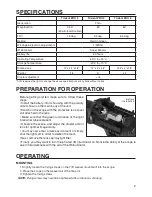
spEcIFIcATIons
pREpARATIon FoR opERATIon
Before getting started make sure to follow these
steps:
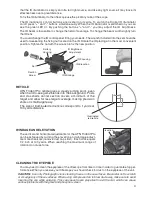
• Install the battery into its housing with the polarity
order shown on the main body of the unit.
• Switch on the scope with the protective lens cover
still attached to the lens.
• Make sure that the green luminance of the light
intensifier tube is present.
• Observe the scene, and adjust the diopter and/or
lens for optimal image clarity.
• You may now enter a dark environment or simply
shut the lights off in order to darken the room.
• Next, remove the lens cap/daylight filter.
• Finally, you may want to turn the infra red (IR) illuminator on. Notice the ability of the scope to
see in total darkness with the aid of the IR illuminator.
opERATIng
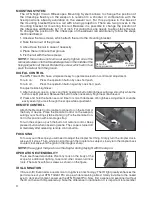
mounTIng
1. Slightly loosen the fixing screws on the 7/8” weaver mount built into the scope.
2. Place the scope on the weaver rail of the fire arm.
3. Tighten the fixing screws.
NOTE:
Fixing screws may need to be tightened after continuous shooting.
Battery
installation
* ATN reserves the right to change the above specifications at any time without notice
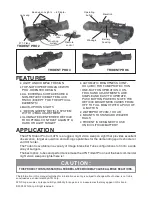
Trident pRo 2
Trident pRo 4
Trident pRo 6
Generation
2nd+
Magnification
2.5X
(5X w/A-focal Doubler)
4X
6X
FOV
18 deg.
9.5 deg.
6.5 deg.
Reticle
Red On Green
Windage & elevation adjustments
1/2MOA
IR illuminator
Super 450mw
Battery life
60 hours
Operating Temperature
-40°C to +50°C
Storage Temperature
-50°C to +70°C
Dimensions
10” x 3.2” x 2.8”
12” x 4” x 2.8”
15.3” x 4” x 2.8”
Weight
2 lb
2.7
4.2
Diopter adjustment
+/-5


