4
C
ONNECTING
:
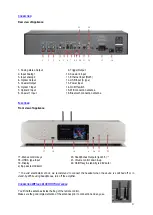
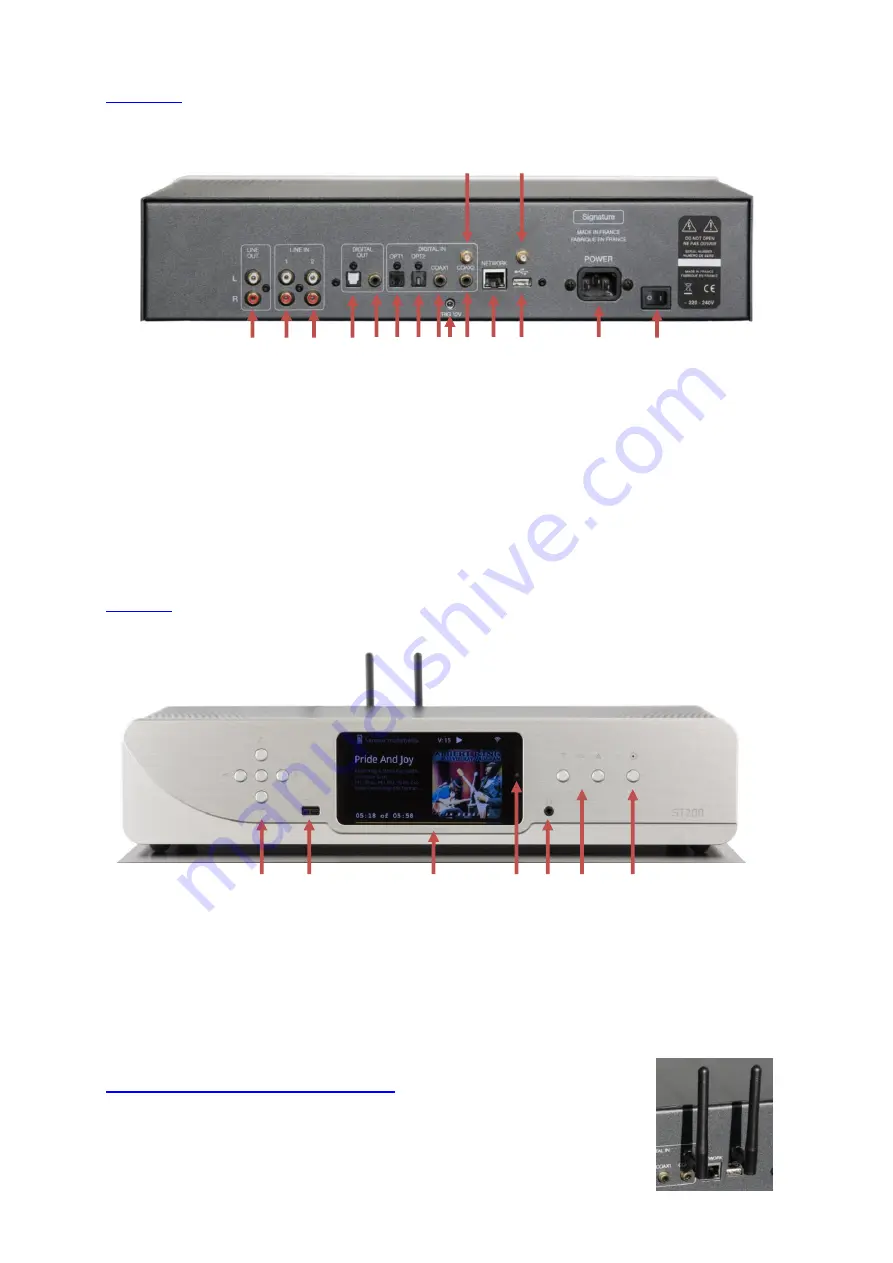
Rear view of Appliance:
1- Analog stereo Output
9- Trigger Output
2- Input Analog 1
10- Coaxial 2 Input
3- Input analog 2
11- Ethernet Input (RJ45)
4- Optical Output
12- USB Input (A type)
5- Coaxial Output
13- Power input
6- Optical 1 Input
14- On/Off switch
7-
Optical 2 Input
15- Wifi connection antenna
8- Coaxial 1 Input
16- Bluetooth connection antenna
F
UNCTIONS
:
Front view of Appliance:
17- Menus control keys
20- Headphones Outputs (jack 3.5)
(1)
18- USB A type Input
21- Volume control down & up
19- Display
22- On/Off key & stand-by led indicator
a) By-pass led indicator
(1)
To avoid electrostatic shock, we recommend to connect the headset when the device is switched off or in
stand-by. While using headphones, turn off the amplifier.
C
ONNECTING
WIFI
AND
BLUETOOTH
A
NTENNAS
:
You’ll find the antennas inside the bag of the remote control.
Make sure the good implementation of the antennas prior to connection and any use.
34
14 15 16
17
18
19
20
21
15 16
1 2 3 4 5 6 7 8 9 10 11 12 13 14
17 18
19
a 20 21 22


