


Step 3.
Align the holes on the blade shank with the motor
holes. Securely fasten the blades with the screws
and washer provided.
HOW TO HANG THE FAN
Step 4.
Insert the screw to assemble the
shaft
and the down rod. Insert
the washer, nut and R-Pin in the
sequence depicted in the illustration
below. Pull down the canopy to
cover the PCB
box.
Spring
washer
R pin
Nut
Hex
screw
Down rod
Canopy
WARNING
• If the blades are not secured properly with the screws and the washer, it may cause injury
during operation. Also, an imbalanced fan may cause damage to the motor and reduce the
lifetime of the fan.
•
Any damage caused by incorrect installation and wrong practices followed while connecting
the fan are not covered under the warranty terms. Please check the warranty terms in detail.
• Do not turn on the fan until the blades are securely fastened to the ceiling fan.
Step 6.
Step 5.
Ceiling
At least 7 feet
At least 1 foot
Floor
USING YOUR CEILING FAN
Congratulations! You have successfully installed your new ceiling fan using the instructions
provided in this guide.
1 Restore the electrical power.
2 Power 'ON' the ceiling fan using the switch on the panel in the room. The LED indicator
flashes ‘ON’ when power supply is restored.
WARNING
•
The fan blade must be hung with at least 1 foot of
clearance from the ceiling for optimal performance and
safety.
•
Any object next to the fan must be at least 2 feet away
from the tip of the fan blade to reduce chances of
risk or injury.
• The fan must be hung with at least 7 feet of clearance
from the floor to the blades.
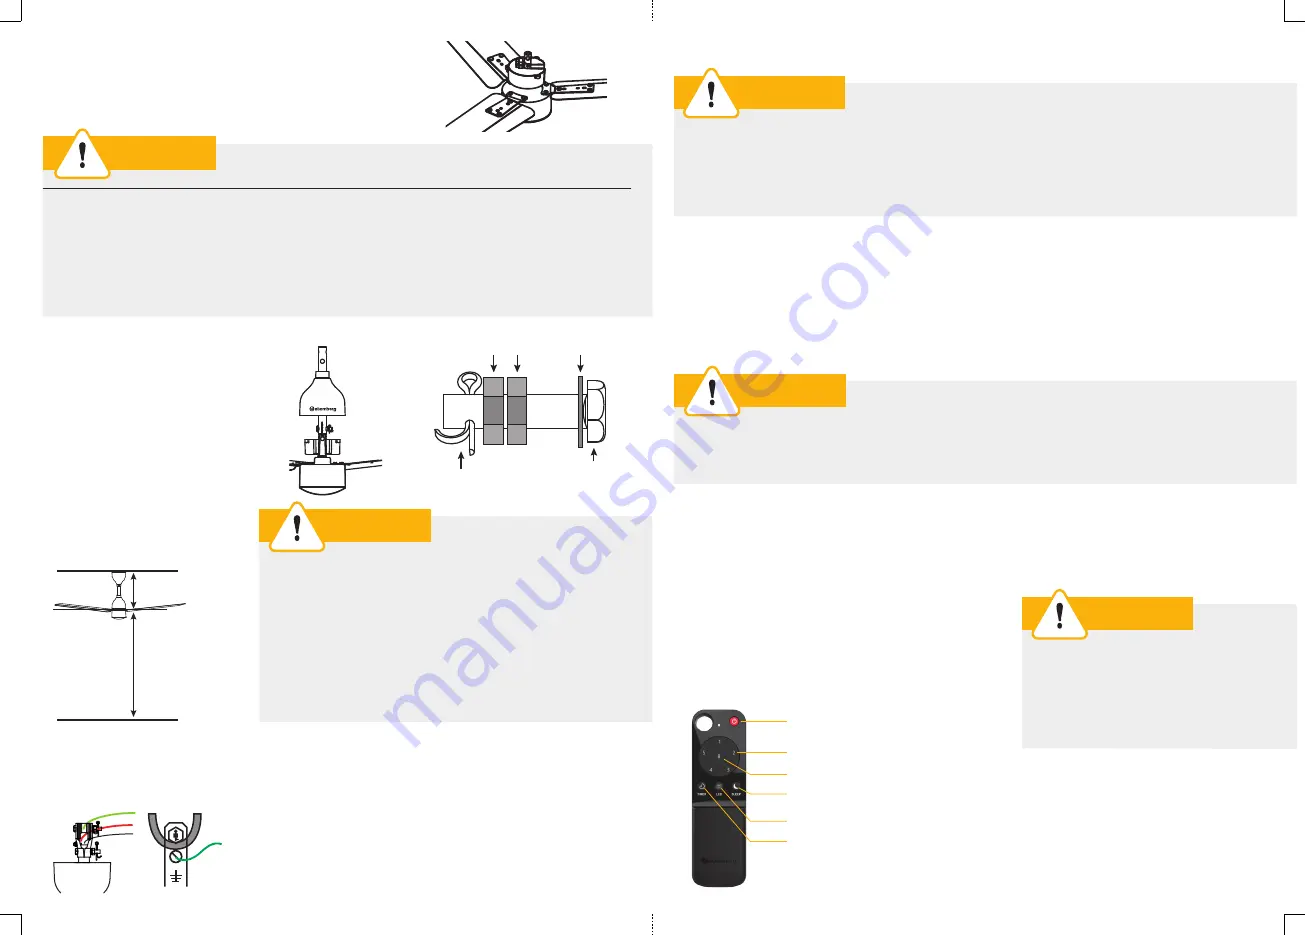
HOW TO USE YOUR REMOTE
Longlasting AAA batteries are used in the remote
The remote provided along with your
ceiling fan is ergonomically designed.
The soft controls on the remote are
longlasting.
SPEED
CONTROL
BOOST
MODE
TIMER
MODE
SLEEP
MODE
LED
CONTROL
ON/OFF
CONTROL
WARNING
DO NOT use the fan regulator as
the fan is operated using a remote.
Eliminate the regulator by using a
direct connection from the switch
to the fan.
SLEEP mode adds smart comfort, as
the temperature drops over the night
and if you wish to auto-reduce the
speed.
With TIMER mode, you can switch
off the fan automatically after set
hours to further save energy.
WARNING
• Any connection to wires must be securely sealed using electrical insulation tape to prevent
electric shocks or fire hazard.
• Avoid pinching of wires between the shackle kit, down rod and ceiling hook assembly to
prevent electric shocks or fire hazard.
3 Use your remote to operate the ceiling fan.
4 If you are leaving the room or facility for a long duration or a holiday, then power 'OFF'
the ceiling fan using the switch on the panel.
WARNING
The performance of the fan gets affected if the regulator is not bypassed, and may lead to
speed variations, restarting or low speed. Eliminate regulators by using a direct connection
from the switch to the fan.
ELECTRICAL WIRING INSTRUCTIONS
Make the correct wire connections to operationalise the
fan. Adjust the canopy as required.
Color codes of the wires may vary from region to region.
Please check your state or country notifications regarding
the same.
Not recommended for use in high humid areas like washroom,
direct or indirect exposure to water entries etc.


