background image

14

April 2008

e-motion™ Installation

TECHNICAL DATA

Electrical Specifications

Required Voltage:

100V to 240V AC
50Hz / 60Hz

The mains power cable must be pluged into a earthed
power outlet labled 8 Amps.

Power Consumption

Idle Mode:

approx. 200W
1.8 A / 115V,  0.9 A / 230V

Payout Mode:

approx. 300W
2.6 A / 115V,  1.3 A / 230V

Power Supply
Secondary Voltage

:

+ 24V / 4A
+ 12V / 12A
 - 12V / 0.3A
+ 5V / 11A
+ 3.3V / 7A

Fuses

Power Supply:

T 8A / 250V

Filterboard F2:   +12V

T 6.3A / 250V (UL fuse)

Filterboard F3:   +24V

T 4A / 250V (UL fuse)

Lamps

Fluorescent Lamp

TL8W/33
300mm, 410 lumen,
4100K (cool white)

Button Lighting

LED 12V

Environmental specifications

Operating Temperature:

0°C - 45°C  (32°F - 113°F)

Operating Humidity:

0% - 85% (non condensing)

(same limits for storage)

Primary Voltage
(The power supply features
voltage autoswitching)

Secondary Voltage

Primary Fuses

Secondary Fuse

Lamps

Suggested Limits

T

ECHNICAL

 D

ATA

Summary of Contents for e-motion

Page 1: ...www atronic com Rev 2 2 June 2008 Atronic e motion Installation Manual ...

Page 2: ... in any form or by any means electronic mechanical magnetic manual or otherwise or disclosed to third parties without the express written permission obtained from a properly authorized official of Atronic DISCLAIMER Atronic makes no representation or warranties express or implied with respect to this publication or any product of Atronic including but not limited to warranties of merchantability o...

Page 3: ...hine Components Dimensions Technical Data Machine Installation Overview Machine Mounting Drilling Template Replace Shipping Locks Prepare Coin Acceptor Prepare Hopper Check Connectors Check Commboard Settings Apply Power Switch On Basic Setup Overview only Tests Technical Support Telephone Numbers 4 5 7 10 13 14 16 17 18 19 20 20 20 20 21 21 22 23 24 CONTENT ...

Page 4: ...d technical personnel who are involved in installation setup and configuration of Atronic gaming machines With this user group we assume that they are basically familiar with gaming machines and casino related terminology Please read this document and the contained safety notes carefully before you start machine installation Included Software Releases The installation procedures described in this ...

Page 5: ...anual EMC HI Operating C5 x x x STD Spare Parts Manual EMC Parts Catalogue Linked Gaming Products Manual product Setup and Configuaration for a particular linked gaming product such as CASH FEVER King Kong Cash The Game of Life Mystery Magic Hot Link etc Peripherals Coin and bill acceptors hopper printer etc See folder Peripherals on the Atronic Service Manual CD Note All mentioned manuals can be ...

Page 6: ...6 April 2008 e motion Installation blank page ...

Page 7: ...om the main power socket so that the machine is free from electrical current The power switch is intended for service purposes only Caution Tipping Hazard The machine must be fastened to an appropriate base to prevent tipping over Use the Atronic Installation Station AIS for machine mounting see also page 17 18 Caution Moving Parts Make sure to disconnect the hopper when working on it Caution The ...

Page 8: ... pla te on the appropriate side of the cabinet Edge protection must be mounted once the knock out plate has been removed Only qualified service personnel should perform repairs Electronic assemblies should only be changed with the power switched off Use only original Atronic parts for replacement Atronic commboard and mainboard Danger of explosion if battery is incorrectly repla ced Check for corr...

Page 9: ...9 April 2008 e motion Installation blank page ...

Page 10: ... Coin Entry Coin Decal Functional Button Panel Mechanical Meters Main Door Lock Jackpot Key Switch Audit Key Switch Hopper Drawer Lock Bill Entry Bill Acceptor Name Plate Atronic Installation Station AIS Baseplate for mounting Speakers Framelights Upper Display Main Display Playfield Height Adjustment Button Panel Hopper Drawer Coin Bowl Bill Decal ...

Page 11: ...tton Multimedia Board Cover Maindoor Switch Coin Unit Assembly Coin Acceptor Coin Optics Bill Acceptor Front Bezel Cashbox Bill Acceptor Filterboard Signal Filterboard Power Top Glass Release Lever Power Switch auxiliary AC Output Power Supply Door Motor Decal Lighting Button Panel Release Lever MACHINE COMPONENTS ...

Page 12: ...ion Installation MACHINE COMPONENTS Logic Box MACHINE COMPONENTS Logicbox Switch Backplane Commboard Mainboard DVD ROM Drive Graphic Card VP11 Release Lever for Multimediaboard Cover Multimediaboard Multimediaboard Cover ...

Page 13: ...DIMENSIONS adjustable 1230 mm 1350 mm 48 4 53 2 1055 mm 41 5 1643 mm 64 7 575 mm 590 mm 22 6 23 2 550 mm 21 7 610 mm 24 420 mm 540 mm 16 5 21 3 e motion Cabinet with Topper Weight approx 129 Kg 284 lbs Overall dimensions closed cabinet Height 1643 mm 64 7 Width 610 mm 24 Depth max 590 mm 23 2 DIMENSIONS adjustable 1230 1350 575 590 550 685 mm 905 575 opened closed 610 1055 135 ...

Page 14: ...dary Voltage 24V 4A 12V 12A 12V 0 3A 5V 11A 3 3V 7A Fuses Power Supply T 8A 250V Filterboard F2 12V T 6 3A 250V UL fuse Filterboard F3 24V T 4A 250V UL fuse Lamps Fluorescent Lamp TL8W 33 300mm 410 lumen 4100K cool white Button Lighting LED 12V Environmental specifications Operating Temperature 0 C 45 C 32 F 113 F Operating Humidity 0 85 non condensing same limits for storage Primary Voltage The p...

Page 15: ...15 April 2008 e motion Installation blank page ...

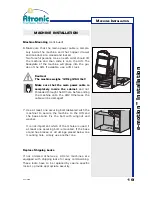
Page 16: ...pare the machine bases by drilling the mounting holes Use the Atronic drilling template for proper mounting hole placement Place and mount the machine to the base using the Atronic Installation Station AIS The power cable must be inside the cabinet Replace shipping locks with casino specific locks Install and connect accounting system components Check that all internal and external connections are...

Page 17: ... on the next page 2 Drill four holes 10mm 3 8 for the AIS mounting drillings a and one out of three holes 10mm 3 8 for the machine securing bolt drillings d into the base It is not important which of the 3 holes for the securing bolt is used if at least one securing bolt is mounted If the base stand has braces or struttings placed below one mounting hole simply use another one 3 Drill or cut out o...

Page 18: ... 541 Baseplate AIS Cabinet Footprint 550 Ø 10mm Ø 10mm drill 1 out of 3 for securing bolt Backside DRILLING TEMPLATE Make sure to leave min 180mm 7 1 distance to the next machine or a wall on both sides of the cabinet Do not cover the ventilation slots at the backside of the cabinet MACHINE INSTALLATION ...

Page 19: ... inside the cabinet and not threaded through the AC hole before sliding the machine onto the AIS Otherwise the cable will be damaged 7 Use at least one securing bolt delivered with the machine to secure the machine to the AIS and the base stand Fix the bolt with wingnut and washer It is not important which of the 3 holes is used if at least one securing bolt is mounted If the base stand has braces...

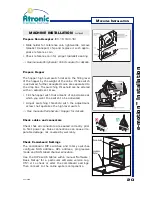
Page 20: ...djustment srew Fill the hopper with that amount of coins tokens at which you want the switch to be activated Adjust switching threshold with the adjustment screw that operates the high level switch See manuals Peripherals Hopper for details Check cables and connectors Check that all connectors are seated correctly prior to first power up False connections can cause irre parable damage not covered ...

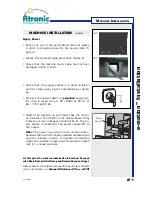
Page 21: ...0 Hz Switch the machine on and check that the machi ne initializes The LED s on the masterboard they indicate correct voltages should all be lit The po wer switch is located at the power supply left to the hopper Note The power up cycle will take some minutes because the machine checks installed hardware and security relevant circuits To operate the machine while the maindoor is open pull the main...

Page 22: ...Clear This will clear all machine data statistics and set tings including progressive jackpot configuration 3 Carry out the Initial Setup After a RAM Reset the machine automatically en ters the Initial Setup menu The Initial Setup al lows to configure all basic machine setting 4 Carry out Progressive Jackpot Configuration A PC or notebook with Atronic s Alink Config soft ware is connected to the g...

Page 23: ...Handling Optics Test Check coin diverter Coin Handling Coin Diverter Test bill validator acceptance Bill Validator Validator Test without Stacking Test hopper payout and switching times Hopper Hopper 1 Note Please refer to the document Manual HI Soft ware version relevant for a particular software version e g C5 1 x x for detailed information Note Make sure to have stacker lock keys and the cashbo...

Page 24: ... of the numbers below Technical Support Locations Atronic Germany International Headquarter 49 5741 273 720 Atronic Peru 51 225 6501 Atronic United Kingdom 44 1727 855 966 Atronic Russia 7 495 7377 299 If technical assistance is required outside of normal business hours please contact one of the Atronic Technical Hotline numbers below Atronic Technical Hotline numbers For technical assistance in E...

Reviews: