background image

4

Safety warnings

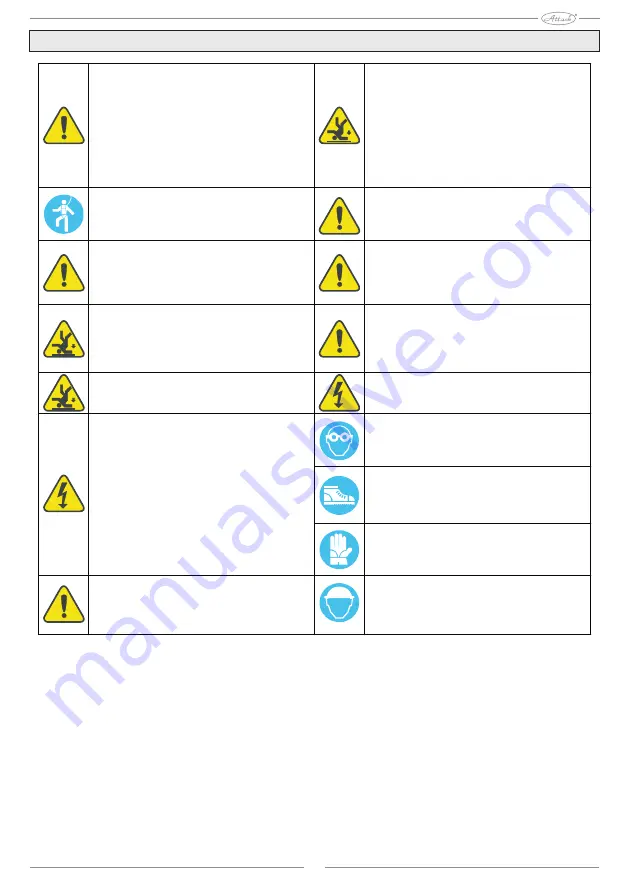
In the case of mounting on the roof - before the work – 
it is essential to install compliant independent 
protection against falling or catching device according 
to DIN 18338 on roofing work on the roof and sealing 
work on roofs and in accordance with DIN 18451 for 
work on scaffolding safety net! Regulation on the 
protection of workers in construction BGBl 340/1994 § 
7-10! It is absolutely necessary to keep  other 
regulations in the country!

Safety harness must be preferably nailed above the 
user. Fix safety harness only to eventually building 
components or points that have sufficient capacity! 
Only prescribed heat transfer medium!

If there are no safeguards against falling or catching 
device-independent entities due to the  technical 
reasons,  it is necessary to use a safety harness!

Do not use damaged ladders, for example cracked 
beams with a wooden ladder rungs, bent and broken 
metal ladders. Do not repair brittle beams, side walls 
and walls of wooden ladders!

Use only safety harnesses, which are identified and 
tested by authorized testing laboratory (safety or 
webbing, connecting cords / belts, shock absorbers, 
shortening ropes).

Place the strap-on ladders safely. Be careful when 
attaching the right angle (68 ° - 75 °). Strap ladders 
are secured against slipping, overturning, sliding and 
running, for example advanced bases, bases ladder 
adapted substrate hinges.

If there are no protection devices against falling or 
catching independent on people, without the use of 
safety harnesses there is danger of falling from great 
heights and thus of  severe or fatal injuries!

Ladders rest only to the secure anchors. In the field of 
transport ensure ladders by closures.

When using ladders,  there is danger of falls caused 
by  slipping, fall or flip over the ladder!

Contact with  loose electrical lines can be fatal.

In the case of drilling and handling collectors wear 
goggles!

During installation, wear safety boots!

When mounting and handling collectors,  wear gloves 
providing protection against cuts!

The manufacturer hereby undertakes to take back 
products marked with the ecological brand and 
materials they contain, to deliver for further 
processing. Only prescribed heat transfer medium can 
be used!

During installation, wear a helmet!

Near unattached electrical lines, with which contact is 
possible, work only if state was secured when  they 
are not under voltage and this condition is ensured 
during the entire period of work, electrically conductive 
parts are protected by fencing or covering them, and 
there is no reduction of safety distance.                                                    
Radius of voltage                                                                                                 
1 m ...........................1000 V voltage                                                                       
2 m ...........................voltage from 1000 to 11000 V                                    
3 m ...........................voltage from 11000 to 22000 V                                  
4 m ...........................voltage from  22000 to  38000 V                         
> 5 m in the case of  unknown voltage

Summary of Contents for SOLARTHERM HSA 200

Page 1: ...SOLAR TECHNIQUE ATTACK SOLARTHERM HSA 200 W W W A T T A C K S K PARALLEL MOUNTING BRACKETS ON THE ROOF...

Page 2: ...4 Shipping instructions 5 Installation instructions 6 Tools Overview 7 Material Overview 8 Recommended mounting points 10 Parallel mounting brackets on the roof 11 Specifications 17 Recommendations f...

Page 3: ...gainst slipping overturning sliding and running for example advanced bases bases ladder adapted substrate hinges If there are no protection devices against falling or catching independent on people wi...

Page 4: ...5 Shipping instructions Do not lift the collector for the connector or a threaded screw connections Attention...

Page 5: ...llation of a solar collector field represents interference in the existing roof Roofing such as tiles shingles and slate especially furnished and habitable attic or roofs with insufficient slope with...

Page 6: ...7 Tools Overview Hexagonal wrench Drill Allen handpiece Angle Grinder Measuring tape Hammer Ratchet with extension...

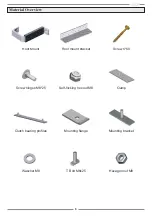
Page 7: ...aterial Overview Roof Mount Roof mount bracket Screw 6 60 Clamp Self locking hex nut M8 Screw hinges M8 25 Clutch bearing profiles Mounting flange Mounting bracket Hexagon nut M8 T Bolt M8x25 Wascher...

Page 8: ...9 Carrier rail Mounting template Gasket...

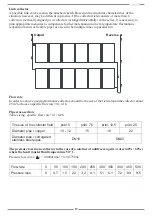
Page 9: ...ctors Total length Mounting points 2 3 4 5 6 239 cm 361 cm 482 cm 603 cm 724 cm 6 8 10 12 14 In areas with large snowfall or high wind areas it is necessary to schedule additional fasteners DIN 1055 f...

Page 10: ...The vertical dimension of the collector A 125 155 cm 2 Focus attachment points see recommendation from previous page remove the slate roofing Generally for one collector is needed one Fasteners 3 Conn...

Page 11: ...em first hand only Order screw with a flat head roof mount washer nut 6 Install the lower bearing rail 6a 6b Order Bearing rail screw with a flat head roof mount washer nut 7 Install the upper bearing...

Page 12: ...tional mounting points under 1 4 9 Push and pull terminal extension until the middle of the inner matrix of the bearing rails top and bottom Order Bearing rail terminal extension washer nut 10 Put ano...

Page 13: ...rs or terminal extension Order Bearing rail screw with a flat head roof mount washer nut 12 Hang the first collector to the lower bearing rail and straighten it 12a 12b The distance between the collec...

Page 14: ...hten them first hand only Order Top bearing rail screw with a flat head washer clamp washer nut 14 Hang the second collector Dimension A dimension B in FIG 12b Please use the mounting template 14b 15...

Page 15: ...ng into the upper bearing rail 17 Install additional terminal other collectors according to point 12 16 18 Replace the fixing unit to the left and right upper end of the collector box Order Bearing ra...

Page 16: ...17 1221 83 117 70 1730 1170 Specifications Gross area Net area Surface hole Weight Capacity Maximum operating pressure m2 m2 m2 2 02 1 84 1 91 kg l bar 31 1 4 10...

Page 17: ...the outlet collector box located next to the sensor housing In order to ensure optimal contact the gap between the housing and a sensor with adequate heat conductive paste When installing the sensor m...

Page 18: ...l run Output Reverse Flowrate In order to achieve good performance collector should be the size of the field around the collector about 25m tochooseaspecificflow rate30 l m h Pipecross section Table s...

Page 19: ...ly instructions supplied with collectors Photographs of symbols are used as pictograms They are based on the potential rate of error in a press but also due to the need of constant technological chang...

Page 20: ...j ceho upozornenia ATTACK s r o producerreservestherighttochangetechnicalparametersanddimensions of boilers without previous warning Der Hersteller ATTACK s r o beh lt sich das Recht der technischen V...

Reviews: