CHAPTER 10: DEMOD & MUX SETTINGS TAB
DigiVu
®
Series Multichannel MPEG-2/H.264 Encoder/Multiplexer with QAM &/or IP Output - Installation & Operation Manual
10-3
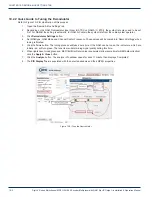
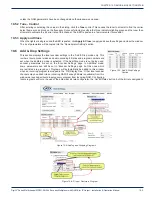
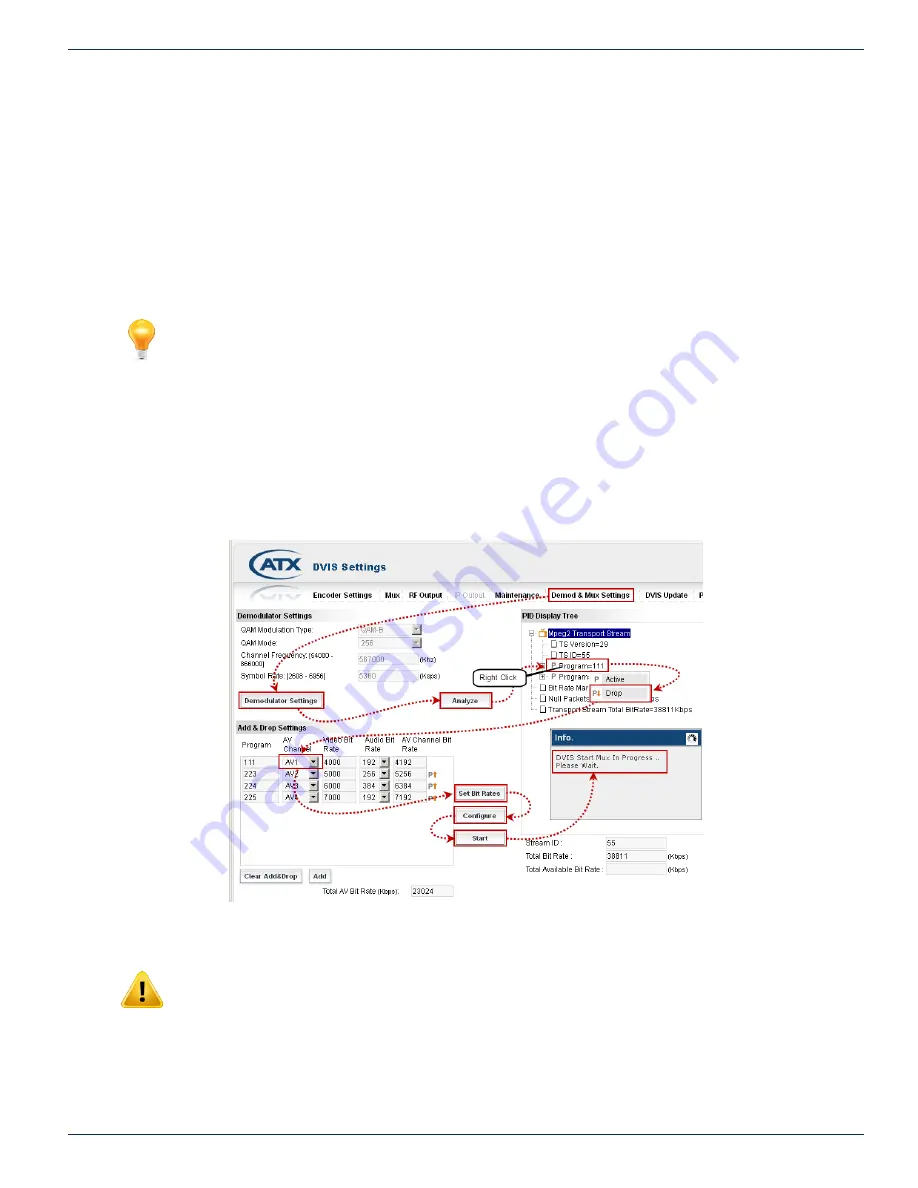
10.2.3 Quick Guide to Drop and Add a Program
Refer to Figure 10-3 for clarification of this procedure.
1. Left click the program to be dropped in the ‘PID Display Tree’ in order to highlight it
2. Right click that program and a drop down menu appears (Active, Drop).
3. Click
Drop.
A replacement program is populated in the Add & Drop Settings window area with same program number
as the dropped program, The dropped program is greyed out.
4. In the ‘Add & Drop Settings’ section select the ‘AV Channel’ (the DigiVu encoder port that is physically connected to
local baseband source) to be inserted; AV1 or AV2 etc. (Initially the drop downs for ‘AV Channel’ will show ‘None’).
5. Click
Set Bit Rates.
DigiVu will analyze the incoming stream and attempt to assign the highest bit rate to each added
AV Channel that the available space will allow.
FYI:
The bitrate computed in step
will be assigned to each program in ‘AV Channel Bit Rate’
column. Since the algorithm is assigning all available bitrate headroom, it might happen that these
values are extremely high and need adjustment downward. To do so, click into the field with
assigned ‘Video Bit Rate’ and enter an appropriate bitrate number (this number depends on several
factor). Do this for all available ‘AV Channels’.
6. The assigned bitrate for each encoder may be adjusted downward if necessary.
7. Select “Audio Bit Rate” for every available AV Channel. The recommended setting is 192 kbps.
8. Click
Configure
button. The settings are saved to the DigiVu configuration.
9. Click
Start
button. This starts the multiplexer add/drop process.
NOTE:
Clickin
g ‘Start’ is
a service affecting operation
Figure 10-3:
Add or Drop a Program

