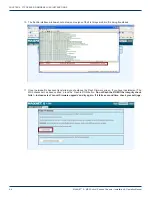
If the chassis is still not visible, it is possible the IP address of the chassis has been forgotten (see Factory Reset section),
the network connection is not good (see Ethernet Port section for LED diagnostics) or a network port is blocked or firewalled
(check with your IT department).
7.2.4. Some Modules Do Not Show Up On Web Page
If the chassis is visible on the web or through SNMP walks, but one or more installed modules is not, try removing and
replacing the module in a different slot. Verify that the green power LED is solid and the red LED is either off or blinking quickly
(approx half second on, half second off). If the LED’s are not as stated, see the appropriate troubleshooting section.
7.2.5. Module Power LED Off or Intermittent
Check the ‘24V’ green LED on the rear of the chassis. If it is off, then the problem is that the chassis is not getting power.
See MPAC/MPDC troubleshooting section. If it is on or if other modules in the chassis are okay, the module itself is suspect.
Continue.
Remove the suspect module and trade slot positions with another functioning module.
a) If the suspect module is okay and the previously good module fails, contact ATX and report a defective chassis.
b) If the suspect module fails and the previously good module is okay, contact ATX and report that the suspect
module is defective.
7.2.6. MPAC/MPDC Not Powering Chassis
*Note that 220 VAC applied to an MPAC-110 will damage the module, but 110 VAC applied to an MPAC-220 will simply not
turn on.
a) Check the fuse continuity on the MPAC or MPDC module
b) Verify that the 110 VAC / 220 VAC electrical outlet is active using a voltmeter and checking the circuit breaker. (In
the case of the MPDC insure that there is -48 VDC on the rear terminal block)
c) Verify that IEC power cord is properly inserted into the receptacle on the rear of the module and properly
connected to a 110 VAC / 220 VAC electrical outlet.
CHAPTER 7: MAINTENANCE & TROUBLESHOOTING
7-2
MAXNET
®
II – MP3 Active / Passive Chassis – Installation & Operation Manual
This page left intentionally blank.
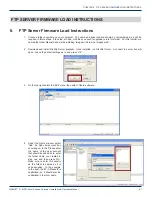
Each MAXNET II chassis ships with a default IP of 192.168.0.1,
so the PC connected to it must have an IP address of
192.168.0.x where x is not equal to 1. This is not generally the
case, so it must be forced.
To modify the PC’s IP in Windows, choose Start -> Settings ->
Network Connections -> Local Area Connection -> Properties
-> Internet Protocol (TCP/IP).
If the chassis IP is no longer at the default IP, modify the subnet
portions of these settings (IP address and Default Gateway) to
match.

