13
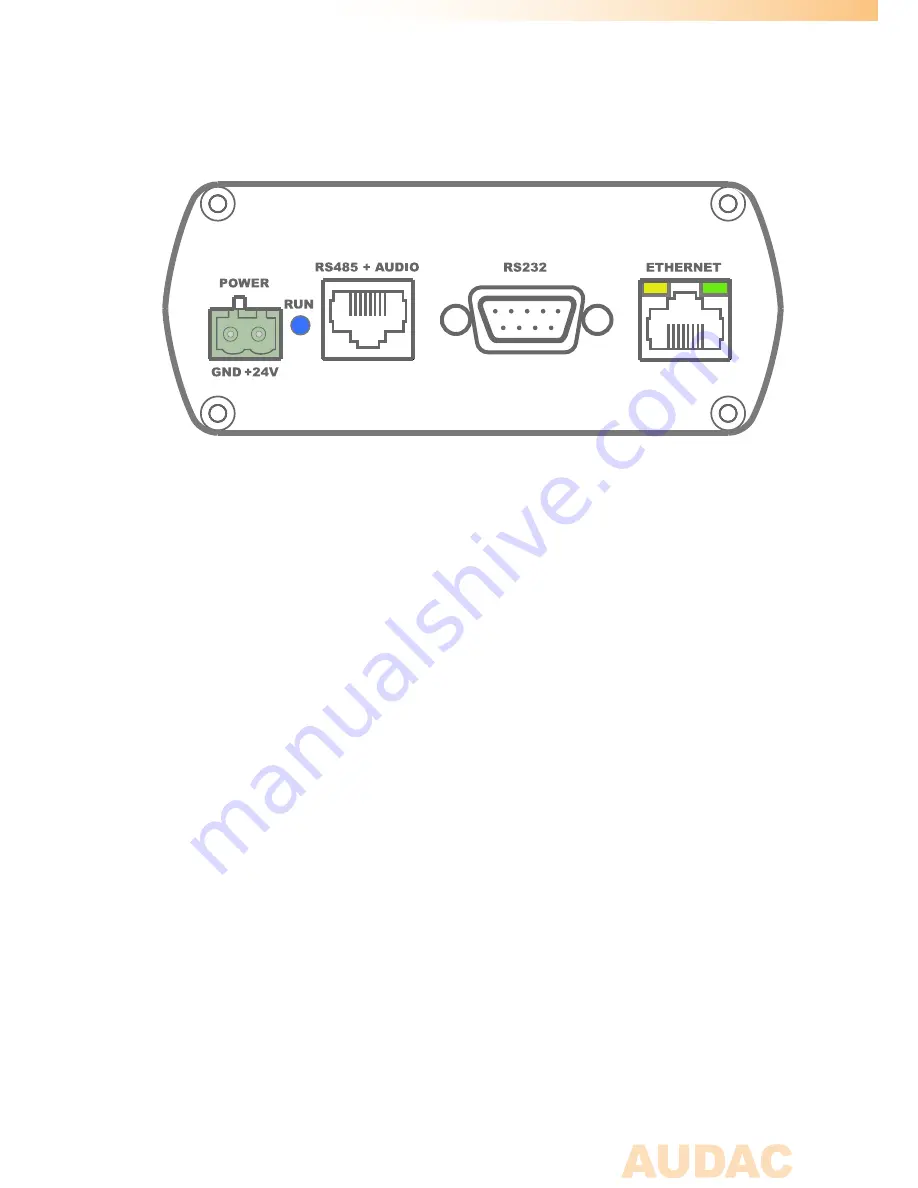
Rear panel
AMP523 and RM523 have the same rear panel
All the control and configuration ports are located on the rear panel of the AMP523 and
RM523, together with the 24 Volts power connection.
1) 24 Volts power connector:
The included 24 volts power supply (PSD241) should be connected to this connector.
Pay attention to the polarity when connecting the power supply.
2) Run LED:
This LED shows the operation mode of the device. When the device is running in
normal mode, this LED will blink at a constant frequency.
3) RS485 + Audio RJ45 connector:
An additional Wall Panel Controller (MWX43/45) and Wall Line or Wall Microphone
input (WMI and WLI units) can be connected to this input. This way, the volume and
the signal routing can be adjusted by means of a wall panel and additional local Line
and Microphone inputs can be connected.
4) RS232 control port:
With this connector, the AMP523/RM523 can be connected to external control
hardware using RS232. This makes it possible to control the AMP523/RM523 by
means of an home automation system.
5) Ethernet connection:
The AMP523/RM523 can be connected to an Ethernet network with this RJ45
connector. This makes it possible to control the AMP523 functions over ethernet, by
simply using any device with a web browser such as computer, smartphone, ...
Summary of Contents for AMP523
Page 1: ...AMP523 RM523 User Manual www audac eu ...
Page 2: ...2 ...
Page 4: ...4 ...
Page 8: ...8 ...
Page 14: ...14 Block Diagram ...


