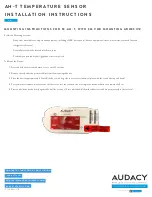
Audacy sensors communicate wirelessly and are powered by a 25-year maintenance-free battery and therefore no wiring is required.
M O U N T I N G I N S T R U C T I O N S F O R 5 9 - A H - T W I T H C R A D L E
M A K E S U R E T O A C T I V A T E P R I O R T O M O U N T I N G - I F N O T A C T I V A T E D P R I O R T O P E R M A N E N T
M O U N T I N G , D E V I C E W I L L N O T B E A B L E T O B E A C T I V A T E D .
Preferred Mounting Location:
•
Away from metal fixtures, objects and equipment; including HVAC ducts (vents), kitchen equipment (stoves, microwaves, overhead fans and
refrigerators/freezers)
•
Centrally located in the desired installation space
•
Preferably on painted drywall (gypsum) or masonry block
1. Mount the cradle in the desired location via screws, ceiling tile wire or double-sided tape.
2. Insert the sensor into the cradle.
•
If desired, the sensor can be more securely fastened to the cradle by aligning the holes on the sensor and cradle and inserting the screw provided through the
cradle and into the sensor.
A H - T T E M P E R A T U R E S E N S O R
I N S T A L L A T I O N I N S T R U C T I O N S
A H - T
1. THE SENSOR MUST BE ACTIVATED BY PRESSING A SMALL BUTTON UNDERNEATH THE LABEL ON THE BACK SIDE OF THE SENSOR.
THE LABEL MAY BE COVERING THE BUTTON.
•
This can be accomplished by using a small/precision screwdriver, the screw that is included with the sensor, or similar object to push through the label and depress the
switch.
2. Remove one of the labels with the unique serial number and attach it to the Device Tracking Form included in the Appendix of the User Manual or as built to
record the location of each device.
•
If the tear away labels are missing, please write down the serial number of the device in a safe place.
•
These serial numbers are required in order to have a complete Audacy operating system.


