

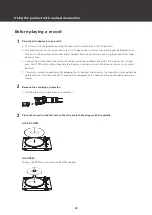


25
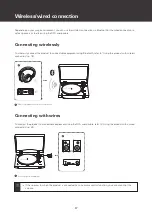
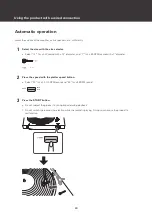
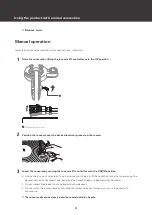
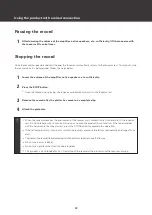
Using the product with a wired connection
According to the settings for the pre-amplifier selector switch, connect the RCA audio cable to an input jack on the
connectable equipment you are using (amplifier, receiver, active speakers, sound card, etc.).
Setting pre-amplifier selector switch
This product has a built-in phono equalizer function. Even if you do not have a phono amplifier or any other
connectable equipment with a built-in phono amplifier, you can use this product by connecting it to active speakers.
Use the pre-amplifier selector switch to set the output as shown below.
When connecting the product to a Bluetooth device, set the pre-amplifier selector switch to LINE.
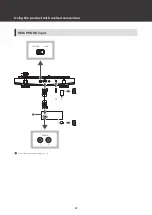
Device with phono input
Position of pre-amplifier selector
switch
Where to connect the RCA audio cable
PHONO
Phono input jack and ground (earth) terminal of connectable equipment
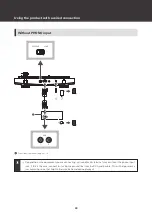
Device without phono input
Position of pre-amplifier selector
switch
Where to connect the RCA audio cable
LINE
AUX or line input jack of connectable equipment
PC sound card
Position of pre-amplifier selector
switch
Where to connect the RCA audio cable
LINE
Sound card’s line input jack
[1]
[1] An audio adapter (sold separately) may be required to connect the RCA audio cable to the PC sound card’s line input jack.
Connecting to the active speaker (with the built-in amplifier)
To connect this product directly to speakers, use active speakers.
Some active speakers can only be connected with a conversion cable.


