background image


|


P a g e


6.


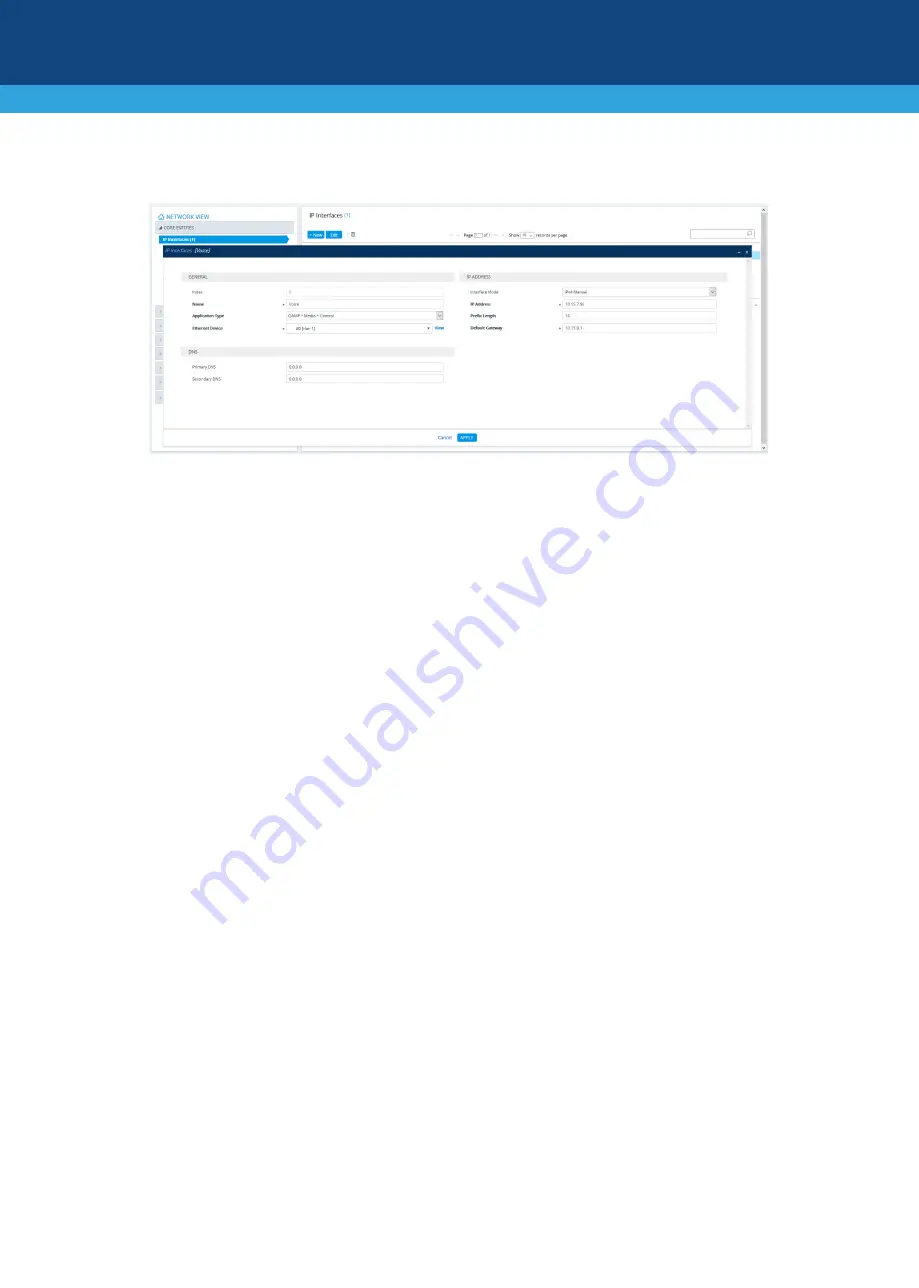
Select the OAMP interface ('Application Type' with 

OAMP + Media + Control

), click 

Edit

, and then in 

the dialog box, modify the device's OAMP interface. 


7.


Click 

Apply 

to submit your changes; your connection with the device becomes unavailable at the 

default IP address (due to the new IP address). 

8.


Change the IP settings of your computer to correspond with the new OAMP IP addresses and subnet of 

the device. 

9.


Access the device again, but at its new IP address, and then on the Web interface's toolbar, click the 

Save 

button; the new IP address is now saved to the device's flash memory. 

10.


Re-cable the device to the required network. You can now access the device's management interfaces 

remotely, using the new IP address. 

Summary of Contents for Mediant 4000B

Page 1: ...read the Safety Precautions on page 9 Package Contents Make sure that the following items in addition to any separate orderable item that you may have purchased are included with your shipped device 4 x anti slide rubber feet for desktop mounting Adjustable rear mounting brackets for 19 inch rack mounting 2 x front mounting brackets with six screws for 19 inch rack mounting 1 x serial interface ca...

Page 2: ...shows unused chassis slots covered by slot covers The two slots can house an optional Media Processing Module MPM that provides additional digital signaling resources DSP for transcoding sessions The MPM module occupies two slots Note The MPM is a separate orderable item 3 Slots 3 and 4 SBC CPU AMC module occupying two chassis slots The module provides the following Central processing unit CPU RS ...

Page 3: ...e the OSN4 module is housed in Slot 5 and the HDMX module in Slot 6 The OSN platform can be used to host third party applications e g IP PBX Note The MPM and OSN modules are separate orderable items 5 Slots 7 and 8 Figure shows unused chassis slots covered by slot covers The slots can house one of the following optional modules MPM module only if MPM modules are also housed in slots 1 and 2 and 5 ...

Page 4: ...must always be earthed grounded Connect an electrically earthed strap of 16 AWG wire minimum to the chassis grounding lug screw located on the rear panel and then connect the other end of the strap to protective earthing Connecting to an AC power source 1 Insert the female socket on one end of the power cord supplied into the AC inlet of one of the Power Supply modules located on the rear panel 2 ...

Page 5: ...e correct polarity black wire negative red wire positive 2 Plug the DC power feed cable crimped to the terminal block into the DC inlet of one of the Power Supply modules located on the rear panel Make sure that the hook on the terminal block snaps into the groove above the inlet 3 Repeat the above steps for the second Power Supply module but connect it to a different DC power source ...

Page 6: ...ernet port GE 1 or GE 2 located on the SBC module on the device s front panel to your computer s LAN port 2 Change the IP settings of your computer to correspond with the device s default IP address and subnet mask 3 On your computer open a standard Web browser for example Google Chrome and then in the URL field enter the device s default IP address the Web Login screen appears 4 Type in the defau...

Page 7: ...IP address due to the new IP address 8 Change the IP settings of your computer to correspond with the new OAMP IP addresses and subnet of the device 9 Access the device again but at its new IP address and then on the Web interface s toolbar click the Save button the new IP address is now saved to the device s flash memory 10 Re cable the device to the required network You can now access the device...

Page 8: ...he device such as the User s Manual and Hardware Manual from AudioCodes website at https www audiocodes com library technical documents productFamilyGroup 1637 productGroup 1645 Customer Support Customer technical support and services are provided by AudioCodes or by an authorized AudioCodes Service Partner For more information on how to buy technical support for AudioCodes products and for contac...

Page 9: ... chassis where the air vents are located must remain unobstructed to ensure adequate airflow and prevent overheating of the chassis components Do not operate the device without the two Fan Tray modules Only modules supplied and approved by AudioCodes may be installed in the chassis slots The device must be installed only in telecommunication sites in compliance with ETS 300 253 requirements Earthi...

Page 10: ...7019900 Israel Tel 972 3 976 4000 Fax 972 3 976 4040 AudioCodes Inc 200 Cottontail Lane Suite A101E Somerset NJ 08873 Tel 1 732 469 0880 Fax 1 732 469 2298 Contact us https www audiocodes com corporate offices worldwide Website https www audiocodes com 2019 AudioCodes Ltd All rights reserved AudioCodes AC HD VoIP HD VoIP Sounds Better IPmedia Mediant MediaPack What s Inside Matters OSN SmartTAP Us...

Reviews: