background image

DSP-4800W

P. 9

ENGLISH VERSION

  4. 

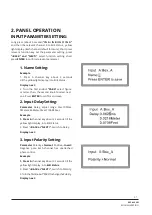
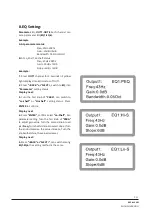
Press ENTER, confirm select “Lo-shelf” sta- 


tus, into parameter setting. Turn the first knob  

 of 

“PARA” to adjust the gain value. Turn the sec- 


ond knob to adjust 

Freq. Turn the third knob to  


select slope. (Turn the knob clockwise, the value  


increases; Turn the knob withershins, the value  


decreases.  


Display next:


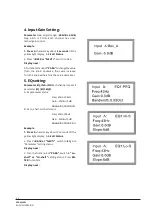
5.  Press  “<BACK>”  or  “<NEXT>”, can switch  

 among

 EQ1-EQ8, the setting method is the same. 


6. Noisegate Setting:


Parameter  Noisegate,  Range:  -120.0dBu-+10d- 


Bu. Each channel has unattached Noisegate control. 


Example 

 1. 

Press A channel key about 3 seconds till the  


yellow light display, into 

Edit Status


2. Press “

<BACK or “NEXT>”, switch to Noisegate.


Display next:


3. Turn any knob of “

PARA” to adjust the settings.  


(Turn the knob clockwise, the value increases; Turn  


the knob withershins, the value decreases.)

OUTPUT PARAMETER SETTING:

Press long (about 3 second)

  “OUT1-OUT8”, and then  

Edit Status, till the relevant channel yellow light display. 
(Each channel default to mute), Short press the rele-
vant function key can set the parameter setting. Press 
“<BACK” and “NEXT>” to select function setting, short 
press

 ENTER to confirm relevant parameter. 


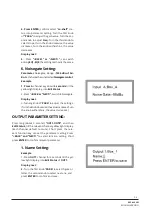
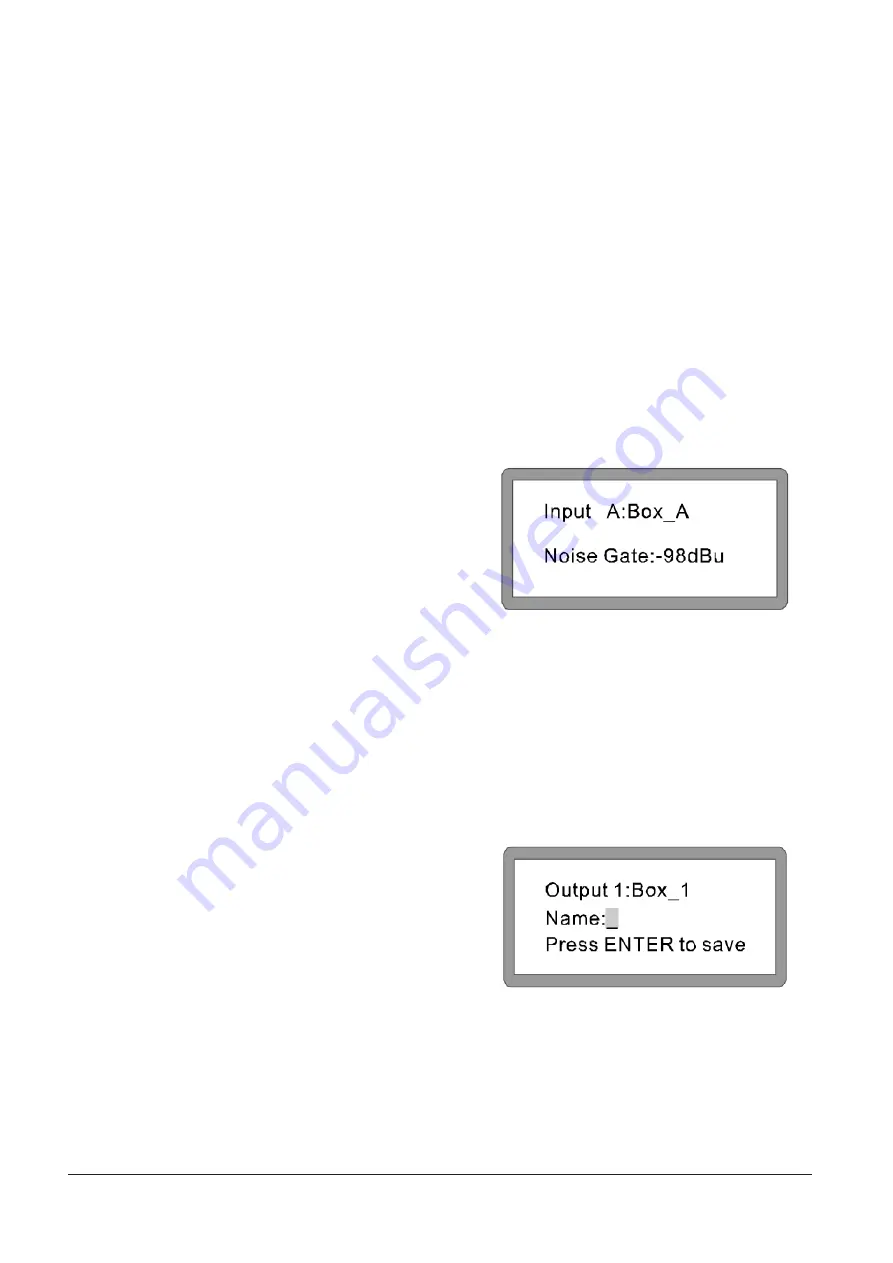
1. Name Setting:


Example 


1. Press 

OUT1 channel for 3 seconds till the yel- 


low light display, into 

Edit Status of OUT1.


Display next:

 2. 

Turn the first knob “

PARA” to select figure or  


letter, the second knob to select next one, and  

 press 

ENTER to confirm and save.

Summary of Contents for DSP-4800 W

Page 1: ...PLEASE READ THE INSTRUCTIONS CAREFULLY BEFORE USE POR FAVOR LEA LAS INSTRUCCI NES ANTES DE USAR USER MANUAL MANUAL DE USUARIO DSP 4800W...

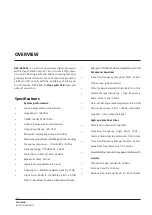
Page 2: ...electable low frequency high frequency 20Hz 1kHz 1kHz 20kHz Gain 15dB adjustable step distance is 0 1dB Central frequency 20Hz 20kHz adjustable step dist 1 36 octave 368 pos High and Low Pass Filter F...

Page 3: ...a long period of time 9 Care should be taken so that objects do not fall into and liquids are not spilled thorugh the enclo sure s openings 10 The product should be serviced by qualified ser vice pers...

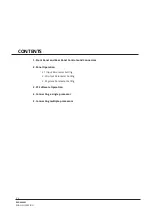
Page 4: ...l and Rear Panel Controls and Connectors 2 Panel Operation 2 1 Input Parameter Setting 2 2 Output Parameter Setting 2 3 System Parameter Setting 3 PC Software Operation 4 Connecting a single processor...

Page 5: ...AN connecter It can control maximium 250 pcs products maximnum distance 1000 meters It depends on the electromagnetic environment 1 FRONT PANEL AND REAR PANEL CONTROLS AND CONNECTORS 1 LCD Display Dis...

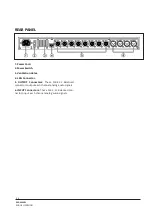
Page 6: ...er Switch 3 Ventilation Holes 4 LAN Connector 5 OUTPUT Connectors These XLR 3 32 Balanced connectors output each channel analog audio signals 6 INPUT Connectors These XLR 3 31 Balanced con nectors inp...

Page 7: ...next 2 Turn the first knobof PARA select figure or letter then the second knob to select next one Press ENTER to confirm and save 2 Input Delay Setting Parameter Delay adjust range 0ms 1000ms 0Meter 3...

Page 8: ...ease Turn the knob withershins the value decrease 5 EQ setting Parameter EQ IN A IN D Each channel can set 8 parameter EQ EQ1 EQ8 A At parameter status Freq 20Hz 20KHz Gain 30dB 15dB Bandwidth 0 05 Oc...

Page 9: ...lay into Edit Status 2 Press BACK or NEXT switch to Noisegate Display next 3 Turn any knob of PARA to adjust the settings Turntheknobclockwise thevalueincreases Turn the knob withershins the value dec...

Page 10: ...ENTER to confirm 3 Output Gain Setting ParameterGain adjust range 40 0dB 15 0dB Step pitch is 0 1dB Each channel has unat tached gain control Example 1 Press OUT1 channel for 3 seconds till the yel l...

Page 11: ...arity Display next 5 Output Delay Setting Parameter Delay adjust range 0ms 1000ms 0Meter 346Meter 0Feet 1134 88Feet Eachchan nel has unattached delay control Example 1 PressOUT1channelkeyabout3seconds...

Page 12: ...knob withershins the value decreases Turn the second knob to select filter type turn the third knob to select slope 7 Crossover LPF Setting Parameter LPF Lowpass range 20Hz 20KHz Selectable fiter typ...

Page 13: ...f OUT1 2 Press BACK or NEXT switch to EQ into Parameter setting status Display next 3 Turn the first knob of PARA can switch to Lo shelf or Hi shelf setting status Press ENTER to confirm Display next...

Page 14: ...confirm A If select Limit Display as below 3 Turn the first knob PARA to change the threshold value turn the second knob to set the attack time Turn the third knob to set the re lease time it can be...

Page 15: ...Program copy Turn any knob of PARA to se lect Program Copy 3 Channel Copy Turn any knob of PARA to se lect each Channel Copy 4 Input SubMenu Turn any knob of PARA to se lect Input Source of Input Chan...

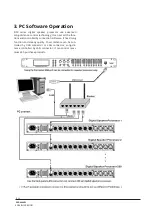
Page 16: ...ed Long distance control technology it can set all the func tions and controlled by connection software It has strong function and steady quality Short distance can be con trolled by USB connector or...

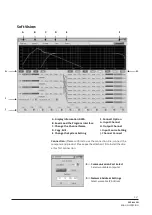
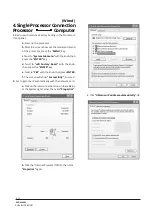
Page 17: ...the System Setting F Connect Option G Input Channel H Output Channel I Input Source Setting J Channel Connect Connection Please confirm to use the connection line connect the computer and product Ple...

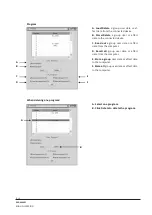
Page 18: ...the connected device C Read out a group user data or effect data from the computer D Recall all group user data or effect data from the computer E Store a group user data or effect data to the comput...

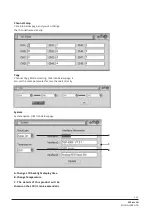
Page 19: ...e directly Copy Channel Copy Mode selecting Click into below page it can set the same parameter for two channels directly A B C System System option click into below page A Change LCD backlight displa...

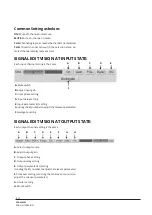
Page 20: ...witch B Adjust input gain C Input phase setting D Input delay setting E Input parameter EQ setting can drag the EQ number to adjust the relevant parameter F Noisegate setting SIGNAL EDIT VISION AT OUT...

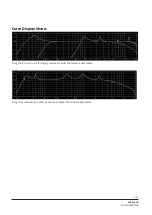
Page 21: ...DSP 4800W P 21 ENGLISH VERSION Curve Display Vision Drag the EQ icon 1 2 3 4 5 6 by mouse to adjust the relevant parameter Drag the crossover icon H L by mouse to adjust the relevant parameter...

Page 22: ...rocessor press the MENU key c Twistto SystemSubmenu withtheknob then press the ENTER key d Twist to wifi Factory Reset with the knob then press the ENTER key e Twist to YES with the knob then press EN...

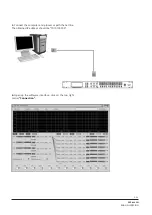
Page 23: ...4800W P 23 ENGLISH VERSION 3 Connect the computer and processor with the net line The obtained IP address should be 10 10 100 100 4 Open up the software interface click on the top right corner Connect...

Page 24: ...the model and brand of the processor press the MENU key c Twistto SystemSubmenu withtheknob then press the ENTER key d Twist to wifi Factory Reset with the knob then press the ENTER key e Twist to YE...

Page 25: ...DSP 4800W P 25 ENGLISH VERSION b Click the Internet Protocol TCP IP then click Properties again c Click Obtain an IP address automatically OK...

Page 26: ...sor with the net line The obtained IP address should be 10 10 100 100 4 After you connect the network successfully type 10 10 100 254 on the IE browser land to the wifi mod ule Input the user name adm...

Page 27: ...DSP 4800W P 27 a Thenenter WorkingModeConfiguration Interface 5 ManyProcessorsConnection Wired b Click on the top left corner AP Interface Set ting in put the Network Name SSID AB Link ENGLISH VERSION...

Page 28: ...tting in underlying LAN Setup First made the DHCP Type into Disable Second Made the IP address of Wifi module as the same as Router 192 168 0 101 192 168 0 102 192 168 0 103 by the same token Then app...

Page 29: ...ick on the top left corner Mode Selection Set for the Station Mode terminal mold STA apply 5 Restart the processors Computer connected to Router Router connected to Processors here with two lines or m...

Page 30: ...he software interface click on the top right cor ner Connection 7 Type the IP address 192 168 0 101 192 168 0 102 192 168 0 103 This IP address should be the same with the DHCP IP ad dress Connection...

Page 31: ...DSP 4800W P 31 Each speaker processor connect to this systems should be set up different IP address ENGLISH VERSION...

Page 32: ...osiciones Filtro Valor Q ancho de banda 0 4 a 28 8 3 a 0 05 Alta o baja frecuencia seleccionable 20Hz 1kHz 1kHz 20kHz Ganancia 15dB Frecuencia central 20Hz 20kHz Filtrodepasodeagudosyfiltrosdepasodegr...

Page 33: ...inactividad 9 Evite el ingreso de objetos peque os y el derrame l quidos en los componentes o ranuras del sistema 10 P ngaseencontactoconelserviciot cnicoautorizadosi A El cable de alimentaci n o el e...

Page 34: ...el 2 1 Configuraci n del par metro de entrada 2 2 Configuraci n del par metro de salida 2 3 Configuraci n del par metro del sistema 3 Funcionamiento del software para PC 4 Conexi n de un solo procesad...

Page 35: ...m xima de 100 metros el equipo controla un m ximo de 250 unidades sujeto a las condiciones electromagn ticas del ambiente 1 PANEL FRONTAL PANEL TRASERO Y CONECTORES 1 Pantalla LCD Despliega los par me...

Page 36: ...nectores de salida Los conectores XLR 3 32 bal anceados emiten las se ales de audio anal gicas de cada canal 6 Conectores de entrada Los conectores XLR 3 31 balanceados reciben las se ales de audio an...

Page 37: ...n mero o letra Utilice la segunda perilla para el caracter siguiente Presione EN TER para confirmar y guardar los cambios 2 Configuraci ndelaydeentrada Par metro Delay regular rango Oms 1000 ms Metros...

Page 38: ...l valor o en sentido antihorario para disminuirlo 5 Configuraci n del Ecualizador Par metro EQ IN A IN D da canal puede esta blecer 8 par metros EQ EQ1 EQ8 A En modo Parameter Frecuencia 20Hz 20KHz Ga...

Page 39: ...lla en el modo Edit 2 Presione BACK o NEXT para seleccionar Noisegate En la pantalla ver 3 Todas las perillas de PARR pueden regular este par metro Gire la perilla deseada en sen tido horario para inc...

Page 40: ...3 Configuraci n de la ganancia de salida Par metro Ganancia Regular rango 0 0 dB 15 dB Step pitch 0 1 dB Cada canal cuenta con control individual de ganancia Ejemplo 1 Presione el canal Out1 por 3 se...

Page 41: ...n la pantalla ver 5 Configuraci n del delay de la salida Par metro Delay Regular rango Oms 1000 Metros 346 Pies 1134 88 Cadacanalcuentacon control individual de delay Ejemplo 1 Presione el canal Out1...

Page 42: ...la segunda perilla de PARR para seleccionar el tipo de filtro y la tercera perilla para seleccionar la pendiente 7 Configuraci n de transici n delfiltrodepasodebajos LPF Par metro LPF paso de bajos Ra...

Page 43: ...uz amarilla en el modo Edit 2 Presione BACK o NEXT para seleccion ar EQ en el modo Parameter En la pantalla ver 3 Gire la primera perilla de PARR para alter nar entre los filtros Lo shelf y Hi shelf P...

Page 44: ...BACK o NEXT para seleccionar Limit o Compressor Presione ENTER 3 Gire la primera perilla de PARR para regu lar el valor del umbral Utilice la segunda perilla para el arranque seleccione entre 2 4 6 8...

Page 45: ...rogram Copy 3 Channel Copy Gire cualquier perilla de PARR para seleccionar Channel Copy 4 Input SubMenu Gire cualquier perilla de PARR para seleccionar la fuente de en trada de los canales A D 5 Secur...

Page 46: ...n importante y calidad constante Por otro lado el control a corta distancia puede realizarse con el conector USB o LAN Mientras que a larga distancia solo con el conector El puerto USB del panel front...

Page 47: ...figuraci n del sistema F Opciones de conexi n G Canal de entrada H Canal de salida I Config de entrada J Conexi n de Canal Conexi n Confirme la l nea de conexi n Conecte la computadora y el equipo Par...

Page 48: ...n efecto del dispositivo conectado C Cargar informaci n del usuario o un efecto en la PC D Recuperar toda la informaci n del usu ario o de un efecto en la PC E Almacenar informaci n del usuario o de u...

Page 49: ...canal directamente Opci n para copiar un canal Al hacer clic ver El usuario puede establecer el mismo par metro para dos canales A B C Sistema Opciones del sistema Al hacer clic en la pantalla ver A...

Page 50: ...de entrada D Configuraci n del delay de entrada E Configuraci n de los par metros de entrada de ecualizaci n Arrastre el cono EQ para regu lar el par metro F Configuraci n de la puerta de ruido EDICI...

Page 51: ...SP 4800W P 51 VERSION ESPA OL Visualizaci n de la Curva Arrastre el cono EQ 1 2 3 4 5 6 con el mouse para regular el par metro Arrastre el cono de transici n H L con el mouse para regular el par metro...

Page 52: ...ilice la perilla para ir a System SubMenu y presione ENTER para acceder d Utilice la perilla para ir a Wifi Factory Reset y presione ENTER para acceder e Utilice la perilla para seleccionar YES y pre...

Page 53: ...DSP 4800W P 53 VERSION ESPA OL 3 Conecte la PC y el procesador con la l nea de red La direcci n IP obtenida debe ser 10 10 100 100 4 Abra la interfaz del software y luego haga clic en Connection...

Page 54: ...ione la tecla MENU c Utilice la perilla para ir a System SubMenu y presione ENTER para acceder d Utilice la perilla para ir a Wifi Factory Reset y presione ENTER para acceder e Utilice la perilla para...

Page 55: ...DSP 4800W P 55 b Haga clic en Protocolo Internet TCP IP y luego en Propiedades nuevamente c Haga clic en Obtener una direcci n IP au tom ticamente y luego en aceptar VERSION ESPA OL...

Page 56: ...r con la l nea de red La direcci n IP obtenida debe ser 10 10 100 100 4 Luego de conectarse a la red ingrese 10 10 100 254 en el navegador de IE Proceda a escribir el nombre de usuar io admin y la con...

Page 57: ...00W P 57 a Ingrese en la interfaz Working Mode Configuration 5 Conexi n varios Procesadores con Cable b Haga clic en la opci n AP Interface Setting y luegoingreseen NetworkName SSID AB Link VERSION ES...

Page 58: ...8 c Dir jase al men LAN Setup En la opci n DHCP Type seleccione Disable Coloque la direcci n IP 192 168 0 101 192 168 0 102 192 168 0 103 etc para equiparar la del router y la del m dulo wifi Apply VE...

Page 59: ...aga clic en la opci n Mode Selection Selec cione Station Mode STA Mode y haga clic en Apply 5 Reinicie los procesadores Conecte la PC al router y el router a los procesadores con dos o m s l neas de r...

Page 60: ...la interfaz del software y luego click en Connection 7 Coloque la direcci n IP 192 168 0 101 192 168 0 102 192 168 0 103 y se habr conectado correctamente La di recci n IP debe ser la misma que en DH...

Page 61: ...should be set up different IP address Procesor Digital 1 Procesor Digital 2 Procesor Digital 250 El conector LAN del panel dorsal permite unir hasta 250 unidades Cada procesador conectado a este sist...

Page 62: ...FOR MORE INFO ON THIS PRODUCT PLEASE CHECK WWW AUDIOLAB WEB COM PARA MAS INFORMACION SOBRE ESTE PRODUCTO VISITE WWW ADUIOLAB WEB COM...

Reviews: