RM500SL
®
User's Guide Version 3.4
June 2011
the calibration curve is significantly different from what is expected. It may be accompanied
by an on-ear reference microphone error.
•
Check that a probe microphone assembly is securely plugged into the PROBE socket of
the side (Right or Left) you are trying to calibrate.
•
Try using a new probe tube. Ensure it is correctly attached and positioned.
•
Try switching right and left probe microphone assemblies.
•
Try switching the right and left cables connecting the rear display unit to the test
chamber. Carefully observe the pins in the test chamber connector for any that are
bent or pushed in.
Sound-field speaker overdriven
Sound-field speaker overdriven!
or
External sound-field speaker overdriven!
This message may occur in on-ear directional or on-ear unaided or aided tests if:
•
No external front speaker is connected but one has been selected in Setup. See
External display, printer, speaker, External sound-field speaker setup.
•
No back speaker has been connected but an on-ear directional test is being attempted.
See External sound-field speaker setup.
•
The test environment is too reverberant for the distance between the client and the
speaker(s). Move the on-ear speaker(s), internal or external, and client away from walls
and hard objects. Move the client closer to the speaker(s).
•
The speaker or connecting cable (external speakers only) is defective. If this is the case,
you should not hear any sound coming from the internal or external speaker(s) during
any test. Try a different speaker or cable.
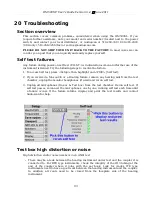
Barcode scanner malfunction
If there is no red scanning beam when the trigger is pulled, tug on the cable where it enters
the scanner. If it comes loose easily, push it back in until it clicks in place.
If the scanning beam stays on when the trigger is released or if the barcode scanner fails to
read known good barcodes, try the following:
1. Unplug the scanner from the equipment, then reconnect it. If the problem persists…
2. Print this page on an external printer (see External display, printer, speaker) or from the
electronic user’s guide on the Audioscan software CD (see Electronic user’s guide).
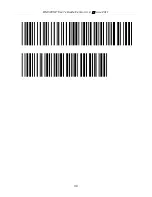
3. Scan these two barcodes, starting with the top one. This will reset the scanner to its
default settings.
96
Summary of Contents for RM500SL
Page 1: ...RM500SL User s Guide Version 3 4 March 2010...
Page 9: ...RM500SL User s Guide Version 3 4 June 2011 EC Declaration of Conformity 9...
Page 10: ...RM500SL User s Guide Version 3 4 June 2011 10...
Page 37: ...RM500SL User s Guide Version 3 4 June 2011 37...
Page 43: ...RM500SL User s Guide Version 3 4 June 2011 telecoil test 43...
Page 51: ...RM500SL User s Guide Version 3 4 June 2011 51...
Page 57: ...RM500SL User s Guide Version 3 4 June 2011 57...
Page 64: ...RM500SL User s Guide Version 3 4 June 2011 64...
Page 78: ...RM500SL User s Guide Version 3 4 June 2011 Screen tour unaided screen 78...
Page 97: ...RM500SL User s Guide Version 3 4 June 2011 97...
Page 98: ...RM500SL User s Guide Version 3 4 June 2011 98...
Page 99: ...RM500SL User s Guide Version 3 4 June 2011 99...
Page 102: ...RM500SL User s Guide Version 3 4 June 2011 102...
Page 112: ...RM500SL User s Guide Version 3 4 June 2011 112...
Page 113: ...RM500SL User s Guide Version 3 4 June 2011 113...

