background image

1

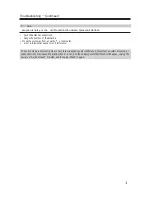
Troubleshooting

If you have any trouble using the unit, look for a solution in this section.

 Po er  

Can t turn  on the un it.

‡

Make sure that the power cord is properly plugged into the wall outlet.

‡

nplug the power cord from the wall outlet, wait   minutes or more, then plug it in again.

The unit turns  off une pec tedly.

‡

If the sleep timer has been set, the unit will turn off automatically after a specified period.

‡

The unit will automatically enter standby mode when  uto  tandby has been set and launches.

e ote  Con trol

The re ote con trol doesn t  ork proper ly.

‡

Replace the battery with a new one.

‡

The remote control is too far away from the unit, or there s an obstacle between them.

‡

The unit s remote control sensor is being sub ected to bright light (inverter-type fluorescent light or
sunlight).

‡

The unit is located behind the tinted glass doors of an audio rack or cabinet.

udio

There s no sound.

‡

Make sure the unit s volume is not set too low.

‡

Make sure the correct input source is selected.

‡

Make sure the unit is not muted.

‡

heck all connections and correct as necessary.

‡

While headphones are connected, the speakers output no sound.

‡

If there s no sound from an external device connected to  I E I , check whether the external device s audio
output level (volume) might be too low.

The sound  uality is not good.

‡

Make sure all audio connecting plugs are pushed in all the way.

‡

The sound quality can be affected by strong magnetic fields, such as that from a T . Try moving any such devices
away from the unit.

‡

If you have any devices that emit high-intensity radio waves near the unit, such as a cellular phone that s being 
used to make a call, the unit may output noise.

‡

The unit s precision drive mechanism may emit a faint hissing sound while reading discs during playback or when 
searching for tracks.  ou may be able to hear this noise in extremely quiet environments.

udio output is inter ittent  hen the CD receiver is sub ected to vibration.

‡

The unit is not a portable device.  se it in a location that s not sub ect to shock or vibration.

‡

Make sure that the included floor pads are attached to the speakers.

eadphones output is inter ittent or there s no sound.

‡

Make sure that the headphones cable is not broken or damaged.  lso, clean the headphones plug.  ee your
headphones  instruction manual for cleaning information.

udio perfor ance.

‡

udio performance will be at its best about 10 to  0 minutes or more after the unit has been turned on and had 

time to warm up.

‡

sing cable ties to bundle audio cables with speaker or power cables may degrade the sound quality, so don t do it.

Summary of Contents for MHF-220BT

Page 1: ...Mini Hi Fi System MHF 220BT...

Page 2: ...led or objects have fallen into the apparatus C If the apparatus has been exposed to rain or water D If the apparatus does not operate normally by following the operating instructions Adjust only thos...

Page 3: ...o not leave rubber or plastic items on this unit for a long time because they may leave marks on the case This unit s top and rear panels may get warm after prolonged use This is normal If you do not...

Page 4: ...e connecting or disconnecting cables Microphone feedback The speakers contain powerful magnets Do not put metal items such as screwdrivers close to the speakers as they may be attracted toward the mag...

Page 5: ...the cover back in place and slide it in the direction of the arrow till you hear a Click sound Rep acin t e attery Use only a battery of the same type AAA Slide the cover at the back of the remote con...

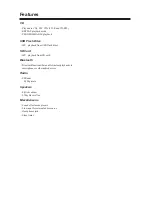
Page 6: ...om USB flash drives SD Card MP playback from SD card Bluetooth Bluetoothfunctionsthatenablewirelessplaybackvia smartphones or other audio devices Radio FM tuner 0 FM presets Speakers Stylish cabinet 2...

Page 7: ...ations B O 1 T O 1 S I 1 A 1 1 1 S S E P 1 P ayin CDs P C 15 P C 15 R P 15 Listenin to t e Ra io L R 1 P S A A P 1 S P S 1 P ayin an E terna De ice P E 1 P B E C LINE IN 1 P ayin a US F as Dri e P SB...

Page 8: ...ettin Starte Top Pane pen Close Press to open the disc compartment cover Press to close the disc compartment cover...

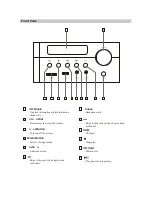
Page 9: ...ume o er Button Turns on off the system 4 Mode Button Selects the input mode hones Headphone jack Skips to the previous title chapter track or channel USB USB port 0 Stops play 5 udio n Audio input ja...

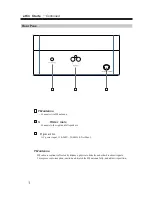
Page 10: ...to the right and left speakers C po er in AC power input 110 240V 50 60Hz 0 2A Max FM antenna FM radio reception is affected by distance physical obstacles and other broadcast signals To improve radi...

Page 11: ...s CD player mode 4 U Selects LINE IN mode 5 S U D Selects different sound effect presets Skips to the previous title chapter or track 0 Searches forward at different speeds Decreases volume 6 C Skips...

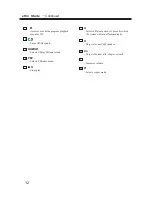
Page 12: ...n sound 5 USB SD Selects USB or SD input mode 6 FM Selects FM radio mode S Stops play S Selects different periods of time after which the system will turn off automatically C Skips to the next FM chan...

Page 13: ...le systems are FAT 6 and FAT 2 Only MP files with the extension MP or mp are supported Files recorded using MPEG audio layer at samplingfrequencies of 2 44 4 kHz and a bit rate of 2 20 kbps are suppor...

Page 14: ...MODE button repeatedly utin t e unit Press t e utton Press the button to unmute Tip You can also unmute the unit by adjusting the volume Alternatively set the unit to standby then turn it on again to...

Page 15: ...atically To pause p ay ac Press the button To resumeplayback press the button again To Fast For ar or Fast Re erse During playback press the Fast Forward button repeatedly to fast forward at different...

Page 16: ...n your Bluetooth If the volume level on the Bluetooth enabled device is low the playback volume relative to other input sources will be low Raise the volume level on the Bluetooth enabled device to an...

Page 17: ...N utton to c an e t e input mo e to LINE P ay ac from e terna e ice Note This adjustment affects only the speaker volume the headphone volume cannot be adjusted If the volume level of your external au...

Page 18: ...k press the Note STOP button Note The memory cards will only fit in one direction Do not force them as this will damage the card Do not connect your B flash drive via a B hub Whenconnecting ordisconne...

Page 19: ...to I E I check whether the external device s audio output level volume might be too low The sound uality is not good Make sure all audio connecting plugs are pushed in all the way The sound quality ca...

Page 20: ...Bluetooth enabled device then perform the pairing process again Sound via Bluetooth connection is interrupted There may be a wireless device or microwave oven nearby If so locate the unit away from t...

Page 21: ...he unit away from a nearby T or computer ars or airplanes can cause noisy interference The unit contains a microcomputer In very rare situations severe interference noise from an external source or st...

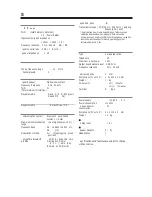
Page 22: ...ower 10 W Output sound pressure level 0 dB W m Frequency response 0 Hz 20 kHz abinet capacity 4 liter Dimensions W x H x D 1 0 x 210 x 1 0 mm Weight 1 kg Driver units cm Woofer cm 1 Tweeter THD Total...

Page 23: ...isuse abuse or neglect Please retain your receipt as proof of purchase and contact our Customer Service Centre on 1800 124 125 Australia or 0800 945 995 New Zealand or alternatively via Customer Help...

Page 24: ...ed to try to correct the interference by one or more of the following measures Reorient or relocate the receiving antenna Increase the separation between the equipment and receiver Connect the equipme...

Reviews: