background image

3

SAFETY PRECAUTION

For safety reasons do not allow children to unfasten seat-belts to change

video media or make any adjustments to the system.  Enjoy your  enter-

tainment system but always remember the safety of all passengers  is

the number one priority.

IMPORTANT NOTICE

It is unlawful in most states for a person to drive a motor vehicle which is

equipped with a television viewer or screen that is located in the motor

vehicle at any point forward of the back of the driver’s seat, or that is

visible, directly or indirectly, to the driver while operating the vehicle.  In

the interest of safety, this system should never be installed where it will

be visible, directly or indirectly, by the operator of the motor vehicle.

1. OBJECT AND LIQUID

Do not insert objects of any kind into the system through its open-

ings; do not spill or spray liquid on or into the system (this may

result in a fire or electric shock).  Do not place heavy objects on the

unit. To  ensure proper ventilation and proper operation, never cover

or block the slots and openings.

2. DISASSEMBLE

Do not attempt to disassemble the unit. There is a risk of electric

shock and/or exposure to Laser Radiation.  Contact qualified ser-

vice personnel if your system is in need of repair.

3. CLEANING UNIT

When cleaning, make sure the system is unplugged  from the power

source.  Do not use any solvents or cleaning materials. Clean the

DVD player using a lightly dampened lint free cloth to wipe the unit.

Summary of Contents for 1287079

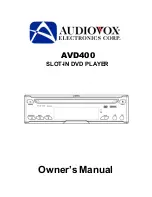
Page 1: ...AVD400 SLOT IN DVD PLAYER Owner s Manual...

Page 2: ...SYMBOLS The lighting flash with arrowhead symbol within an equilateral triangle is intended to alert the user to the presence of uninsulated dangerous voltage within the product s enclosure that may b...

Page 3: ...installed where it will be visible directly or indirectly by the operator of the motor vehicle 1 OBJECT AND LIQUID Do not insert objects of any kind into the system through its open ings do not spill...

Page 4: ...to the disc contents the software pro ducers designed therefore some playback features may not be available Refer to the instructions supplied with the discs 5 Powering the DVD Player This system MUST...

Page 5: ...nit Refer to Figure 1 1 Power Button 2 Previous Button 3 Next Button 4 Stop Button 5 Remote Control Sensor 6 Play Button 7 A V 2 Audio Input Jack 8 A V 2 Video Input Jack 9 Eject Button 10 IR Input 11...

Page 6: ...RIC KEYPAD 8 10 Button 9 TITLE Button 10 AUDIO Button 11 REPEAT Button 12 SUBTITLE Button 13 DISPLAY Button 14 EJECT Button 15 SETUP Button 16 PAUSE Button 17 STOP Button 18 NEXT Button 19 PREVIOUS Bu...

Page 7: ...le into the IR IN jack on the back of the DVD player Place the IR receiver anywhere in the vehicle to allow remote control from any location 3 Connecting to a Monitor a Match the color coded plugs to...

Page 8: ...ng Select item or setting Return Display the root menu of the disc Repeat playing title chapter or track Display information title chapter track time etc Change the angles of a scene Select the subtit...

Page 9: ...Press DISPLAY twice to display the current disc playback information Press display again to remove the display Display Mode 1 The type of disc 2 The number of current title 3 The number of total title...

Page 10: ...During disc playback press SUBTITLE to select the desired subtitle lan guage You can see item 14 change 6 AUDIO During disc playback press AUDIO to select the desired audio language You can see item...

Page 11: ...in Playing CD USING THE REPEAT FEATURED The default mode for the Repeat feature is OFF Pressing REPEAT consecutively changes the repeat options Repeat Single repeats the track that is playing Repeat A...

Page 12: ...n MP3 disc is inserted into the unit the menu screen appears automatically You can use the menu screen to change folders and songs The system plays the songs in the order they were recorded onto the d...

Page 13: ...ough the options the repeat option changes Selected repeat option loops repeatedly until you turn it off NOTICE sign in front of a file name indicates that this is a folder not a MP3 file sign in fron...

Page 14: ...ume it s last playback mode Main SETUP Menu Screen 1 Select language using the LEFT RIGHT buttons press ENTER to enter the LANGUAGE setup page Language Display Menu a Select OSD Menu using the UP DOWN...

Page 15: ...ay c Select Audio using the UP DOWN buttons then press ENTER to enter the submenu Select the audio language you desire using the UP DOWN buttons then press ENTER to confirm the setting Audio Display d...

Page 16: ...the UP DOWN buttons then press ENTER to confirm the setting TV Shape Display 4 3 PS When the player is connected to a normal TV and a wide picture is shown on the full screen 4 3 LB When the player i...

Page 17: ...he UP DOWN buttons and then press ENTER to enter the submenu Choose Brightness on or off using the UP DOWN buttons then press ENTER to confirm the setting Brightness Display d Select EDGES using the U...

Page 18: ...s ENTER to enter the AUDIO setup page AUDIO Display Menu a Select AC3 using the UP DOWN buttons then press ENTER to enter the submenu Select the digital output you desire using the UP DOWN buttons the...

Page 19: ...Select MP3 WMA using the UP DOWN buttons then press ENTER to enter the submenu Select the digital output you desire using the UP DOWN buttons then press ENTER to confirm the setting MP3 WMA Display d...

Page 20: ...3 PG 4 PG 13 5 PG R 6 R 7 NC 17 8 Adult NOTE For 1st time use the default password is 3308 NOTE The Default Password is 3308 This password is always effective even after you have selected your own pa...

Page 21: ...Storage temperature Operating humidity Dimensions W x H x D Weight DVD CD VCD MP3 JPEGCD R NTSC PAL Horizontal 720 pixel vertical 480 pixel 1 0 Vp p 75 Ohm 1 2 V to 1 8 V More than 60 dB Less than 60...

Page 22: ...factory serial number bar code label s THE EXTENT OF THE COMPANY S LIABILITY UNDER THIS WARRANTY IS LIMITED TO THE REPAIR OR RE PLACEMENT PROVIDED ABOVE AND IN NO EVENT SHALL THE COMPANY S LIABILITY...

Page 23: ...128 7079 2004 Audiovox Electronics Corp 150 Marcus Blvd Hauppauge N Y 11788...

Reviews: