background image

24

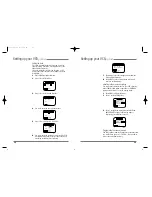
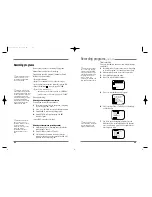
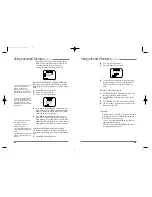
Reviewing timer programs

If you want to review the timer programs that you set up:

1

Press MENU to display the menu.

2

Press 1 to select Timer Recordings.

3

Press 2 to select Review/Cancel Programs. 

4

Press MENU to view additional timer programs. 

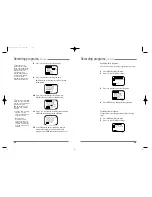
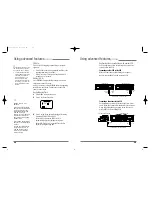
Cancelling timer programs

To cancel timer recording programs before recording
starts :

1

Press MENU to display the menu.

2

Press 1 to select Timer Recordings.

TIMER RECORDINGS

1 Make a New Program
2 Review/Cancel Programs

MENU  Exit

PROGRAM1  (ONE TIME)

Channel    06  Cable
Start Time 0


4


:


3


0


A


M

End Time  0


5


:


3


0


A


M

Start Date 07


/


10

/

 00 Mon

Tape Speed EP

CLEAR  Cancel
MENU  For next program

TIMER RECORDINGS

1 Make a New Program
2 Review/Cancel Programs

MENU  Exit

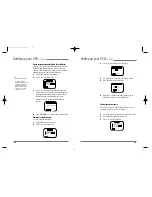
Recording programs,

continued

23

8

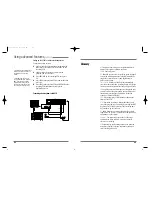
Use 0-9 to enter the recording start time.

9

Use 0-9 to enter the recording end time.

AM/PM and the current date/year will be selected

automatically.

10

Use 0-9 to set the date that the program airs.

DAY(Sat)/Year(00) will be set automatically.

11

Press 1 or 2 to select the recording speed and press
MENU and the following screen will appear.

12

Press MENU three times repeatedly to return to

normal viewing and if you want to make a new
program, press MENU and restart from step 4 to 11.

PROGRAM 1 has been saved

For program recording,
insert a cassette and 
turn the VCR off before
the program start time.

  MENU  Continue

PROGRAM1  (ONE TIME)
Channel     06   Cable
Start Time  0


4


:


3


0


A


M

End Time   0


5


:


3


0


A


M

Start Date  07


/


10

00 Mon

Tape Speed EP
                    1=SP 2=EP

CLEAR  Correct
MENU  Save

PROGRAM1  (ONE TIME)

Channel    06  Cable
Start Time 0


4


:


3


0


A


M

End Time  0


5


:


3


0


A


M

Start Date –


/


/


Tape Speed EP

CLEAR  Correct
MENU  Cancel

PROGRAM1  (ONE TIME)

Channel    06  Cable
Start Time 0


4


:


3


0


– 1=AM

End Time  –


:


2=PM

Start Date –


/


–/–


Tape Speed EP

CLEAR  Correct
MENU  Cancel

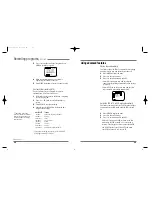
Recording programs,

continued

See page 18 for

information, about tape
speed. Understanding tape
speed options will ensure
that you are able to
completely record a
program without running
out of tape and that you
are able to record
programs with the level of
picture quality you desire.

To turn the VCR off after

setting up a timer recording
program, press  POWER on
the remote control or
POWER on the VCR. The
timer recording indicator
will light.

• To stop a timer recording

program in process,
press and hold STOP for
about five seconds.

• When the timer

recording indicator
appears, the VCR is in
standby and cannot be
operated. To release the
VCR from standby, press
POWER.

DV-T27N-SJ  99.11.26 5:3 PM  ˘

`

23

Summary of Contents for AVR-1040

Page 1: ...Video Cassette Recorder User s Guide AVR 1040 DV T27N SJ 99 11 26 5 3 PM A1...

Page 2: ...See example as shown Safety information ANTENNA DISCHARGE UNIT NEC SECTION 810 20 ANTENNA LEAD IN WIRE POWER SERVICE GROUNDING ELECTRODE SYSTEM NEC ART 250 PART H GROUND CLAMP ELECTRIC SERVICE EQUIPME...

Page 3: ...o product through openings as they may touch dangerous voltage points or short out parts that could result in a fire or electric shock Never spill liquid of any kind on the video product 16 Lightning...

Page 4: ...ogrammed When the power indicator is blinking on the display panel the VCR is in the child lock mode Overview of the equipment continued POWER RECORD VCR TIMER This section summarizes the buttons cont...

Page 5: ...a video cassette from the compartment Overview of the equipment continued Objects between the remote control and VCR will block the path of the remote control beam Dark walls direct sunshine or very...

Page 6: ...of batteries properly never throw them into a fire 5 13 P S Press to pause video tape playback for temporarily still picture Each press of the button advances the picture one frame 14 100 Press in co...

Page 7: ...tions below to make these connections You will normally only make one of the connections shown below not all of them Connecting an antenna to the VCR If your antenna ends in a single coaxial lead pres...

Page 8: ...ntinued VCR ANT IN TV CH 3 4 9 If you have a coaxial terminal for VHF signals and twin lead terminals for UHF signals you need an adapter Not supplied as shown below If you have twin lead terminals fo...

Page 9: ...ONS 5 LANGUAGE SELECT MENU Exit 11 If your cable system requires you to use a converter box for all channels connect the incoming cable to the IN terminal on the converter box Connect another cable be...

Page 10: ...Signal Type CABLE 4 Cable Box Setup MENU Exit Setting up your VCR continued Time 07 11 PM Date 07 10 00 Mon CLEAR Correct MENU Set TIME AND DATE SET 13 Setting the clock The clock displays the current...

Page 11: ...use the auto channel search feature at late night you may eliminate channels that air only daytime programming 1 Press MENU display the main menu 2 Press 3 to select Channel Set 3 Press 1 to select A...

Page 12: ...the VCR will automatically eject the cassette In the power on mode the VCR will playback automatically If you insert a video cassette with a safety tab intact into the VCR After setting the timer reco...

Page 13: ...tically play the tape once you insert it If the VCR does not play the video cassette press PLAY Searching forward while viewing a video cassette To search forward on a video cassette press FF The vide...

Page 14: ...and One touch recording Preparing to record a program manual or timer Before you begin recording Turn on the television Set the TV to channel 3 or 4 or to the video input Insert a video cassette with...

Page 15: ...n to normal viewing and if you want to make a new program press MENU and restart from step 4 to 11 PROGRAM 1 has been saved For program recording insert a cassette and turn the VCR off before the prog...

Page 16: ...Search 4 Go To Search MENU Exit 25 3 Press 2 to select Review Cancel Programs Press MENU to cycle the programs 4 When the program contents to be erased is displayed press CLEAR to cancel it 5 Press ME...

Page 17: ...tart of the recording To search for an index mark 1 Press MENU to display the menu 2 Press 4 to choose Functions 3 Press 3 to choose Index Search 4 If you want to search through a certain number of in...

Page 18: ...the TV screen And by one more pressing DISPLAY before disappearing the OSD from the screen only the tape counter will remain on the screen Daylight Saving Time 1 Press MENU to display the menu 2 Pres...

Page 19: ...al erasure of a recording SP Standard play the recording speed to use when the best picture quality is of prime importance and when total recording time is not 31 Setting up the VCRs for video cassett...

Page 20: ...near the end of the tape and then slowly finishes rewinding Do not prematurely eject the tape Troubleshooting continued 33 Troubleshooting If you have a problem with your VCR try the solutions listed...

Page 21: ...han 47K ohms 8 8 dBm unbalanced Output Audio line out Phono type connector less than 1 5K ohms 5 8 dBm unbalanced Frequency response Normal 100Hz l0KHz SP Signal to noise ratio Normal more than 42 dB...

Reviews: