background image

- E1 -

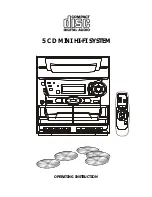
5 CD MINI HI-FI SYSTEM

OPERATING INSTRUCTION

Summary of Contents for CD2772

Page 1: ...E1 5 CD MINI HI FI SYSTEM OPERATING INSTRUCTION...

Page 2: ...damage it and create hazard When you are not going to use the unit for a long period of time disconnect the AC power cord ON CONDENSATION When left in a heated room where it is warm and damp water dr...

Page 3: ...ker terminals NOTE Ensure in each case that the striped wire is connected to the terminal of the speaker output and the non striped wire is connected to the terminal of the speaker output Also ensure...

Page 4: ...rols REC record button PLAY button REW rewind button F FWD fast forward button STOP EJECT button PAUSE button 15 DISPLAYwindow 16 MEMORY CLOCK TIMER and SLEEP buttons 17 CD STOP button 18 TUNING DOWN...

Page 5: ...nnected and the unit is on stand by power will be consumed and only the clock display will be lit Press the POWER STANDBY button to turn on the unit After a short period of time the display will show...

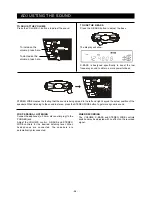
Page 6: ...that the sound is being spread to the left and right beyond the actual position of the speakers When listening to the sound in stereo press the STEREO WIDE button to get more dynamic sound WHEN RECORD...

Page 7: ...to turn ON the unit 4 Press the POWER STANDBY button to turn OFF the unit 3 Press the MEMORY CLOCK button in clock mode 3 Press the MEMORY CLOCK button in clock mode 4 Press the POWER STANDBY button t...

Page 8: ...the length of remaining time until the unit turns off It changes the indicator in the following way SLEEP 90 SLEEP 80 SLEEP 10 SLEEP 20 The Sleep Timer is set and the SLEEP indicator lights in the di...

Page 9: ...2 Select a band You can tune into a stored station directly by entering the preset number 20 stations on FM band can be preset 20 stations on MW AM band can be preset PRESETTING STATIONS 6 Press the M...

Page 10: ...tereo broadcast is received FM STEREO indicator lights up IF THE FM STEREO BROADCAST SIGNAL IS WEAK Set the MODE selector to FM MONO Background noise will be reduced but the signal reproduced will be...

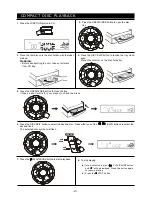
Page 11: ...he disc holder with the label side up WARNING Before transporting the unit take out all discs from CD tray 4 Press the DISC SKIP button to revolve the tray clock wise Place other disc s on the disc ho...

Page 12: ...ext track and so on to the next disc The first track on the next disc will be played normally to carry on scanning release and press the search button LOCATING A PARTICULAR POINT IN A TRACK To Locate...

Page 13: ...vate random play back 3 Press PLAY PAUSE button Some abnormal symbols will be shown on the display and a short period of time is needed for track shuffling before playback can be started IN PLAYBACK M...

Page 14: ...l be played repeatedly starting from the currently playing point Press the SKIP buttons with repeat one disc function on one can still search through the whole disc or whole program and the CD player...

Page 15: ...discs in the disc tray can be played in a preset order NOTE 1 The same track can be selected more than once in the same program 2 With program on the SKIP buttons function can only be used for the sel...

Page 16: ...4 see page E15 To erase the whole program Press the STOP until the word MEMORY disappears from the display The display will then show the information of the current disc or Open the disc tray by pres...

Page 17: ...PT PLAYBACK Press the PAUSE button To resume play press the PAUSE button again TO FAST WIND Press the REWIND or F FWD button Press the STOP EJECT button to stop winding at the desired position WHEN TH...

Page 18: ...rogress Use only normal type I tapes for recording RECORDING FROM THE BUILT IN TUNER 2 Insert a tape into the cassette compartment RECORDING DECK A ONLY 3 Press the RECORD button which also engages th...

Page 19: ...Control at the REMOTE SENSOR located on the unit When there is a strong ambient light source the performance of the infrared REMOTE SENSOR may be degraded causing unreliable operation The recommended...

Page 20: ...nnected the correct way round The TV or VCR is too close to the stereo system Separate the stereo system from the TV or VCR Adjust the antenna wire Set the MODE switch to FM MONO the FM STEREO light w...

Page 21: ...frequency 44 1 kHz Quantization 1 bit linear ch Pick up light source Semiconductor laser Pick up wave length 790nm CASSETTE SECTION Track format 4 tracks 2 channels Frequency response Normal tape 80...

Page 22: ...F1 MINI CHA NE HAUTE FID LIT CHANGEUR 5 CD INSTRUCTIONS DE FONCTIONNEMENT...

Page 23: ...de niveau Laissez l air circuler librement autour de l appareil Ne placez pas l appareil sur des surfaces susceptibles de bloquer les orifices d a ration tapis couvertures etc et ne couvrez pas l app...

Page 24: ...imentation CA et mettez toutes les fonctions hors service avant d effectuer tout raccordement MISE EN MARCHE DE L APPAREIL Pressez la touche POWER alimentation L affichage s allume Choisissez la fonct...

Page 25: ...ture touche de rembobinage touche d avance rapide touche d arr t jection touche pause 15 FENETRE D AFFICHAGE 16 BOUTON m moire horloge fonction r veil fonction sommeil 17 Bouton contr le CD STOP 18 BO...

Page 26: ...s avoir utilis l appareil pressez la touche POWER et l affichage s teint Les num ros affich s correspondent la dur e la fr quence choisie ou au DC Les num ros de DC ne sont affich s que s il s agit d...

Page 27: ...e VOLUME CROISSANT D CROISSANT pour r gler le son AMPLIFICATION DES GRAVES X BASS Pressez la touche X BASS pour r gler les graves La fonction X BASS augmente les fr quences basses pour amplifier les g...

Page 28: ...CLOCKenmode pour r gler l heure 4 Pressez la touche POWER STANDBY pour mettre l appareil hors circuit r p tez les tapes pour le r glage de l heure en cours REMARQUE 1 Pressez la touche d arr t pour vo...

Page 29: ...enfonc e la touche SLEEP pour choisir la dur e de temps restant avant la mise hors circuit de l appareil L affichage change comme suit SLEEP 90 SLEEP 80 SLEEP 10 SLEEP 20 La minuterie d arr t diff r...

Page 30: ...e la recherche cesse automatiquement Cependant l appareil peut ne pas s arr ter sur une station dont le signal est faible Dans ce cas il faut chercher la station manuellement PR R GLAGE DE STATIONS S...

Page 31: ...gl R CEPTION D UNE MISSION FM ST R O R glez le s lecteur de mode FM STEREO Lorsque l mission FM st r o est capt e l indicateur FM STEREO s allume SI LE SIGNAL DE L MISSION FM ST R O EST FAIBLE R glez...

Page 32: ...ressez l une ou l autre des touches SAUT pour choisir la plage d sir e Le symbole du disque choisi clignote 7 Pressez la touche LECTURE PAUSE pour com mencer la lecture 8 Pour cesser la lecture a pres...

Page 33: ...e jusqu au disque suivant La lecture de la premi re plage du disque suivant s effectue normalement donc pour continuer le balayage rel chez et pressez la touche de recherche COMMENT REP RER UN ENDROIT...

Page 34: ...toutes les plages 48 plages maximum des disques dans le tiroir et choisit la lecture de chaque plage au hasard 2 Le lecteur change une nouvelle plage choisie au hasard et en commence la lecture si la...

Page 35: ...re de la plage en cours sera r p t e de fa on continue jusqu ce que vous pressiez la touche d arr t Vous pouvez utiliser les fonctions de SAUT et RECHERCHE durant la r p tition de lecture La touche de...

Page 36: ...e programme 2 Lorsque le programme est en marche les touches de saut ne fonctionnent que pour les plages choisies 3 Lorsque le programme est en marche il n est pas possible d effectuer la lecture r p...

Page 37: ...e indique alors le renseignement sur le disque en cours ARR T ET ANNULATION DE LA LECTURE PROGRAMM E ou Ouvrez le tiroir des disques en pressant la touche OPEN CLOSE Arr t momentan de la lecture progr...

Page 38: ...FWD avance rapide Pressez la touche STOP EJECT pour cesser l enroulement l endroit d sir EN FIN DE BANDE En mode d enroulement rapide ou de lecture normale la cassette s arr te automatiquement en fin...

Page 39: ...tes normales type I pour l enregistrement et la lecture 4 Pressez la touche de PAUSE 5 Pressez la touche D ENREGISTREMENT qui d clenche aussi la touche de LECTURE 2 Introduisez une cassette enregistr...

Page 40: ...on durant la lecture d un DC FONCTIONNEMENT DU MAGN TOCASSETTE Impossible d effectuer un enregistrement Enregistrement ou lecture sont impossibles ou diminution du niveau sonore GUIDE DE D PANNAGE CAU...

Page 41: ...conducteur au laser Longueur d onde du faisceau 790 nm MAGN TOCASSETTE Format de piste 4 pistes 2 canaux R ponse de fr quences Cassette normale 80 10 000 Hz Rapport signal bruit 40 dB cassette normal...

Page 42: ...S1 MINI HI FI SISTEMA DE 5 CD MANUAL DE INSTRUCCIONES...

Page 43: ...cionamiento apropiado y seguro SOBRE CONDENSACI N Cuando se encuentre en una habitaci n que est caliente y h meda se pueden condensar gotas de agua dentro del lector de CD Cuando se ha creado esta con...

Page 44: ...ma izquierda de los conectores del AUX IN Para escuchar el equipo conectado 1 Presione el bot n FUNCI N para seleccionar AUX 2 Ponga en marcha la fuente externa NOTA Si la fuente externa es un televis...

Page 45: ...troles casetera deck A Bot n de GRABACION Bot n PLAY Bot n REBOBINADO Bot n AVANCE RAPIDO Bot n de STOP EJECT Bot n PAUSA 15 Pantalla DISPLAY 16 Bot nes de MEMORY CLOCK TIMER SLEEP 17 Bot n de parada...

Page 46: ...ras el cable de alimentaci n est enchufado a la red el ctrica y la unidad se encuentre en la funci n de espera existir consumo de energ a y la pantalla solo mostrar el reloj Pulse el bot n POWER STAND...

Page 47: ...la derecha m s all de la posici n actual de los altavoces Cuando est escuchando el sonido en est reo presione el bot n STEREO WIDE para obtener un sonido m s din mico PARA ESCUCHAR INDIVIDUALMENTE Con...

Page 48: ...emporizador funcionar cuando la tecla TIMER sea presionada hasta que la palabra TIMER se ilumine en la pantalla Cancele el temporizador presionando la tecla hasta que la palabra TIMER desaparezca 3 Si...

Page 49: ...r en la pantalla NOTA SLEEP solo se puede ajustar en las funciones TUNER TAPE y AUX 2 Mantenga presionado el bot n SLEEP para seleccionar el tiempo a transcurrir para que se apague el aparato El indic...

Page 50: ...una estaci n almacenada directamente ingresando el n mero presintonizado 20 estaciones en la banda FM pueden ser prefijadas 20 estaciones en la banda MW AM pueden ser prefijadas 1 Presione el boton F...

Page 51: ...TUNER 2 Presione el bot n BAND para seleccionar una banda 3 Presione el bot n PRESET hasta el n mero presele ccionado SKIP HOUR SKIP MIN PRESET BAND PARA RECIBIR LA RADIODIFUSORA FM EN STEREO Situe el...

Page 52: ...en comprobar los discos 6 Presione el bot n DISC SKIP para seleccionar el disco deseado Presione cualquiera de los botones SKIP para seleccionar la pista deseada El s mbolo del disco seleccionado par...

Page 53: ...sonando no se interrumpir 2 Los botones SKIP s lo se podr n usar para cambiar de pista en el disco que se est escuchando Para elegir una pista en otro disco se deber pulsar el bot n DISC SKIP para ac...

Page 54: ...cada vez que se pulse el bot n SKIP mientras se est escuchando en la funci n azar Reproducci n al azar en situaci n de puesta en marcha Durante la funci n de marcha normal no se puede activar la funci...

Page 55: ...la pantalla Presionando los botones SKIP har que el CD comience a sonar a partir del nuevo punto seleccionado en el disco que est sonando Presionarelbot n DISCSKIP har queelCDcomience por la primera p...

Page 56: ...el bot n MEMORY CLOCK para guardar esa pista en la memoria 6 Para que comience a sonar presione el bot n PLAY PAUSE Notas 1 La misma pista puede ser programada m s de una vez en el mismo programa 2 C...

Page 57: ...es mientras se est en la programaci n Presione una vez el bot n STOP presione el bot n MEMORY CLOCK hasta que el indicador de pista muestre y repita los pasos 2 y 4 ver p gina S16 Para borrar todo el...

Page 58: ...o F FWD Presione STOP EJECT para detener la cinta a la altura deseada Cuando la cinta se termina Al adelantar o rebobinar la cinta o luego de la reproducci n del casete la cinta se detendr autom ticam...

Page 59: ...cambie la velocidad de copiado una vez que el proceso de copiado ya est en progreso Utilice s lo cintas normales tipo I para grabar GRABACI N A PARTIR DE LA RADIO DEL EQUIPO Nota A veces es posible r...

Page 60: ...la tapa del compartimento de las bater as 2 Introduzca dos bater as de tama o AAA o UM 4 CAMBIO DE BATER AS Cuando las bater as se debiliten la distancia a la que funciona el control remoto se acorta...

Page 61: ...escuchan los graves o aparentemente la situaci n f sica de los instrumentos es imprecisa Muchos ruidos o interferencias RECEPCION DE RADIO El indicador de FM est reo parpadea Muchos ruidos o interfer...

Page 62: ...longitud de ondas 790nm Secci n de la grabadora Formato de pistas 4 pistas 2 canales Frecuencia de respuesta Cinta normal 80 10 000 Hz Radio de se al de ruido 40 dB cinta normal Distorsi n y oscilaci...

Reviews: