background image

Summary of Contents for DT921C

Page 1: ...CORDLESS TELEPHONE 900MHz DIGITAL CALLER ID IMPORTANT REVIEW INSTRUCTIONS BEFORE OPERATION COM1 IUNICATIONS CORP...

Page 2: ...tery pack is installed in the base unit the AUDIOVOX DT 921c uses this battery pack to provide operational backup in case of power failure In this way you have access to all normal phone functions dur...

Page 3: ...miliar with the AUOIOVOX OT 921 c We strongly recommend you read the manual before using your phone I SPECIAL FEATURES 900 MHz Operation Fully Digital Link between Handset and Base with ADPCM voice co...

Page 4: ...there is no guarantee that interference will not occur in a particu lar installation If this equipment does cause harmful interference to radio or television reception which can be determined by turni...

Page 5: ...be given advance notice of the change to give you an opportunity to maintain uninter rupted service Notice The REN assigned to this device denotes the number of devices you may connect to the telephon...

Page 6: ...wed by the FCC This means your handset and base unit can communi cate only over a certain distance which will depend on the location of the base unit and handset weather and the construction and layou...

Page 7: ...Never spill liquid of any kind on the product 4 Do not use this product near water tor example near a bath tub kitchen sink or swimming pool 5 Do not place this product on an unstable cart stand or t...

Page 8: ...pilled into the product c Ifthe product has been exposed to rain or water D If the product does not operate normally by following the oper ating instructions Adjust only those controls that are covere...

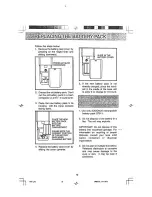
Page 9: ...ndicator will light to show the handset is seated properly and the battery pack is charging It is recommended that the battery pack be charged for at least 16 hours initially and 8 hours for maintenan...

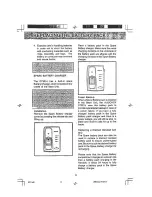
Page 10: ...own 1 Use only AUDIOVOX rechargeable battery pack BT911 2 Do not dispose of the battery in a fire The cell may explode I PLACE THE NEW BATTERY PACK INTO THE P BATTERY I COMPARTMENT PLEASE NOTE THE COR...

Page 11: ...attery pack to provide operational backup in case of a power failure If you have a fully charged battery pack in the Spare Battery pack charger and there is a power outage you will still be able to pl...

Page 12: ...is in the base unit The batteries must be charged for 16 hours before using your phone for the first time Ha dset Ringer The handset ringer is programmed ON as the factory default setting Refer to PR...

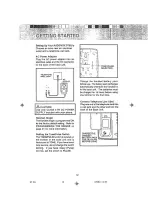
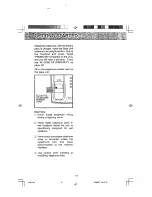
Page 13: ...et locations unless the jack is specifically designed for wet locations 3 Never touch uninsulated telephone wires or terminals unless the telephone line has been disconnected at the network interface...

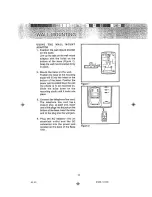
Page 14: ...osition the power cord to extend down the wall the phone is to be mounted on Slide the base down on the mounting studs until it locks into place Figure 1 0 0 0 3 Connect the telephone line cord The te...

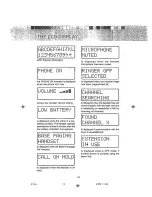
Page 15: ...set has lost communication with the base unit and is attempting to reestablish a link by scanning all channels I I is displayed when the unit is in a low battery condition The handset typically operat...

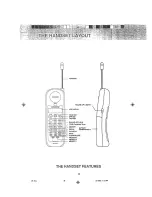
Page 16: ...P OOWN LCO OISPLAY HOLD KEY OFF KEY TALK KEY DIAUNG KEYS 0 9 TONE Temporary Tone MEMORY BATTERY REDIAL COMPARTMENT CALLER ID MUTE CLEAR DELETE PROGRAM MEMORY 2 MEMORY1 THE HANDSET FEATURES 16 16 5 15...

Page 17: ...13 O t 1 v I TONE PULSE SELECTOR AC POWER JACK PHONE CORD JACK THE BASE UNIT FEATURES 17 17 DT 921 5 15 98 11 13 AM...

Page 18: ...hear a dial tone dial the number SIORING MEMORY SPEED DIA L NUMBERS The phone should be OFF Enter the number you wish to store on the LCD up to a maximum of 20 digits OR Enter the number to be dialed...

Page 19: ...ter the memory location of the phone number you wish to dial 01 20 The number will be dis played on the LCD and will be dialed To exit press OFF 4 A Press the TALK key then REDIAL to automatically red...

Page 20: ...key This will dial the number that is displayed on the LCD after 2 seconds See ADVANCED DIALING on Page 22 If you make a mistake when dialing press OFF to hang up then press the TALK key to get the di...

Page 21: ...and or phone number of the second caller can be displayed on the LCD immediately after hearing the CALL WA For more details see JP1 CAl I E i ID tt 0 c Switching calls using FLASH To switch over to th...

Page 22: ...will show the ringer type selected for example Press PROG or OFF to exit CLR DEL Key F nctlon j l i The CLEAR and DELETE functions can be accessed separately depending on how long the key is held down...

Page 23: ...er manually using MEMORY MEM dialing CID dialing or REDIAL 2 Enter the number you wish to dial on the display first Then press the TALK key This will dial the number which is displayed on the LCD afte...

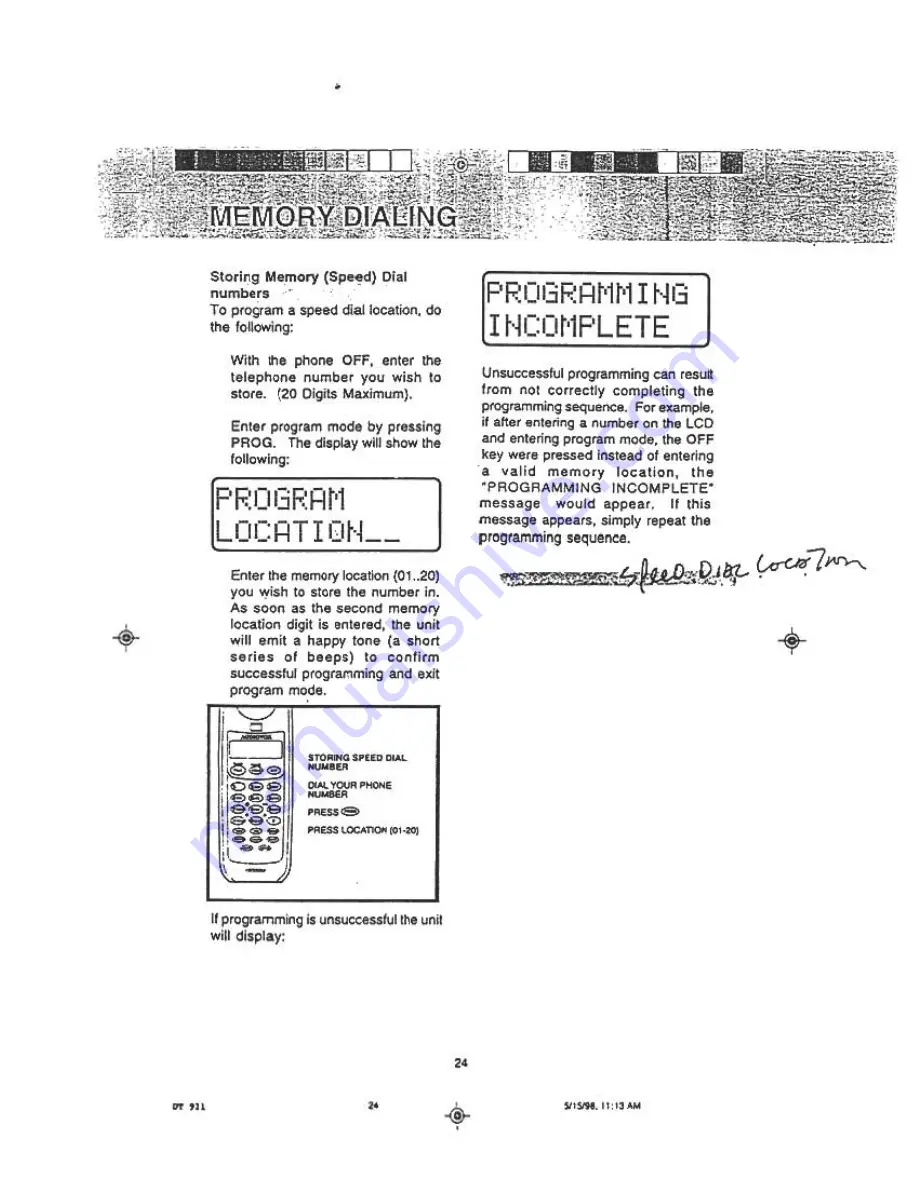
Page 24: ...e pressed instead of entering a valid memory location the PROGRAMMING INCOMPLETE message would appear If this message appears simply repeat the programming sequence Enter program mode by pressing PROG...

Page 25: ...al mode the contents of the speed dial memory will be ap pended to those digits For exam ple if 1503 was on the LCD and the contents of the memory loca tion is 6438981 then the display would show the...

Page 26: ...For longer pauses press HOLD two or more times Each press makes the pause 2 seconds longer and is treated as a stored digit If your phone is connected to a PBX you can store the PBX access number and...

Page 27: ...I Once the CID memory is full any new call forces a deletion of the oldest call record If you subscribe to numeric number only Caller ID service the calling party s phone number when available will b...

Page 28: ...e located the number you wish to dial simply press TALK key The last seven digits will be added to the numbers already in the LCD and the whole number shown below will be automatically dialed The occa...

Page 29: ...isplays the next higher in sequence call record The higher the call number the older the call There may be additional characters in the name which can not be shown on the current display Press the 9 k...

Page 30: ...EL wilJ canc el the v PrGssln g CLR DEL Wij the operation and the di r r then show 0 0 0 The older CIO I ecords willobe moved forward y one location ICIELET I t 13 RLL I RLLS I The message will remai...

Page 31: ...nitor each other to make sure that they can communicate If the handset is moved out of range the handset will make a series of beeps and will then display CHANNEL SERACHING on t he LCD At 15 second in...

Page 32: ...must be treated with care Avoid rough treatment Place the handset down gently Save the original packing materials to pro tect your telephone if you ever need to ship it Avoid water Your telephone can...

Page 33: ...Call your local telephone company I YOU HEAR OTHER CALLS WHILE USING YOUR PHONE 0 Disconnect your base unit from the telephone jack and plug in a regular telephone If you still hear other calls the p...

Page 34: ...andset 902 3 MHz to 905 0 MHz All ten channels within this range MEMORY Speed Dial 20 Memory locations 20 digits per location CID Alpha Numeric Display 50 Memory locations Base 925 05 MHz to 927 75MHz...

Page 35: ...r costs incurred for testing or checking or to any product or part hereof which has suffered through alteration serial number defacement improper Installation excessive temperature or humidIty environ...

Page 36: ...f The Ringer t 1 CLA DEL Key Function z z Advanced Dialing a 2 3 MEMORY DIALING a ZA Storing Speed Dial Numbers a l L Dialing From Memory S Changing Stored Numbers S Deleting Stored Numbers S Storing...

Page 37: ...5100 Audiovox Canada 405D Britannia Ad East Ste 101 Mississauga Ontario Canada L4Z3E6 905 712 9299 Audiovox Pacific Pty Ltd 110 Rocky Point Road Kogarah NSW 2217 Australia 02 9587 00 11 Audiovox Singa...

Reviews: