background image

E - 5

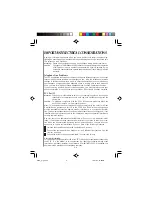
An applicable certification jacks Universal Service Order Codes (USOC) for the equipment is provided
(i.e., RJ11C) in the packaging with each piece of approved terminal equipment.

A plug and jack used to connect this equipment to the premises wiring and telephone network must
comply with the applicable FCC Part 68 rules and requirements adopted by the ACTA.  A compliant
telephone cord and modular plug is provided with this product.  It is designed to be connected to a
compatible modular jack that is also compliant.  See installation instructions for details.

The REN is used to determine the number of devices that may be connected to a telephone line.  Excessive
RENs on a telephone line may result in the devices not ringing in response to an incoming call.  In most
but not all areas, the sum of RENs should not exceed five (5.0).  To be certain of the number of devices that
may be connected to a line, as determined by the total RENs, contact the local telephone company. [For
products approved after July 23, 2001, the REN for this product is part of the product identifier that has the
format US:3W4WI03BTL9035.  The digits represented by ## are the REN without a decimal point (e.g.,
03 is a REN of 0.3).  For earlier products, the REN is separately shown on the label.

If this equipment Model TL9038 causes harm to the telephone network, the telephone company will notify
you in advance that temporary discontinuance of service may be required.  But if advance notice isn’t
practical, the telephone company will notify the customer as soon as possible.  Also, you will be advised
of your right to file a complaint with the FCC if you believe it is necessary.

The telephone company may make changes in its facilities, equipment, operations or procedures that
could affect the operation of the equipment.  If this happens the telephone company will provide advance
notice in order for you to make necessary modifications to maintain uninterrupted service.

Please follow instructions for repairing if any (e.g. battery replacement section); otherwise do not alter-
nate or repair any parts of device except specified.

Connection to party line service is subject to state tariffs.  Contact the state public utility commission,
public service commission or corporation commission for information.

The equipment is hearing aid compatible.

NOTICE: If your home has specially wired alarm equipment connected to the telephone line, ensure the
installation of this [equipment ID] does not disable your alarm equipment.  If you have questions about
what will disable alarm equipment, consult your telephone company or a qualified installer.

Should you experience trouble with this equipment, please contact (Audiovox Electronics Corporation,
150 Marcus Blvd. Hauppauge, New York 11788.  Phone: 1-800-252-6123) for repair or warranty infor-
mation.  If the equipment is causing harm to the telephone network, the telephone company may request
that you disconnect the equipment until the problem is resolved.

NOTICE: According to telephone company reports, AC electrical surges, typically resulting from light-
ning strikes, are very destructive to telephone equipment connected to AC power sources.  To minimize
damage from these types of surges, a surge arrestor is recommended.

Applicable for Coin or Pay Phone Only

To comply with state tariffs, the telephone company must be given notification prior to connection for
customer-owned coin or credit card phone.  In some states, the state public utility commission, public
service commission or corporation commission must give prior approval of connection.

IMPORTANT ELECTRICAL CONSIDERATIONS

9038_2_ib_e.p65

10/31/03, 12:20 PM

5

Summary of Contents for Dual Handset Cordless Phone

Page 1: ...ual Handset Cordless Phone T l phone num rique sans fil 2 4GHz identification de l appelant et haut parleur Tel fono inal mbrico con dos auriculares y espectro digital de 2 4GHz OWNER S MANUAL MANUEL...

Page 2: ...ase section Accessories Icon explanations USING THE MENU SYSTEM 11 TELEPHONE OPERATION 12 13 Answering an incoming call Making a call Transferring an external call MEMORY OPERATION 14 15 Adding a new...

Page 3: ...uct should be operated only from the type of power source indicated on the marking label If you are not sure of the type of power supply to your home consult your dealer or local power company 8 Do no...

Page 4: ...duct only in accordance with the instructions and limitations specified in the instruction manual provided for this product 6 Observe proper polarity orientation between the battery pack and battery c...

Page 5: ...ment Caution To maintain compliance with the FCC s RF exposure guidelines place the base unit at least 20 cm from nearby persons Note This equipment has been tested and found to comply with the limits...

Page 6: ...ent operations or procedures that could affect the operation of the equipment If this happens the telephone company will provide advance notice in order for you to make necessary modifications to main...

Page 7: ...r Any repairs or alternations made by the user to this equipment or equipment malfunctions may give the telecommunications company cause to request the user to disconnect the equipment Users should en...

Page 8: ...rds 20 digits 7 level Adjustable Receiver Volume 7 level Adjustable Ringer Volume 10 Ringer melody selection Name to number matching Real time clock function Call timer display Alarm clock function Ho...

Page 9: ...batteries at full charge you can leave the handset in the base unit at all times for safe trickle charging During charge the charge LED will be on and battery icons will be FLASHING PLACINGTHE BATTER...

Page 10: ...er TV microwave ovens wireless equipment or another cordless phone In a HIGH and CENTRAL location with no obstructions barriers For maximum reception noise free during use the phone keeping handset as...

Page 11: ...USE CHARGER LED 18 LINE CORD MODULAR JACK 19 ADAPTOR SOCKET ACCESSORIES 20 MAIN ADAPTOR 21 CHARGER ADAPTOR 22 LINE CORD 23 BATTERY PACK ICON EXPLANATIONS RECEIVED SIGNAL STRENGTH INDICATOR RSSI On whe...

Page 12: ...ered into the menu structure and decides not to complete the operation that has been selected then there are two mechanisms that allow the user to recover 1 Pressing and holding the NO 5 key during a...

Page 13: ...he phone has no way of sensing that the dialing of the number is finished Therefore the display will revert to showing the elapsed call duration after a 5 second timeout Pre dialing Here the user ente...

Page 14: ...external call is described here Transferring to another registered handset If the user needs to transfer an outgoing or incoming call to another handset registered to the same base station this is don...

Page 15: ...on until a key is pressed then stays there until no key is pressed for 3 seconds at which point it moves on to the next letter position The user can correct entries using the 5 6 key Pauses in the dia...

Page 16: ...honebook mode by pressing scroll keys 5 6 6 and YES 3 Then select DELETE by pressing scroll keys 5 6 6 and YES 3 Press scroll keys 5 6 6 to select the memory to be deleted from the Phonebook Press YES...

Page 17: ...ETHE CALL RECORDTO PHONE BOOK Press scroll keys 5 6 6 to select CLI RECORD then YES 3 to confirm Press scroll keys 5 6 6 to select STORE PBK then YES 3 Press scroll keys 5 6 6 to select the record to...

Page 18: ...s YES 3 again to execute the deletion CALLER ID WITH CALLWAITING During phone conversation when there is incoming call from a third party you will hear beep tone from the handset receiver and the disp...

Page 19: ...ll Press scroll keys 5 6 6 to select RINGER and press YES 3 to confirm Press scroll keys 5 6 6 to select EXTERNAL and press YES 3 to confirm Press scroll keys 5 6 6 to select RING NUMBER and press YES...

Page 20: ...ress YES 3 to confirm Press scroll keys 5 6 6 to select TONE OFF and press YES 3 to disable the key tone To enable the key tone Press scroll keys 5 6 6 to select KEYPAD and press YES 3 to confirm KEY...

Page 21: ...TING Press scroll keys 5 6 6 to select CLOCK and press YES 3 to confirm Press scroll keys 5 6 6 to select SET ALARM and press YES 3 to confirm TIME hh mm is displayed key in the desired alarm time in...

Page 22: ...should be set to W T ID2 so on for the additiont of more handsets By short cut key For Twins Handsets version only Press and hold key for 1 second in standby mode DISABLE WALKIE TALKIE MODE BACKTO PH...

Page 23: ...Walkie Talkie function In standby mode handset s battery will be consumed very soon IF its base is not available Therefore you are recommended that Unplug batteries from your handsets before taking t...

Page 24: ...ect ADVANCED then press YES 3 to confirm Press scroll keys 5 6 6 again to select AUTO ANS then press YES 3 to confirm Press scroll keys 5 6 6 to select either AUTO ON or AUTO OFF then press YES 3 to c...

Page 25: ...battery is correctly connected fully charged up 10 hours before use Ensure telephone line is plugged firmly into base unit telephone wall jack Make sure your telephone line is operating normally by u...

Page 26: ...XTENT OF THE COMPANY SLIABILITYUNDERTHISWARRANTYISLIMITEDTOTHEREPAIRORREPLACEMENTPROVIDEDABOVEAND INNOEVENT SHALL THE COMPANY S LIABILITY EXCEEDTHE PURCHASE PRICE PAID BY PURCHASER FORTHE PRODUCT The...

Reviews: