8
HR7012 ReaR Seat Video HeadReSt SyStem
owner’s manual
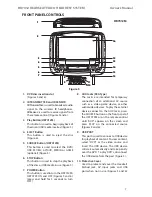
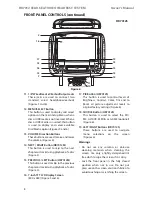
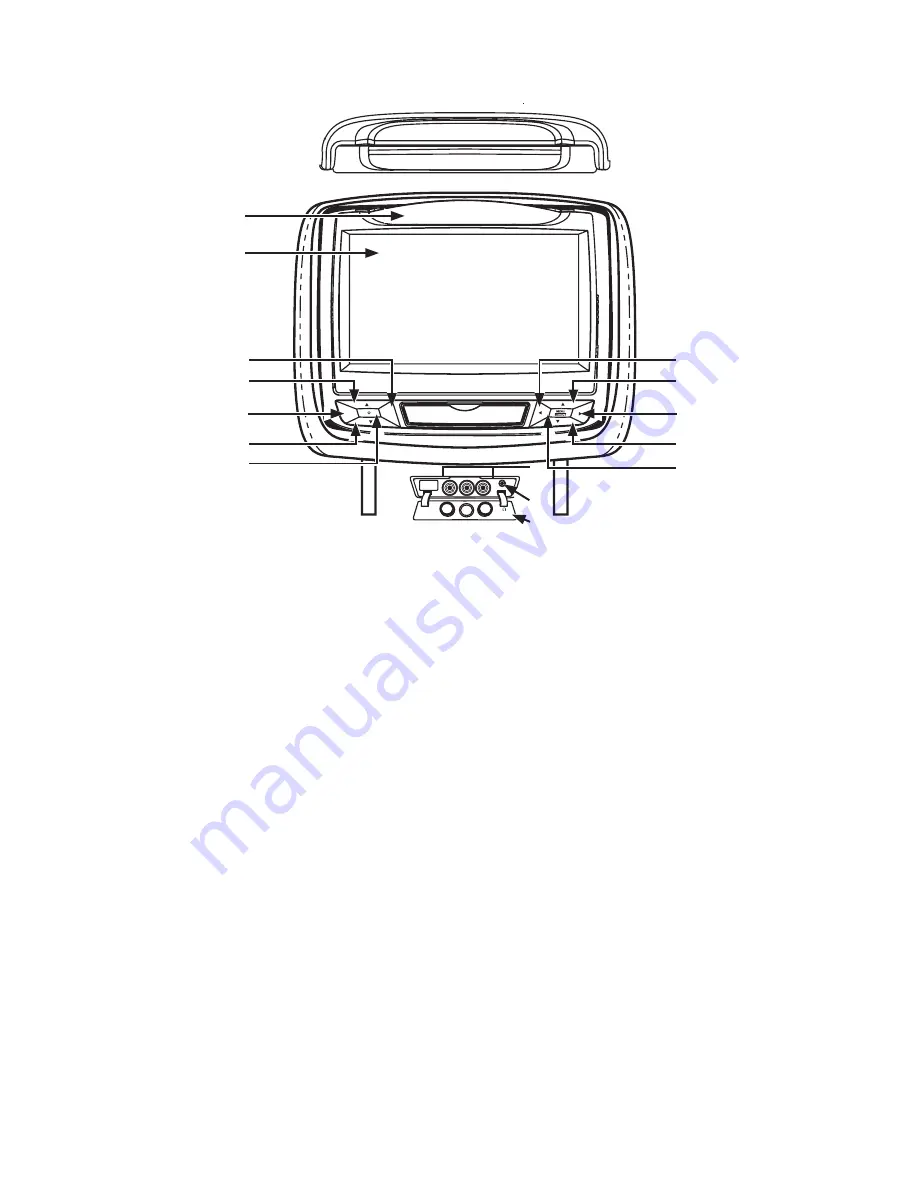
11. 1/8”Wired Headset/earbud Output jacks
These jacks are used to connect two
standard wired headphones/earbuds
(Figures 5 and 6)�
12. meNU/SeLeCT Button
This button is used to display and select
options on the main Setup Menu when a
disc or USB media is not inserted� When a
disc or USB media is inserted, this button
is used to display and select available
Disc/Media option (Figures 5 and 6)�
13. VOLUme Direction Buttons
These buttons are used to raise and lower
the volume� (Figures 6)�
14. NeXT / RIGHT Button (HR7012m)
This button is used to skip to the next
chapter or track during playback of a disc
(Figure 5)�
15. PReVIOUS / LeFT Button (HR7012m)
This button is used to skip to the previous
chapter or track during playback of a disc
(Figure 5)�
16. 7-inch TFT LCD Display Screen
(800 x 480) (Figure 5 and 6)�
17. PIX Button (HR7012S)
This button is used to control levels of
Brightness, Contrast, Color, Tint and to
Reset all picture adjustment levels to
original factory settings (Figure 6)
18. SOURCe Button (HR7012S)
This button is used to select the M1/
M2, AV/AUX, MEDIA or GAME (optional)
(Figure 6)�
19. LeFT/RIGHT Buttons (HR7012S)
These buttons are used to navigate
menu selections on the screen
(Figures 6)�
Warnings
• Do not use any solvents or abrasive
cleaning materials when cleaning the
screen� Use only a lightly dampened lint
free cloth to wipe the screen if it is dirty�
• Lock the front panel in the fully closed
position when not in use� Do not put
pressure on the screen, caution children to
avoid touching or scratching the screen��
fRont Panel ContRolS (continued)
HR7012S
figure 6
S
P
AUDIO
R
VEDIO
AUDIO
L
8
13
2
10
11
19
19
13
12
7
17
13
18
16
13


