4
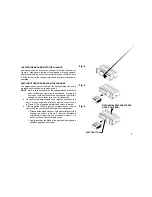
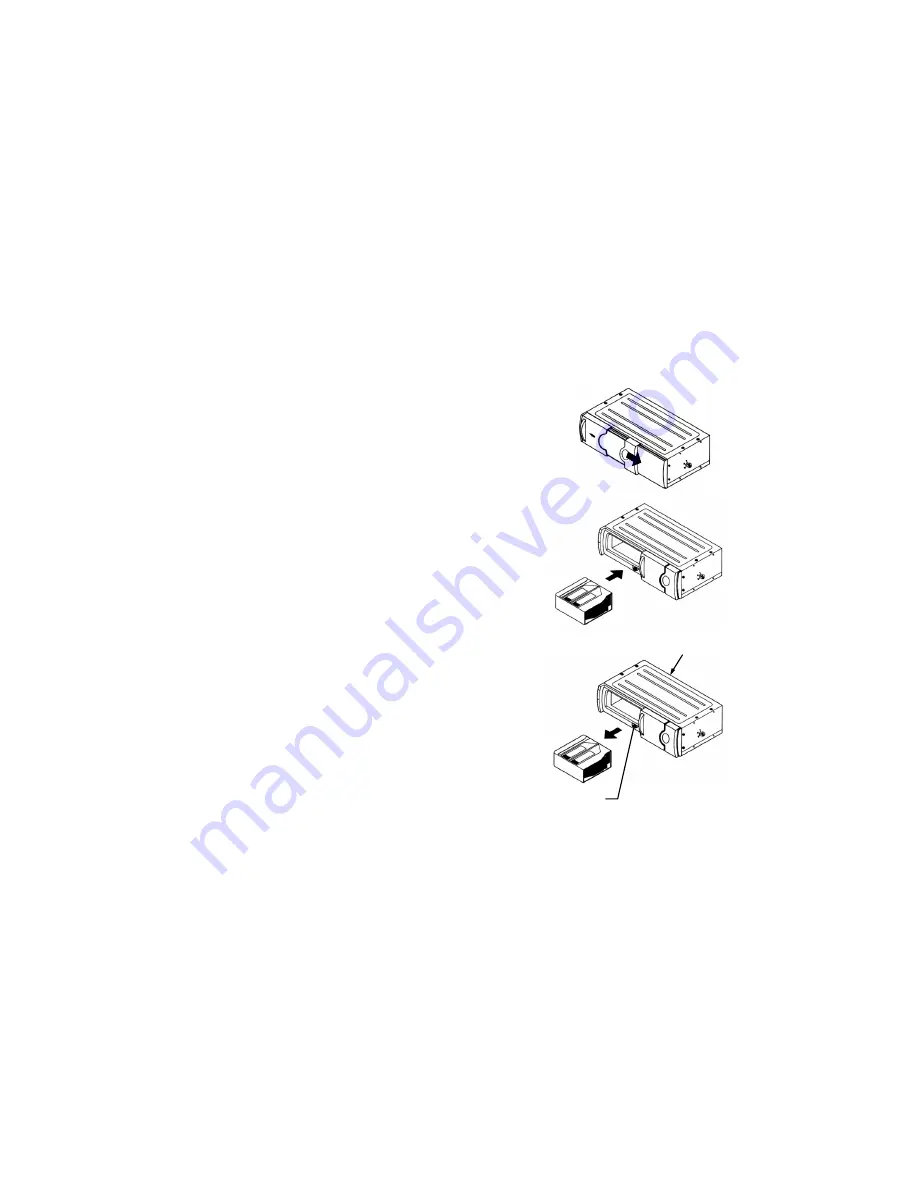
Fig. 6
Fig. 5
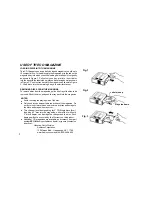
Fig. 4
LOADING THE MAGAZINE INTO THE CHANGER
Completely slide the door on the changer to the right as shown in
Figure 4. Making sure the top of the magazine is facing upward,
gently insert it into the unit until it clicks into place, as shown in Figure
5. Slide the door of the changer fully closed and the unit is ready for
operation.
REMOVING THE MAGAZINE FROM THE CHANGER
The magazine can be removed from the changer using one of two
methods as outlined below in steps a and b.
NOTE: Be sure to keep the door on the changer closed at all times
when not loading or removing the magazine. Leaving the
door open could allow dust, dirt and moisture to enter the
changer which could cause the unit to malfunction.
a. During normal operation with power applied, slide open the
door on the changer and press the eject button as shown
in Figure 6. The magazine will eject and can be removed.
b. If the magazine will not eject in a normal manner, remove
power by disconnecting the DIN cable from the changer.
1. Slide open the magazine door. At the lower left rear of the
changer, as shown in Figure 6, insert a thin-bladed
screwdriver straight into the access hole about 1-1/2
inches until it contacts the release tab.
2. Lightly leverage the blade to the right and the magazine
will disengage and be ejected.
MECHANICAL RELEASE ACCESS
HOLE (LEFT REAR)
EJECT BUTTON


