76
USER'S MANUAL
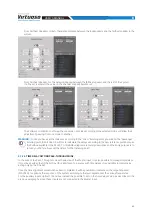
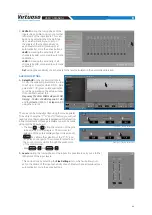
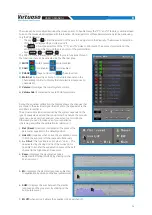
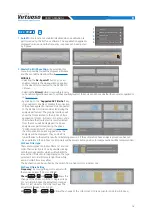
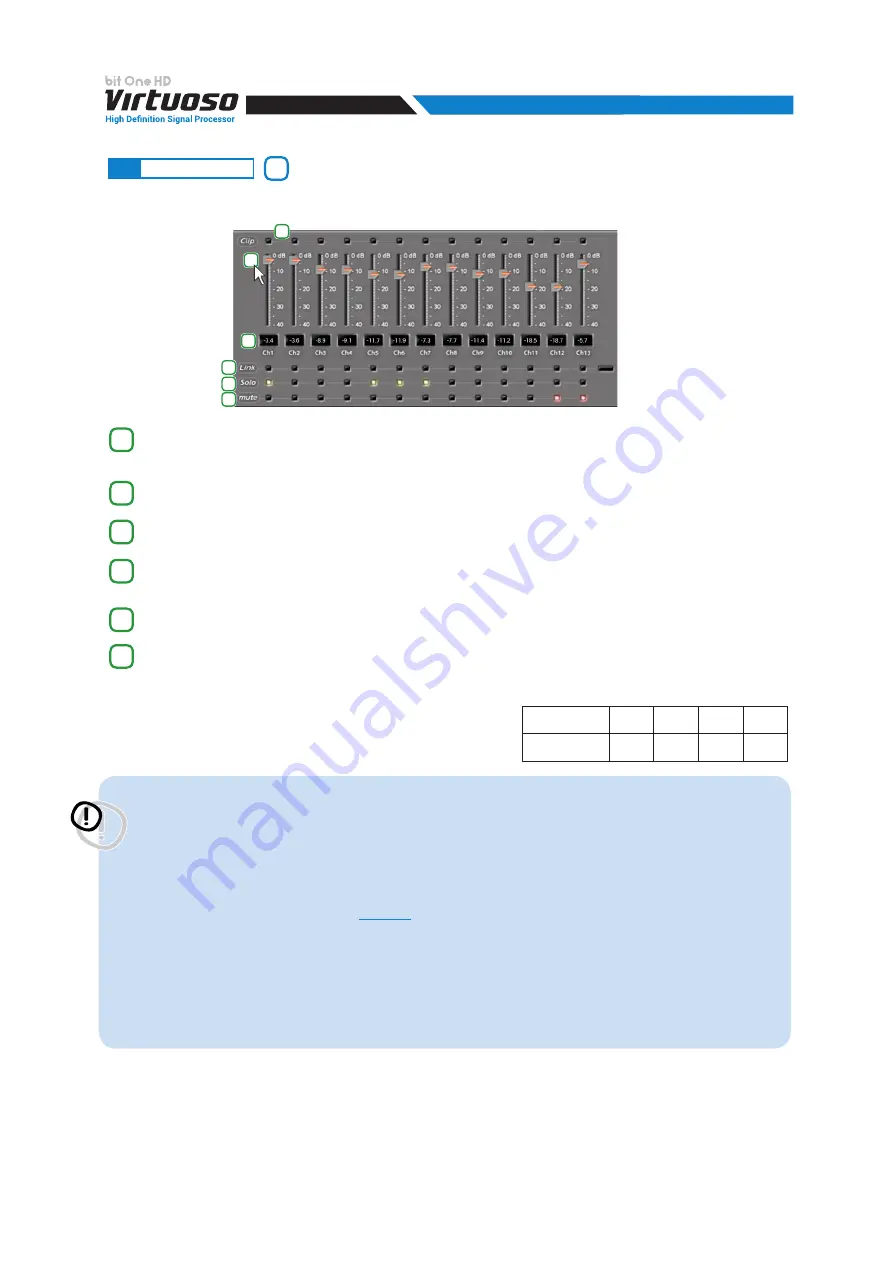
When “
Clip
“ lights up in red, it means clipping is occurring on the output channel. When this occurs, you will
just have to decrease the output level of the corresponding channel or decrease the equalization previously
set up. If the “
Limiter
” function has been applied to the clip the led light will be orange
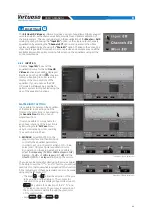
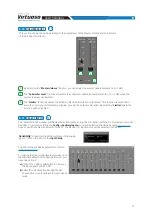
By acting on one of the sliders belonging to the output channels, the output level (- 40 ÷ 0 dB) for each
channel can be adjusted.
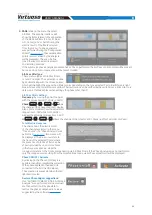
This area of the screen shows the output level of each single channel (- 40 ÷ 0 dB), compared to the slider
position of the output channels.
By selecting “
Link
”, all the bit One HD Virtuoso output levels can be adjusted simultaneously. By selecting
“
Link
” again the function will be disabled
By selecting “
Solo
” the output levels will be muted except the active one. By selecting “
Solo
” again this
function will be disabled.
The selection of the “
Mute
” button provides the ability to mute the corresponding output channels. By
selecting “
Mute
” again, the mute function will be disabled
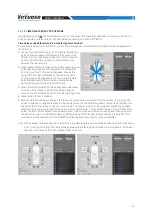
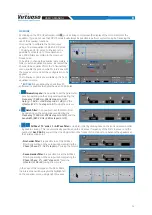
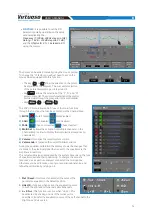
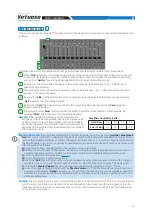
This section shows the settings of the output levels of the bit One HD Virtuoso active channels as displayed by the
software.
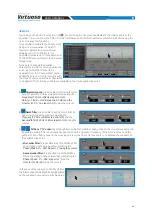
Following please note the description of each of the functions marked with numbers in the image above.
1
2
3
4
5
6
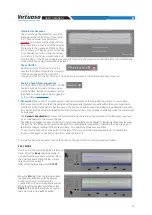
Important Remark:
the output level adjustment (2) affects the system signal / noise ratio
(whistle / background
hiss)
. We recommend that you always set the bit One output at high level and the amplifiers’ sensitivity at low
level, so the amplifiers will be less sensitive to background noises/hisses. An excessive output level causes the
clipping led lights to turn on (1), especially if equalizations with high gain are applied. Therefore we recommend
that you proceed as follows:
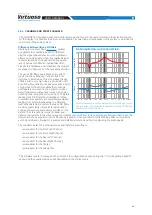
Remark:
if the installation includes a mono Subwoofer, the
sensitivity of its dedicated amplifier needs to be increased by
+3 dB compared to rest of the amplifiers (see the “Amplifiers
Sensitivity” diagram). This empirical method considers many
aspects and will provide an improved adjustment capability of
the “Subwoofer Level.
a)
Adjust the amplifiers sensitivity level to the minimum value (3-4V RMS).
b)
Balance the emission level of the system channels by moving the sliders (2) paying attention to maintain a
centered mid level at around -20 dB. Turn the output volume to an acceptable listening volume level.
c)
Set the desired output equalizations
.
d)
Insert a CD playing a highly dynamic track.
e)
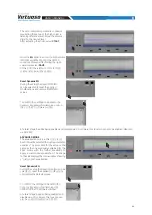
Select the “
Link
” function (5), move the slider and increase the output channels level until one of the “clipping”
led lights turns on (1); move the slider back of at least 2-3 dB (check the value on one of the displays (3)).
f)
Increase the “
Master Volume
” (6) up to the maximum undistorted level taking it close to “0” dB.
g)
In case the signal is highly distorted with the “
Master Volume
” at “0” dB, the output levels (2) will need to be
decreased or enable the “
Limiter
” function. If, on the contrary, no distortion occurs, the amplifiers’ sensitivity
will have to be increased until the first distortion symptoms appear: by doing this, you will make the most of
all the available power.
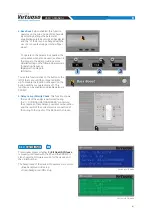
Amplifiers Sensitivity (Volts)
Front/Rear
1.0
2.0
3.0
4.0
Sub (+3 dB)
0.7
1.4
2.1
2.8
Remark:
this procedure leads the user to calibrate the system at “zero dB undistorted”. This is not always the best
solution, since, if you listen to a track that has been recorded at a lower level or with lower dynamics than the
track used for the setup, a loss in dynamics may occur. So a good compromise needs to be found, depending
on the listener preferences.
9
1
6
2
3
4
5
8.9
OUTPUT LEVEL
8

