background image

Preparation

42

COMfortel 3500 - Firmware Version 1.2B - Commissioning Instructions 02 07/12

This section describes the preparations required before commissioning the device. This
includes the setting of the height and the connecting of the key extension modules (not
included in the package) as well as the receiver and/or headset (not included in the package).
Furthermore, this includes installing the telephone in a suitable location.

Assembling the Feet of the Casing and Adjusting the Height of 
the Telephone

Requirements

– Telephone and key extension modules separated from each other

– The feet of the casing delivered with the telephone and the key extension

modules

Steps to Take

1.

If required, remove the feet of the casing from the telephone and key exten-
sion modules.

2.

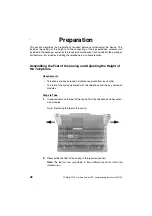
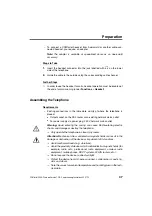
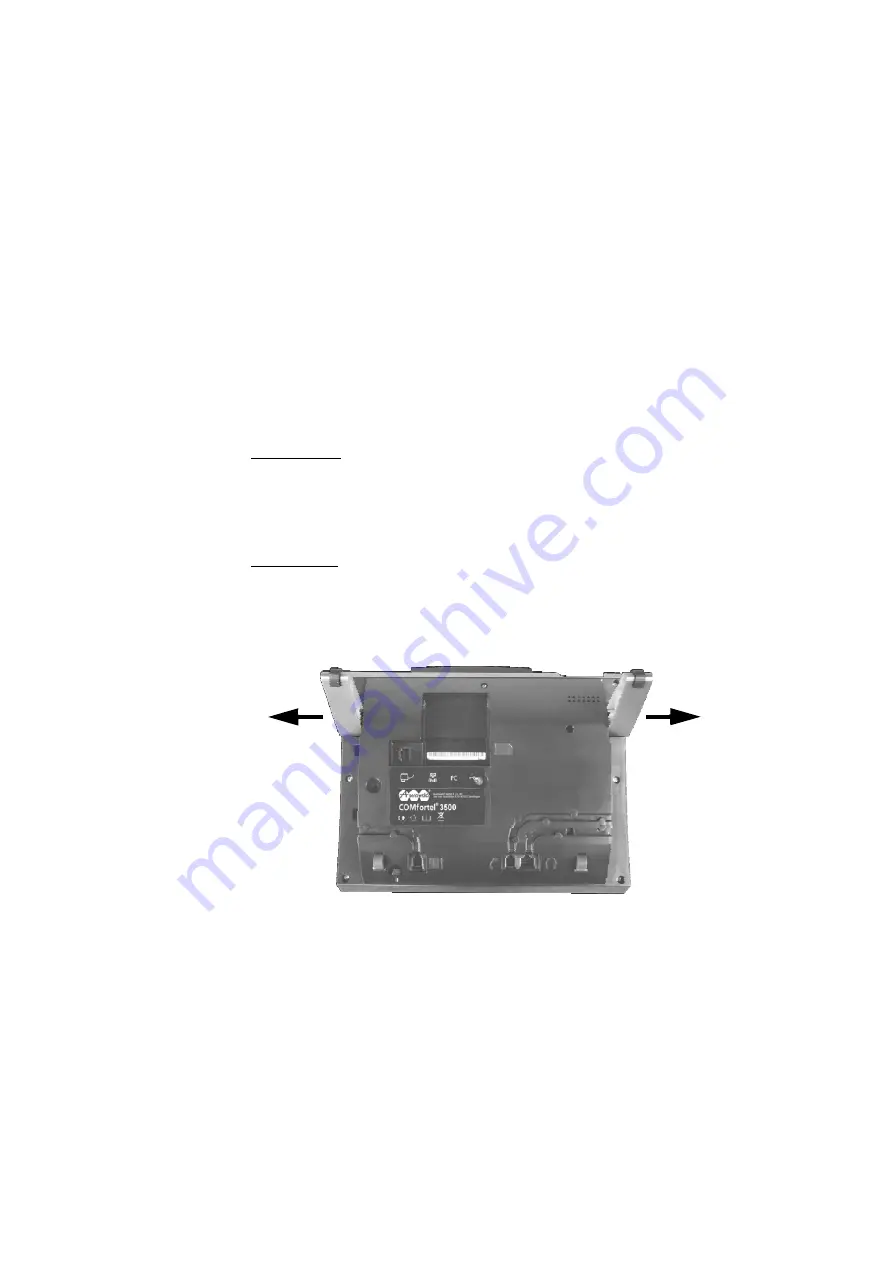
Reassemble the feet of the casing in the required position.

Note: The feet can be assembled in three different positions within the
marked area.

Preparation

Fig. 6: Removing the feet of the casing

Summary of Contents for COMfortel 3500

Page 1: ...Inbetriebnahmeanleitung Commissioning Instructions VoIP Systemtelefon und Standard VoIP Telefon VoIP System Telephone and Standard VoIP Telephone COMfortel 3500...

Page 2: ......

Page 3: ...terungsmodule montieren und anschlie en 14 Steckernetzteil e anschlie en 15 H rer anschlie en 17 Headset anschlie en 17 Telefon aufstellen 18 Inbetriebnahme 20 Telefon in Betrieb nehmen 20 Netzwerkein...

Page 4: ...d Connecting the Key Extension Modules 43 Connecting the Power Supply Plug s 44 Connecting the Receiver 46 Connecting the Headset 46 Assembling the Telephone 47 Commissioning 49 Commissioning the Tele...

Page 5: ...der Stromversorgung aus bevor Sie das Steckernetzteil ziehen Beachten Sie beim Umgang mit 230 V Netzspannung und mit am Netz betriebenen Ger ten die einschl gigen Vorschriften Warnung In das Geh use...

Page 6: ...t beschr nktem Zugang Ein Ort mit beschr nktem Zugang ist nur mit Hilfe eines spezi ellen Werkzeugs Schloss und Schl ssels oder anderen Sicherheitsein richtungen zug nglich Au erdem sind die Personen...

Page 7: ...m gliche Anwendungsfehler und Umst nde hin die z B zu Funkti onseinschr nkungen oder St rungen im Betrieb f hren k nnten Hinweis Kennzeichnet erg nzende Hinweise Bestimmungsgem e Verwendung Wichtig P...

Page 8: ...chlossenen trocke nen R umen vorgesehen Das Telefon verf gt ber einen Touchscreen Die Bedienung erfolgt auf Basis des Betriebssystems Android 2 3 Alternativ kann das Telefon ber Tasten bedient werden...

Page 9: ...orgung ber Steckernetzteil 230 V 10 50 60 Hz 170 mA oder ber Ethernet Port mittels PoE gem IEEE 802 3af Steckernetzteil Typ Nr FW7577 EU 40 Leistungsaufnahme Netz Min 4 W max 14 W ohne Tastenerweiteru...

Page 10: ...der mehr Tastenerweiterungsmodulen werden entweder zwei Steckernetzteile oder Power over Ethernet und ein Steckernetzteil ben tigt Wichtig Bei der Stromversorgung ber Power over Ethernet darf der Br c...

Page 11: ...orgung abnehmen senden Sie das Ger t an uns zur ck Unfreie Sendungen k nnen wir leider nicht annehmen COMmander Business 19 64 COMmander 6000 R 64 112 COMmander 6000RX 112 Mit Over Commitment mehr Tei...

Page 12: ...hmigung gestattet Zuwiderhandlung verpflichtet zu Schadenersatz Alle Rechte vorbehalten Auerswald GmbH Co KG 38162 Cremlingen 2012 Bluetooth ist eine eingetragene Marke von Bluetooth SIG Inc Android i...

Page 13: ...es Telefons an einem geeigneten Aufstellungsort Geh usef e aufstecken und damit H he des Telefons einstellen Voraussetzungen Telefon und Tastenerweiterungsmodule voneinander getrennt Die dem Telefon u...

Page 14: ...Sie Telefon und Tastenerweiterungsmodule um so dass Sie die Unterseite vor sich haben 3 Stecken Sie den schmaleren Stecker RJ 10 des Verbindungskabels in die mit gekennzeichnete Buchse auf der Unters...

Page 15: ...fon allein kann entweder ber das mitgelieferte Steckernetzteil oder wenn Ihre aktive Netzwerkkompo nente Switch oder Router dies unterst tzt ber Power over Ethernet PoE versorgt werden Das Telefon mit...

Page 16: ...ur f r Betrieb ohne Power over Ethernet Stecken Sie den RJ 45 Stecker des Steckernetzteils in die mit gekennzeichnete Buchse auf der Unter seite des Telefons Warten Sie mit der Verbindung zur 230 V Ne...

Page 17: ...de des Spiralka bels in die mit gekennzeichnete Buchse auf der Unterseite des Telefons 2 F hren Sie das Kabel ber den zugeh rigen Kabelkanal nach au en siehe Abb 4 3 Stecken Sie den anderen RJ 10 Stec...

Page 18: ...rieb im Anschluss an die Inbetriebnahme eingeschaltet werden unter Funktionen Headset Telefon aufstellen Voraussetzungen In unmittelbarer N he des Aufstellungsorts vorhandene Anschl sse Ausgangsbuchse...

Page 19: ...echnischen Daten angegebenen Werte f r Umgebungstemperatur und Luftfeuchtigkeit Durchzuf hrende Schritte 1 Stellen Sie das Telefon auf eine saubere und ebene Fl che Achtung Manche in M beln vorhandene...

Page 20: ...Power over Ethernet In der mit gekennzeichneten Buchse auf der Unterseite des Telefons steckender Br ckenstecker F r Betrieb mit Steckernetzteil en Am Telefon angeschlossene s Ste ckernetzteil e F r...

Page 21: ...atisch von diesem DHCP Server Das Telefon sucht eine Auerswald TK Anlage im Netzwerk Der Einrichtungsassistent startet automatisch Der Dialog zur Auswahl der Sprache wird ge ffnet nur beim ersten Star...

Page 22: ...es Provisioning Servers und den Namen der Provisioning Datei Anschlie end startet das Telefon betriebsbereit mit der Startseite Startet das Telefon stattdessen mit dem Einrichtungsassistenten k nnen S...

Page 23: ...Taste um den Einrichtungsassistenten zu verlas sen Weitere Schritte Richten Sie das Telefon nach Ihren Bed rfnissen ein Sie k nnen die Ein richtung sowohl displaygef hrt am Telefon selbst siehe Bedien...

Page 24: ...as Telefon ein 11 Tippen Sie auf OK 12 Tippen Sie auf DNS Server 1 13 Geben Sie einen DNS Server f r das Telefon ein 14 Tippen Sie auf OK 15 Dr cken Sie die Home Taste um zur Startseite zu gelangen Im...

Page 25: ...asswort 5 Geben Sie im Eingabefeld Passwort das zur internen Rufnummer ge h rige Passwort ein 6 Tippen Sie auf OK 7 W hlen Sie im Listenfeld die Landeskennung f r den Standort des Telefons aus 8 Tippe...

Page 26: ...ie Anwendung Einstellungen Anwendung ausw hlen Einstellungen oder Manuell einrichten aus dem Einrichtungsassistent 2 Tippen Sie auf Anbieter TK Anlagen 3 Tippen Sie auf Anbieter TK Anlage erstellen 4...

Page 27: ...auf OK 23 Tippen Sie auf Rufnummern 24 Tippen Sie auf Neue Rufnummer 25 Tippen Sie auf das Eingabefeld Rufnummer 26 Geben Sie im Eingabefeld Rufnummer die zuvor in der TK Anlage einge richtete interne...

Page 28: ...der Zur ck Taste blenden Sie die Android Tastatur wieder aus 4 Tippen Sie auf das Eingabefeld Authentifizierungs ID 5 Geben Sie im Eingabefeld Authentifizierungs ID die vom VoIP Anbieter zur Verf gung...

Page 29: ...xy siehe Bedienungs und Konfigurationsanleitung des Telefons Telefon an einen PC anschlie en Voraussetzungen Ein PC mit den folgenden Merkmalen Intel Pentium 1 GHz oder kompatiblem Prozessor Windows X...

Page 30: ...tehende Netzwerkverbindung zwischen dem PC und dem Telefon Kenntnis der IP Adresse des Telefons abfragbar unter Anwendung aus w hlen Einstellungen Netzwerk F r Betrieb als Systemtelefon Kenntnis des A...

Page 31: ...TK Anlage Bei Betrieb als Standard VoIP Telefon den Benutzernamen und das Benutzer Passwort des Telefons 4 Klicken Sie auf OK Der Konfigurationsmanager wird ge ffnet 5 Nehmen Sie nacheinander Seite f...

Page 32: ...en USB Speicherstick in die mit gekennzeichnete Buchse auf der Unterseite des Telefons 2 Tippen Sie nacheinander auf Anwendung ausw hlen Einstellungen Update Provisioning Hat das Telefon eine passende...

Page 33: ...it der matten Oberfl che nach oben wieder ein Telefon reinigen Durchzuf hrende Schritte 1 Reinigen Sie das Geh use mit einem leicht feuchten Tuch oder verwenden Sie ein Antistatiktuch 2 Reinigen Sie d...

Page 34: ...t the power plug When handling 230 V system voltage and devices attached to the mains supply be sure to adhere to the applicable regulations Warning Liquid entering the casing can cause life threateni...

Page 35: ...hearing damage or interfere with the voice connection Only used admitted accessories with the CE symbol in combination with this telephone Warning The telephone receiver creates a weak magnetic field...

Page 36: ...cts for these purposes is only allowed with prior written permission by Auerswald for each individual incident Important Improper use may cause for example functional restrictions or interference the...

Page 37: ...rolled via the display but also via 20 freely programmable function keys 5 of them touch function keys at the display These can be used to execute functions by simply pressing the corresponding functi...

Page 38: ...delivery Headset Separate interface for dynamic headsets also with DHSG support Displays 19 LEDs 16 of them polychromatic 5 inch TFT colour display 800 x 480 pixels background illumination COMfortel X...

Page 39: ...rovided via the delivered wall mounted power supply For telephones with two or more key extension modules either two power supply units or Power over Ethernet and one power supply are required Importa...

Page 40: ...ration and configuration of the telephone are described thoroughly in the Operating and Configuration Manual Also note the information about the war ranty service CE symbol and declaration of conformi...

Page 41: ...stered trade marks of the Microsoft Corporation in the U S A and or other countries All other trademarks mentioned are the property of the corresponding manufac turer MPEG Layer 3 audio coding technol...

Page 42: ...installing the telephone in a suitable location Assembling the Feet of the Casing and Adjusting the Height of the Telephone Requirements Telephone and key extension modules separated from each other T...

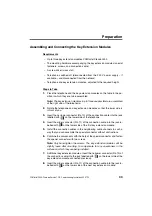
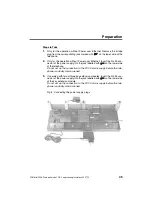
Page 43: ...of you 3 Insert the narrower connector RJ 10 of the connection cable into the jack labelled with on the lower side of the telephone 4 Insert the wider connector RJ 11 of the connection cable into the...

Page 44: ...his via Power over Ethernet PoE The power supply for telephones with a single key extension module can be provided via the delivered power supply For telephones with two or more key extension modules...

Page 45: ...J 45 con nector of the power supply into the jack labelled with on the lower side of the telephone Do not set up the connection to the 230 V mains supply before the tele phone is actually commissioned...

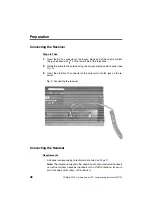
Page 46: ...de the cable to the outside using the corresponding cable channel see Fig 9 3 Insert the other RJ 10 connector of the spiral cord into the jack on the re ceiver Connecting the Headset Requirements A h...

Page 47: ...telephone is placed Output socket on the DSL router or an existing network mains outlet For power supply via power plug 230 V network mains outlet Warning Liquid entering the casing can cause life thr...

Page 48: ...phone on a clean flat surface Attention Some paints or plastics used on furniture may react chemically with the plastic feet on the device and cause them to soften Plastic chem ically changed in this...

Page 49: ...the operation with Power over Ethernet Bridge plug which is inserted into the jack labelled with at the lower side of the telephone For the operation with power supply plug s Power supply plug s con...

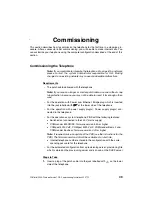
Page 50: ...ing a DHCP request The telephone searches for an Auerswald PBX in the network The setup assistant is automatically started The dialogue box to select the language is opened only during the in itial st...

Page 51: ...provisioning server and the name of the provisioning file from the DHCP server Subsequently the telephone starts up displays the start page and is ready for operation If the telephone starts up with...

Page 52: ...ress the Home key to leave the setup assistant Further Steps Configure the telephone according to your requirements You can carry out the configuration either via the display on the telephone see the...

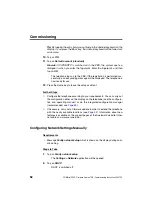
Page 53: ...10 Enter a gateway for the telephone 11 Tap on OK 12 Tap on DNS server 1 13 Enter a DNS server for the telephone 14 Tap on OK 15 Press the Home key to get to the start page The message No account conf...

Page 54: ...Enter the password corresponding to the internal telephone number in the Password entry field 6 Tap on OK 7 Select the country code for the location of the telephone in the list field 8 Tap on the Ar...

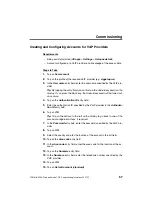
Page 55: ...ord COMpact 3000 only PIN for the telephone Steps to Take 1 Start the Settings application All apps Settings or Manual setup from the setup assistant 2 Tap on Providers exchange systems 3 Tap on New p...

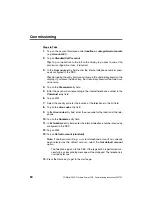
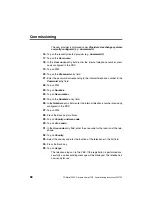
Page 56: ...in the Password entry field 22 Tap on OK 23 Tap on Numbers 24 Tap on New number 25 Tap on the Numbers entry field 26 In the Numbers entry field enter the internal telephone number previously configure...

Page 57: ...y the Android keyboard will be faded out once more 4 Tap on the Authentication ID entry field 5 Enter the authorization ID specified by the VoIP provider in the Authoriza tion ID entry field 6 Tap on...

Page 58: ...o a PC Requirements A PC with the following features Intel Pentium 1 GHz or compatible processor Windows XP Service Pack 3 or higher Windows Vista 32 64 bit Ser vice Pack 2 or higher Windows 7 32 64 b...

Page 59: ...ed under All apps Settings Ethernet For the operation as system telephone Knowledge of the admin user name and of the admin password of the Auerswald PBX Steps to Take 1 Start a browser for example Mo...

Page 60: ...on 1 2B Commissioning Instructions 02 07 12 The configuration manager opens 5 Configure the desired settings in sequence page by page Further Steps Once you have configured all the settings first save...

Page 61: ...abelled with on the lower side of the telephone 2 Subsequently tap on the elements All apps Settings Update Pro visioning If the telephone can find an appropriate firmware file on the USB mem ory stic...

Page 62: ...he lettering label 3 Reinsert the cover with the mat surface upwards Cleaning the Telephone Steps to Take 1 Clean the casing with a slightly moist cloth or anti static cloth 2 Clean the touch screen o...

Page 63: ...ervice Copyright 12 E Einrichtung per PC 30 F Firmware Begriffserkl rung 12 Firmware Update Begriffserkl rung 12 durchf hren 32 G Garantie siehe Beileger Garantie bedingungen Informationsservice Geh u...

Page 64: ...Stichwortverzeichnis 64 COMfortel 3500 Firmwareversion 1 2B Inbetriebnahmeanleitung 02 07 12 U Umwelthinweis 11 Update Firmware 32 V Verwendung der Ger te 7...

Page 65: ...Stichwortverzeichnis COMfortel 3500 Firmwareversion 1 2B Inbetriebnahmeanleitung 02 07 12 65...

Page 66: ...ption 36 device use 36 E environmental notice 40 F feet of casing assemble 42 firmware definition of terms 41 firmware update definition of terms 41 perform 61 firmware update 61 H headset connection...

Page 67: ...Beschriftungsschilder COMfortel 3500 Firmwareversion 1 2B Inbetriebnahmeanleitung 02 07 12 67 Beschriftungsschilder...

Page 68: ...Beschriftungsschilder 68 COMfortel 3500 Firmwareversion 1 2B Inbetriebnahmeanleitung 02 07 12...

Page 69: ...Lettering Labels COMfortel 3500 Firmware Version 1 2B Commissioning Instructions 02 07 12 69 Lettering Labels...

Page 70: ...Lettering Labels 70 COMfortel 3500 Firmware Version 1 2B Commissioning Instructions 02 07 12...

Page 71: ......

Page 72: ......

Page 73: ......

Page 74: ......

Page 75: ......

Page 76: ...884330 02 07 12...

Reviews: