12
!
5
. After connecting the conductors, they must be
secured with the cable tie clamps and reinstall
protective covers of the receiver.
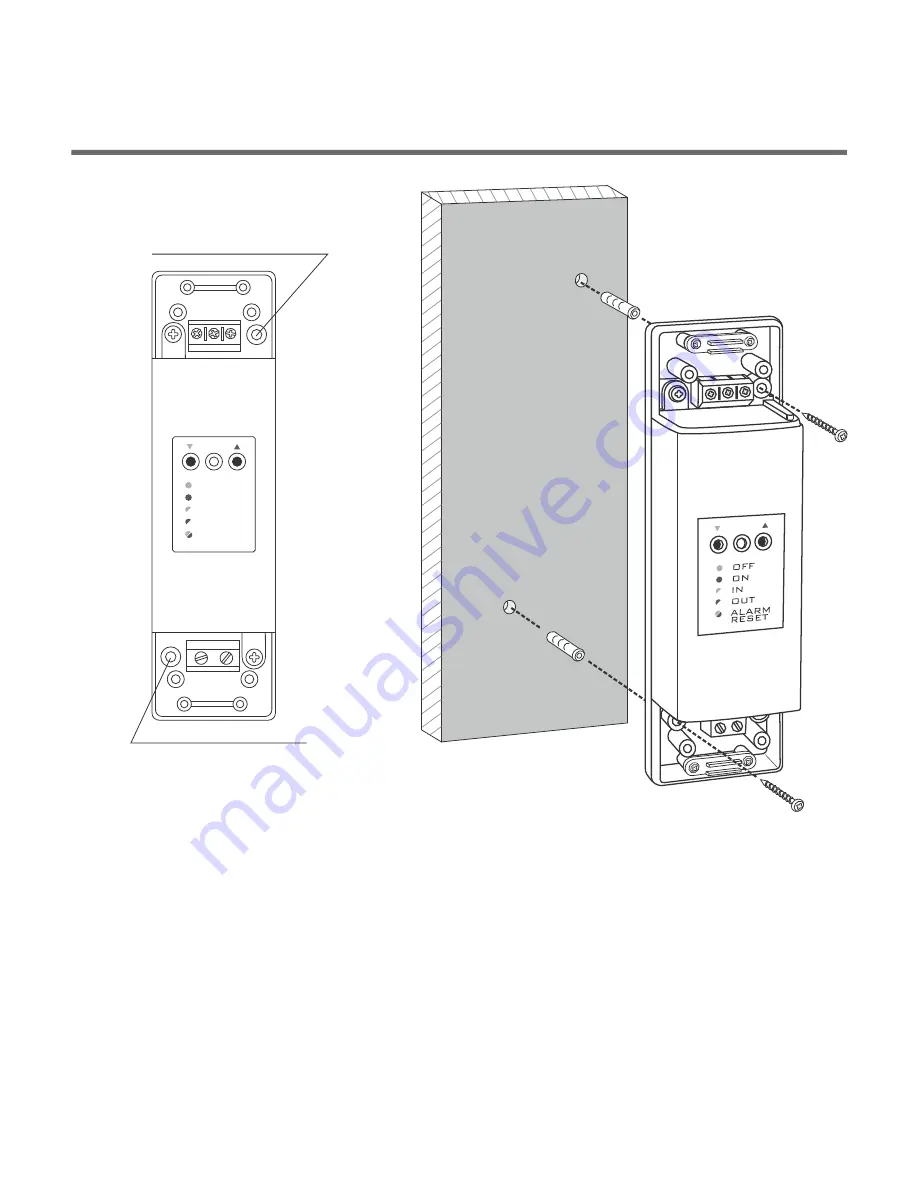
To fasten the RTH receiver to the wall:
1)
Remove protective covers from the lower and upper part of the regulator.
(See chapter: “Fastening the RTH receiver”).
2)
On the wall, mark the location of holes for fastening screws.
3)
In marked places, drill holes of a diameter corresponding to the bundled
wall plugs (5 mm).
4)
Insert wall plugs into the drilled holes.
5)
Screw in the RTH receiver to the wall with screws, making sure they hold
the receiver securely.
Fastening the RTH receiver to the wall
WARNING !
Cables supplied with the regulator are designed for conducting maximal
load of 2.5 A.
If devices to be connected require more power, the cables need
to be replaced with cables of the appropriate cross-sectional area.
13
NOTE:
If the wall is wooden, there is no need to use wall plugs. In such a
case, drill two holes 2.7 mm in diameter instead of 5 mm, and screw the
screws directly into the wood.
NOTE:
The RTH receiver cannot be placed in metal containers
(e.g. an
assembly box, a metal enclosure of a heater)
in order to not to interfere with
its operation.
OFF
ON
IN
OUT
ALARM
RESET
hole for fastening
the receiver to the
wall with a screw
hole for fastening
the receiver to the
wall with a screw
Summary of Contents for S03 RTH
Page 1: ...OFF ON IN OUT ALARM RESET S03 RTH USER S MANUAL EN ...
Page 23: ......
Page 24: ...www auraton pl ver 20180223 ...


