background image

4

Under Desk/Wallmount Rack

Before You Start

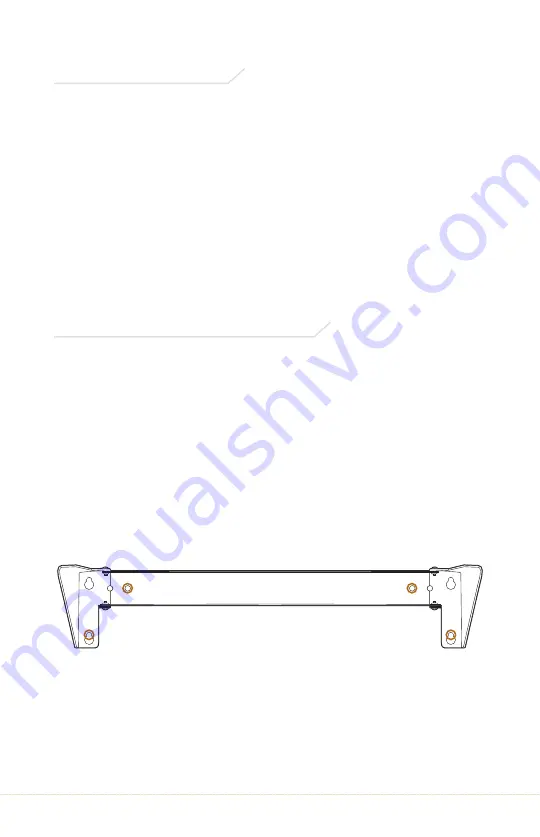
The DWR-2U/4U/6U features two 

different sets of mounting holes.

The keyhole slots allow you to mount and 

remove the rack from its mounting screws.

The round holes are designed to be used 

with the included wood screws. Use these for 

vertical and under-desk installation.

Under-Desk Installation

Important!

 The included wood screws are M5×25 

(3/16 × 1 in.). Make sure the desk or tabletop is at least 

1 inch thick. For tops that are less than 1 inch thick, use 

shorter screws that are appropriate for your installation.

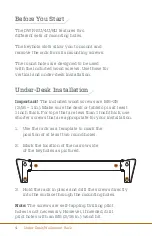
1.  Use the rack as a template to mark the 

position of at least two round holes.

2.  Mark the location of the narrow side 

of the keyholes as pictured.

3.  Hold the rack in place and drill the screws directly 

into the surface through the mounting holes.

Note:

 The screws are self-tapping. Drilling pilot 

holes is not necessary. However, if needed, drill 

pilot holes with an M5 (3/16 in.) wood bit.

Summary of Contents for DWR-6U

Page 1: ...Under Desk Wallmount Rack DWR 2U DWR 4U DWR 6U 2U 4U 6U Owner s Manual Model DWR 4U Shown ...

Page 2: ...s Please read and follow these instructions and keep this manual in a safe place Make sure the mounting surface can support the combined weight of the rack and installed equipment This product has been designed specifically for mounting directly on wooden desks or tables masonry or concrete walls depending on the wall type and material accessories such as drywall anchors and longer screws may be r...

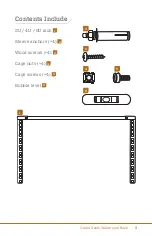
Page 3: ...Under Desk Wallmount Rack 3 Contents Include 2U 4U 6U rack 1 Sleeve anchors 4 2 Wood screws 4 3 Cage nuts 4 4 Cage screws 4 5 Bubble level 6 1 2 3 4 6 5 ...

Page 4: ...screws are M5 25 3 16 1 in Make sure the desk or tabletop is at least 1 inch thick For tops that are less than 1 inch thick use shorter screws that are appropriate for your installation 1 Use the rack as a template to mark the position of at least two round holes 2 Mark the location of the narrow side of the keyholes as pictured 3 Hold the rack in place and drill the screws directly into the surfa...

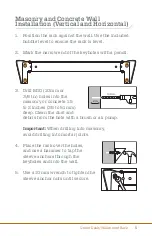
Page 5: ...pencil 3 Drill M10 10 mm or 3 8 in holes into the masonry or concrete 1 5 to 2 inches 38 to 51 mm deep Clean the dust and debris from the hole with a brush or air pump Important When drilling into masonry avoid drilling into mortar joints 4 Place the rack over the holes and use a hammer to tap the sleeve anchors through the keyholes and into the wall 5 Use a 10 mm wrench to tighten the sleeve anch...

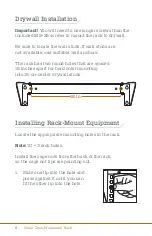
Page 6: ...table wall anchors The rack has two round holes that are spaced 16 inches apart for horizontal mounting into 16 on center drywall studs Installing Rack Mount Equipment Locate the appropriate mounting holes in the rack Note 1U 3 rack holes Install the cage nuts from the back of the rack so the cage nut lips are pointing out 1 Slide one lip into the hole and press against it until you can fit the ot...

Page 7: ...10 4 cm 4U 4 19 4 7 6 in 10 2 49 3 19 3 cm 6U 4 19 4 11 1 in 10 2 49 3 28 2 cm Weight 2U 1 4 lb 0 64 kg 4U 1 8 lb 0 8 kg 6U 2 2 lb 1 kg Alternate Slide one lip into the hole and press the other lip with a slotted screwdriver until it fits into the hole 2 Use the included cage nut screws to install your equipment into the rack ...

Page 8: ...e or defect caused by misuse neglect accident alteration abuse improper installation or maintenance EXCEPT AS PROVIDED HEREIN THE WARRANTY PROVIDER MAKES NEITHER ANY EXPRESS WARRANTIES NOR ANY IMPLIED WARRANTIES INCLUDING BUT NOT LIMITED TO ANY IMPLIED WARRANTY OF MERCHANTABILITY OR FITNESS FOR A PARTICULAR PURPOSE This warranty provides you with specific legal rights and you may also have additio...

Reviews: