background image

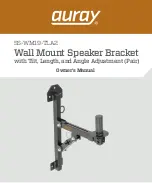
Owner’s Manual

SS-WM19-TLA2

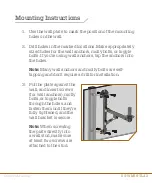
1.  Use the wall plate to mark the position of the mounting 

holes on the wall. 

2.  Drill holes in the marked locations. Make appropriately 

sized holes for the wall anchors, molly bolts, or toggle 

bolts. If you’re using wall anchors, tap the anchors into 

the holes. 


Note:

 Many wall anchors and molly bolts are self-

tapping and don’t require a drill for installation. 

3.  Put the plate against the 

wall, and insert screws 

(for wall anchors), molly 

bolts, or toggle bolts 

through the holes, and 

fasten them until they’re 

fully tightened, and the 

wall bracket is secure. 


Note:

 When screwing 

the plate directly into 

a wall stud, make sure 

at least two screws are 

attached to the stud.

Mounting Instructions

Summary of Contents for SS-WM19-TLA2

Page 1: ...Wall Mount Speaker Bracket with Tilt Length and Angle Adjustment Pair SS WM19 TLA2 Owner s Manual ...

Page 2: ... inches to accommodate a wide range of speaker depth An integrated safety pin and chain provide extra security for your mounted speakers Five point wall brackets attach to any flat surface and provide flexible speaker placement options for venues like clubs theaters and function halls Please read and follow these instructions and keep this manual in a safe place Handle the unit with care Clean the...

Page 3: ...tap the anchors into the holes Note Many wall anchors and molly bolts are self tapping and don t require a drill for installation 3 Put the plate against the wall and insert screws for wall anchors molly bolts or toggle bolts through the holes and fasten them until they re fully tightened and the wall bracket is secure Note When screwing the plate directly into a wall stud make sure at least two s...

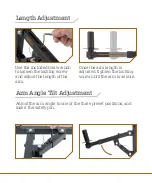
Page 4: ...g screw and adjust the length of the arm Once the arm length is adjusted tighten the locking screw until the arm is secure Adjust the arm angle to one of the three preset positions and insert the safety pin Length Adjustment Arm Angle Tilt Adjustment ...

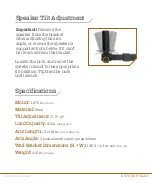
Page 5: ... cm Arm Angle 3 position with safety pin and chain Wall Bracket Dimensions H W 19 63 4 3 in 49 9 10 9 cm Weight 4 51 lb 2 04 kg Important Remove the speaker from the bracket when adjusting the arm angle or ensure the speaker is supported from below if it can t be removed from the bracket Loosen the nuts and move the speaker mount to the appropriate tilt position Tighten the nuts until secure ...

Page 6: ...by misuse neglect accident alteration abuse improper installation or maintenance EXCEPT AS PROVIDED HEREIN THE WARRANTY PROVIDER MAKES NEITHER ANY EXPRESS WARRANTIES NOR ANY IMPLIED WARRANTIES INCLUDING BUT NOT LIMITED TO ANY IMPLIED WARRANTY OF MERCHANTABILITY OR FITNESS FOR A PARTICULAR PURPOSE This warranty provides you with specific legal rights and you may also have additional rights that var...

Reviews: