background image

8  GB/IE/CY

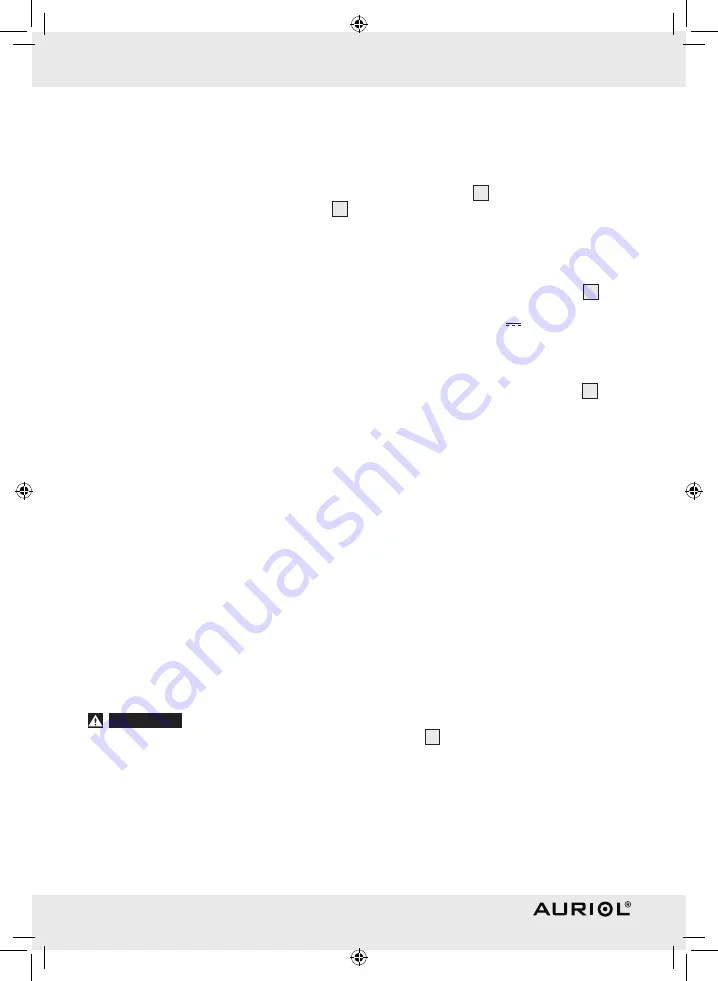
Before Initial Use

j

   Make sure that the device is standing safely on 

a stable surface.

j

   Make sure that the device is mounted properly 

if installed on a wall. A falling clock could injure 
people or cause damage to the device itself or 
to other objects.

j

   Stand the radio-controlled clock on its base 

19


or mount it on the wall.

j

  Place the clock on a level, horizontal surface.

j

   Do not stand the device on valuable or sensitive 

surfaces without suitable protection. The surface 
may otherwise be damaged.

j

   Do not place the device anywhere near to sources 

of interference such as televisions, computers, 
thick walls, etc. These may hinder reception of 
the radio signal.

j

   Do not use the clock in reinforced concrete 

buildings, e. g. airports, high-rises, factories or 
basements. This can seriously disrupt reception 
of the radio signal.

j

   Do not start radio reception in a moving vehicle, 

e. g. car or train. Reception of the radio signal 
by the device can disrupt the vehicle electronics.

j

   Do not expose the clock to temperatures below 

--20°C for any length of time. This can seriously 
affect the reception range of the device.

Q

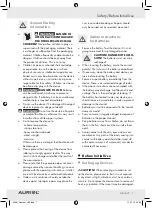
   Installing the LCD 

radio-controlled clock

note: 

You will need a drill, suitable assembly 

material and a screwdriver for installation. 

CaUTIOn! DangEr TO LIFE anD rISK 

OF InJUrY; rISK OF DaMagE TO PrOP-
ErTY!

 Please read the operating and safety instruc-

tions for your drill carefully.

WarnIng!

 DangEr TO LIFE!

 Please 

ensure that you do not drill into any electrical wiring, 
gas or water pipes in the wall. If necessary, carry out 
checks with a wire, pipe and stud detector before 
you drill into a wall.

j

   Find a suitable place to install the radio-controlled 

clock.

j

    Mark the drill hole on the wall.


CaUTIOn! DangEr OF InJUrY!

 Refer to 

the operating instructions for your electric drill.

j

    Drill the hole with a drill.

j

    Insert a suitable wall plug into the drill hole.

j

    Use a screwdriver to insert a suitable screw.

j

   Hang the radio-controlled clock on the screw 

using the mount 

16

.

Q

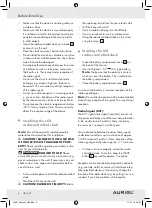
   Starting the LCD 

radio-controlled clock

j

   Open the battery compartment cover 

20

 on 

the back of the device. 

j

   Insert a Mignon 1.5 V   / AA type battery. 


note:

 Make sure that the polarity is correct 

when you insert the battery. This is indicated in 
the battery compartment. 

j

  Close the battery compartment cover 

20

.

As soon as the battery is inserted, reception of the 
radio signal begins.

note:

 Do not alter the position of the radio-controlled 

clock during reception of the signal. This may disrupt 
reception.

radio Signal (DCF):

The DCF signal (time signal transmitter) consists of 
time pulses emitted by one of the most accurate clocks 
in the world close to Frankfurt / Main, Germany – 
this varies by 1 second in a million years.

Your radio-controlled clock receives these signals  
under ideal conditions up to a distance of approx. 
1,500 km around Frankfurt / Main. Reception of the 
radio signal generally takes approx. 3 - 10 minutes.

j

   If it does not work properly, restart the radio-

controlled clock. To do this, keep the WAVE 
button 

21

 pressed for approx. 3 seconds. 

Reception can be considerably impaired by obstacles 
(e.g. concrete walls) or sources of interference (e.g. 
other electrical devices). If necessary, change the 
location of the radio clock (e.g. by putting it near a 
window) if you have problems with reception.

45981_Content_LB3.indd   8

11.01.10   08:35

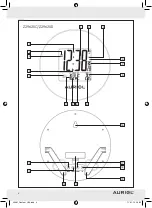
Summary of Contents for Z29620A

Page 1: ...3 1 2 3 4 5 6 8 9 10 11 12 13 14 15 16 17 18 19 20 21 22 Z29620A Z29620B 7 45981_Content_LB3 indd 3 11 01 10 08 35...

Page 2: ...4 3 4 5 16 17 18 6 8 9 10 11 12 13 14 15 2 1 19 21 20 19 22 Z29620C Z29620D 7 45981_Content_LB3 indd 4 11 01 10 08 35...

Page 3: ...of DCF radio signal Page 9 Setting the time date month year manually Page 9 Using the 12 24 hour display Page 9 Setting the alarm Page 9 Activating Deactivating the alarm Page 10 Switching off the al...

Page 4: ...ce is not intended for commercial use Q Description of Parts 1 Time display 2 Radio icon 3 Battery icon 4 Summertime icon 5 Temperature scale C F 6 Inside temperature 7 Phase of the moon 8 Day of the...

Page 5: ...ions or interfer ence with the device by unauthorised individuals J Under no circumstances should you take the device apart Improper repairs may place the user in considerable danger Repairs should on...

Page 6: ...pipe and stud detector before you drill into a wall j Find a suitable place to install the radio controlled clock j Mark the drill hole on the wall m CAUTION DANGER OF INJURY Refer to the operating i...

Page 7: ...e faster You can also use this fast setting option for subse quent settings If you do not press any button for 60 seconds the LCD automatically reverts to the standard display 4 Confirm your setting b...

Page 8: ...he towns and times will appear in the LC display in place of the day of the week display 8 month display 9 and date display 10 j Press the MODE button 22 briefly three times j Press the MODE button 22...

Page 9: ...e moon 7 on the LCD The following icons can be displayed New moon Waxing half moon Half moon Waxing full moon Full moon Waning full moon Half moon Waning half moon Q Displaying summertime Summertime i...

Page 10: ...ection points and their opening hours can be obtained from your local authority Faulty or used batteries must be recycled in accord ance with Directive 2006 66 EC Please return the batteries and or th...

Page 11: ...K ytt DCF radiosignaalin vastaanotto Sivu 16 Kellonajan p iv yksen kuukauden vuoden asetus Sivu 17 12 24 tuntin yt n k ytt Sivu 17 H lytyksen asetus Sivu 17 H lytyksen aktivointi deaktivointi Sivu 18...

Page 12: ...3 Paristosymboli 4 Kes aikasymboli 5 L mp tila asteikko C F 6 Sis l mp tila 7 Kuun vaihe 8 Viikonp iv n n ytt kaupungin nimi 9 Kuukauden n ytt minuuttin ytt maailmanaika 10 P iv yksen n ytt tuntin ytt...

Page 13: ...aiheuttaa k ytt j lle huomattavia vaaratilanteita Anna korjaukset vain ammattiliikkeen teht v ksi Paristoja koskevia turvallisuusohjeita J Ota paristot pois laitteesta jos laitetta ei k ytet pitk n ai...

Page 14: ...j Poraa reik porakoneella j Kiinnit sopiva tulppa porausreik n j Ruuvaa ruuvinv ntimell siihen sopiva ruuvi j Ripusta radio ohjattu kello ripustuslaitteella 16 ruuviin Q Radio ohjatun LCD kellon k ytt...

Page 15: ...akion ytt n 4 Vahvista sy tt painamalla MODE n pp int 22 Minuuttin ytt vilkkuu 5 Toista toiminnot 3 ja 4 minuuttien vuoden kuukauden 9 ja p iv yksen 10 asettamiseksi Q 12 24 tuntin yt n k ytt j Paina...

Page 16: ...ja aikojen n ytt tulee LC n ytt n viikonp iv n yt n 8 kuukausi n yt n 9 ja p iv yksen n yt n 10 asemasta j Paina 3 x MODE n pp int 22 j Paina MODE n pp int 22 ja pid se painet tuna kahden sekunnin aja...

Page 17: ...n N ytt ruutuun tulevat viikonp iv n 8 kuukauden 9 ja p iv yksen 10 n yt t Q L mp tilan n ytt C F LC n yt ss n ytet n aktuelli sis l mp tila 6 j Paina DOWN n pp int 17 voidaksesi kytke edestakaisin l...

Page 18: ...iden j tehuoltomah dollisuuksista kunnan tai kaupungintoimistosta l heit k ytetty tuotetta talousj ttei siin Toimi ymp rist yst v l lisesti toimit tamalla se asianmukaiseen j tehuoltoon Paikallisesta...

Page 19: ...idan 24 Anv ndning Ta emot DCF radiosignal Sidan 24 St lla in klockslag datum m nad r Sidan 25 Anv nda 12 24 timmarsindikering Sidan 25 St lla in larm Sidan 25 Aktivera inaktivera larm Sidan 25 St nga...

Page 20: ...terisymbol 4 Symbol sommartid 5 Temperaturskala C F 6 Inomhustemperatur 7 M nfas 8 Veckodag Stad 9 M nad Minuter v rldstid 10 Datum Timmar v rldstid 11 Kalender 12 Symbol helglarm 13 PM eftermiddag 14...

Page 21: ...ngar f r batterier J Ta ur batterierna om produkten inte skall an v ndas under l ngre tid J OBSERVERA EXPLOSIONS RISK Ladda aldrig batterierna J Kontrollera att batteripolerna ligger t r tt h ll Dessa...

Page 22: ...a r korrekt placerade Detta visas p batterifacket j St ng batterifacksluckan 20 Radiosignalen b rjar tas emot n r batteriet r ilagt Obs Flytta inte p klockan Risk f r st rd mottag ning f religger Radi...

Page 23: ...resp DOWN 17 f r att st lla in nskat v rde Tryck MODE 22 en g ng f r att bekr fta inmatningen 4 Minuterna blinkar Upprepa steg 3 f r att st lla in minuterna Helglarm Helglarmet r aktivt dagligen l rda...

Page 24: ...s zon Sommar vintertid 1 Alaska AL 12 manuellt 1H 2 Honolulu HN 10 manuellt 1H 3 Vancouver VA 8 manuellt 1H 4 Los Angeles LA 8 manuellt 1H 5 St George SG 7 manuellt 1H 6 Chicago CH 6 manuellt 1H 7 Tor...

Page 25: ...t rningar Ta ur batterierna en stund och s tt tillbaka dem om s dana funktionsst rningar f rekommer Q Reng ring och sk tsel j Reng r produkten p utsidan med mjuk torr trasa j Anv nd aldrig vatten elle...

Page 26: ...h samtliga relevanta f re skrifter Dessa handlingar finns tillg ngliga och kan best llas vid behov EMC Produktbeteckning Radiostyrd LCD v ggklocka Modell nr Z29620A Z29620B Z29620C Z29620D Version 01...

Page 27: ...g Modtagelse af radiosignalet Side 32 Indstilling af klokkesl t dato m ned r Side 33 Indstilling af 12 24 timersmodus Side 33 Indstilling af alarm Side 33 Aktivering deaktivering af alarmen Side 33 Sl...

Page 28: ...beregnet til erhvervsm ssig anvendelse Q De enkelte dele 1 Tidsvisning 2 Radio tegn 3 Batteritegn 4 Tegn for sommertid 5 Temperaturskala C F 6 Indend rs temperatur 7 M ne fase 8 Ugedagsvisning bynavn...

Page 29: ...kke autoriserede personer ikke er omfattet af garantien J Apparatet m ikke skilles ad Forkert udf rte reparationer kan bevirke alvorlig fare for bru geren Reparationer m kun udf res af fagfolk Sikkerh...

Page 30: ...ind i borehullet j Sp nd ved hj lp af en skruetr kker en pas sende skrue ind j H ng radiouret ved hj lp af oph ngningsme kanismen 16 p skruen Q LCD radiouret tages i brug j Batteriafd kningen 20 p ba...

Page 31: ...es UP tasten 18 for at stille frem og tilbage mellem 12 timers og 24 timers formatet Bem rk AM tegnet 14 i displayet st r i 12 timersmodus for formiddag PM tegnet 13 i displayet st r i 12 timersmodus...

Page 32: ...men det viste lokale klokkesl t afviger fra det virkelige kan De aktualisere det lokale klokkesl t automatisk j Tryk og hold DOWN tasten 17 trykket i ca 2 Sekunden til dette form l Det lokale klokkes...

Page 33: ...let 3 dukker op i LC displayet hvis batteriet er for svagt V r opm rksom p at skifte batteriet i tide j Batteriafd kningen p bagsinden af uret 20 bnes j Det brugte batteri fjernes j Der il gges et nyt...

Page 34: ...med husholdningsaffald De kan indeholde giftige tungmetaller og er under lagt behandling af milj skadelig affald De kemiske symboler for tungmetaller er f lgende Cd kadmium Hg kviks lv Pb bly Aflever...

Page 35: ...37 GR CY 38 38 38 38 38 39 39 40 LCD 40 LCD 40 DCF 41 41 12 24 42 42 42 42 42 43 C F 44 44 44 44 44 45 45 45 45981_Content_LB3 indd 37 11 01 10 08 35...

Page 36: ...0 11 12 13 PM 14 AM 15 16 17 DOWN 18 UP 19 20 21 WAVE 22 MODE Q 1x Mignon 1 5 V AA Z29620A Z29620B 22 5 x 19 5 x 2 1cm x x Z29620C Z29620D 21 x 2 5cm Z29620A Z29620B Z29620C Z29620D Q 1 x LCD 1 x Mign...

Page 37: ...39 GR CY J J J J J J J J J J J J J J J 45981_Content_LB3 indd 39 11 01 10 08 35...

Page 38: ...40 GR CY J J Q Q m j j j 19 j j j j j j 20 C Q LCD m j j m j j j j 16 Q LCD j 20 j Mignon 1 5 V AA 45981_Content_LB3 indd 40 11 01 10 08 35...

Page 39: ...DCF DCF 1 1 1 500 M 3 10 j WAVE 21 3 Q Q DCF DCF LCD 2 DCF j WAVE 21 3 DCF LCD 2 DCF DCF Q 1 WAVE 21 3 2 2 WAVE 21 3 3 MODE 22 2 UP 18 DOWN 17 UP 18 DOWN 17 60 LCD 4 MODE 22 45981_Content_LB3 indd 41...

Page 40: ...LCD 12 PM 13 LCD 12 Q 1 MODE 22 LCD 2 MODE 22 2 3 UP 18 DOWN 17 MODE 22 4 3 1 MODE 22 1 MODE 22 2 MODE 22 2 3 UP 18 DOWN 17 MODE 22 4 3 Q j MODE 22 j UP 18 DOWN 17 15 12 LCD j UP 18 DOWN 17 15 12 LCD...

Page 41: ...St George SG 7 1 6 Chicago CH 6 1 7 Toronto TO 6 1 8 New York NY 5 1 9 Rio de Janeiro RI 3 1 10 London LO 0 DCF 11 Frankfurt FF 1 DCF 12 Paris PA 1 DCF 13 Madrid MA 1 DCF 14 Rome RO 1 DCF 15 Zurich Z...

Page 42: ...SY 10 1 26 Auckland AK 12 1 j MODE 22 j MODE 22 j MODE 22 2 8 9 10 Q C F 6 LCD j DOWN 17 5 Celsius Fahrenheit Q 8 LCD Q LCD 4 DCF Q 3 LCD j 20 j j Mignon 1 5 V AA j 20 Q j CB j 45981_Content_LB3 indd...

Page 43: ...j Q 2006 66 EC Cd Hg Pb Q Q Milomex Ltd c o Milomex Services Hilltop Cottage Barton Road Pulloxhill Bedfordshire MK45 5HP UK EMC LCD Z29620A Z29620B Z29620C Z29620D 01 2010 45981_Content_LB3 indd 45 1...

Page 44: ...Seite 49 Bedienung DCF Funksignal empfangen Seite 50 Uhrzeit Datum Monat Jahr einstellen Seite 50 12 24 Stundenanzeige verwenden Seite 50 Alarm einstellen Seite 50 Alarm aktivieren deaktivieren Seite...

Page 45: ...keine Haftung Das Ger t ist nicht f r den gewerblichen Einsatz bestimmt Q Teilebeschreibung 1 Zeitanzeige 2 Funk Symbol 3 Batterie Symbol 4 Symbol Sommerzeit 5 Temperaturskala C F 6 Innentemperatur 7...

Page 46: ...g an Textilien reiben Dieses kann zur statischen Aufladungen f hren und das Messergebnis beeinflussen J Beachten Sie dass Besch digungen durch unsachgem e Handhabung Nichtbeachtung der Bedienungsanlei...

Page 47: ...n unter 20 C aus Q LCD Funkwanduhr montieren Hinweis F r diesen Arbeitsschritt ben tigen Sie eine Bohrmaschine sowie geeignetes Montage material und einen Schraubendreher m VORSICHT LEBENS UND VERLET...

Page 48: ...signal aufgrund von Fehlern einer zu gro en Distanz zum Sender o nicht empfangen k nnen haben Sie die M glichkeit die Zeit manuell einzu stellen Sobald ein Empfang des DCF Funksignals erfolgreich ist...

Page 49: ...e die UP 18 bzw DOWN Taste 17 Das Wochentag Alarm Symbol 15 bzw das Wochenend Alarm Symbol 12 erscheint im LC Display Der Alarm ist aktiviert j Dr cken Sie die UP 18 bzw DOWN Taste 17 erneut Das Woche...

Page 50: ...H 8 New York NY 5 manuell 1H 9 Rio de Janeiro RI 3 manuell 1H 10 London LO 0 DCF Signal 11 Frankfurt FF 1 DCF Signal 12 Paris PA 1 DCF Signal 13 Madrid MA 1 DCF Signal 14 Rome RO 1 DCF Signal 15 Zuric...

Page 51: ...ung des Ger tes j Elektrostatische Entladungen k nnen zu Funktions st rungen f hren Entfernen Sie bei solchen Funktionsst rungen kurzzeitig die Batterie und setzen Sie sie erneut ein Q Reinigung und P...

Page 52: ...5 5HP UK erkl ren dass sich das Produkt in bereinstimmung mit den grundlegenden Anforde rungen und allen anderen relevanten Vorschriften befindet Diese Unterlagen sind hinterlegt und k nnen bei Bedarf...

Reviews: