Section 03
ENGINE
Subsection 11
(GEARBOX)
03-11-22
VMR2004_134_03_11A.FM
NOTE:
The alligator clip is recommended.
Replace wire harness
no. 54
if damaged, brittle,
hard or otherwise damaged.
If the shifting indicator switch and its harness are
good, check the vehicle harness and/or indicator
lights.
Installation
For installation, reverse the removal procedure.
Pay attention to the following details.
If all switches are removed, take care to put back
wires at the proper location.
Take care do not damage shifting indicator switch-
es threads during installation.
STARTER DRIVE PINION
Removal
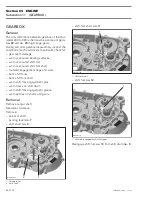
Remove:
– drive pulley (refer to CVT)
– screw
no. 53
retaining starter drive pinion cover
NOTE:
Do not lose shims
no. 50, no. 52
and/or
spring
no. 49
during removal of starter pinion cover.
– starter drive pinion cover
no. 51
– starter drive pinion
no. 48
.
1. Starter drive pinion cover
2. Starter drive pinion
3. Screw
4. Shim
5. Shim
6. Spring
Inspection
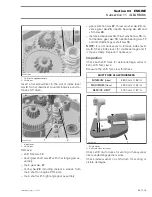
Check if starter drive pinion is free of movement.
NOTE:
Centrifugal weights avoid disengaging of
the pinion while starting the engine.
1. Starter drive pinion
2. Starting position (spring released)
3. Gear is engaged drive pulley fixed half (spring loaded)
Replace needle bearing
no. 46
if damaged (see
CRANKCASE
above).
Check starter drive pinion cover for crack and clean
it before reinstallation.
Check bore inside starter drive pinion cover if dam-
aged, worn or otherwise damaged. Replace as
necessary.
Installation
For installation, reverse the removal procedure.
NOTE:
Apply multi-purpose grease inside starter
drive pinion cover.
3
R400motr240A
4
1
2
5
6
2
R400motr217A
3
1


