Slim Cooker Installation & Operating Instructions
FOR YOUR SAFETY – WHAT TO DO IF YOU SMELL GAS
Turn off gas supply at bottle immediately and extinguish all naked flames.
Remove the appliance from any potential ignition sources and do not operate any electrical equipment near the
appliance (e.g.: light switches, power points, mobile phones, pagers, other appliances)
Allow sufficient time for any accumulated propane gas to disperse
Check for damage to seals and hoses and if no damage is visible, ensure fittings are adequately tight then
check for gas leaks using soapy water as detailed in this manual in a well ventilated area. Do not try to detect
leaks using a flame
If odour / gas leak persists, turn off the gas supply at the gas cylinder and contact an authorized service agent.
HOW TO CHECK FOR GAS LEAKS
To check for leaks, open the gas supply at the bottle with the appliance gas valves in the OFF position (DO
NOT SWITCH APPLIANCE ON) and check for leakage by brushing a solution of soapy detergent and water
onto the connection points at the bottle and the appliance. If bubbling is evident (it may take more than 30
seconds to appear) this indicates a gas leak is present. If disassembling, cleaning, reassembling and tightening
the connection does not rectify the leak you should close the gas cylinder valve and consult the place of
purchase for assistance.
Turn on the gas and check for gas leakage at all joints with soapy water or other approved methods.
PROCEDURES FOR GAS LEAKAGE
The strong and distinctive odour of gas may make you aware of a gas leak. If you suspect a gas leak:
Immediately turn off the gas supply at the gas bottle;
Turn off all appliances and pilot lights;
Do not allow gas to build up in the area.
Do not use any naked flame or other ignition source (such as light switches, power points, mobile phones and
pagers);
Do not operate any electrical equipment in the vicinity of a gas leak;
Contact your licensed gas fitter to repair the leak and re-light the appliance.
NEVER attempt to repair the appliance yourself.
IT MUST BE SERVICED AND REPAIRED BY A LICENSED PLUMBER OR GAS FITTER
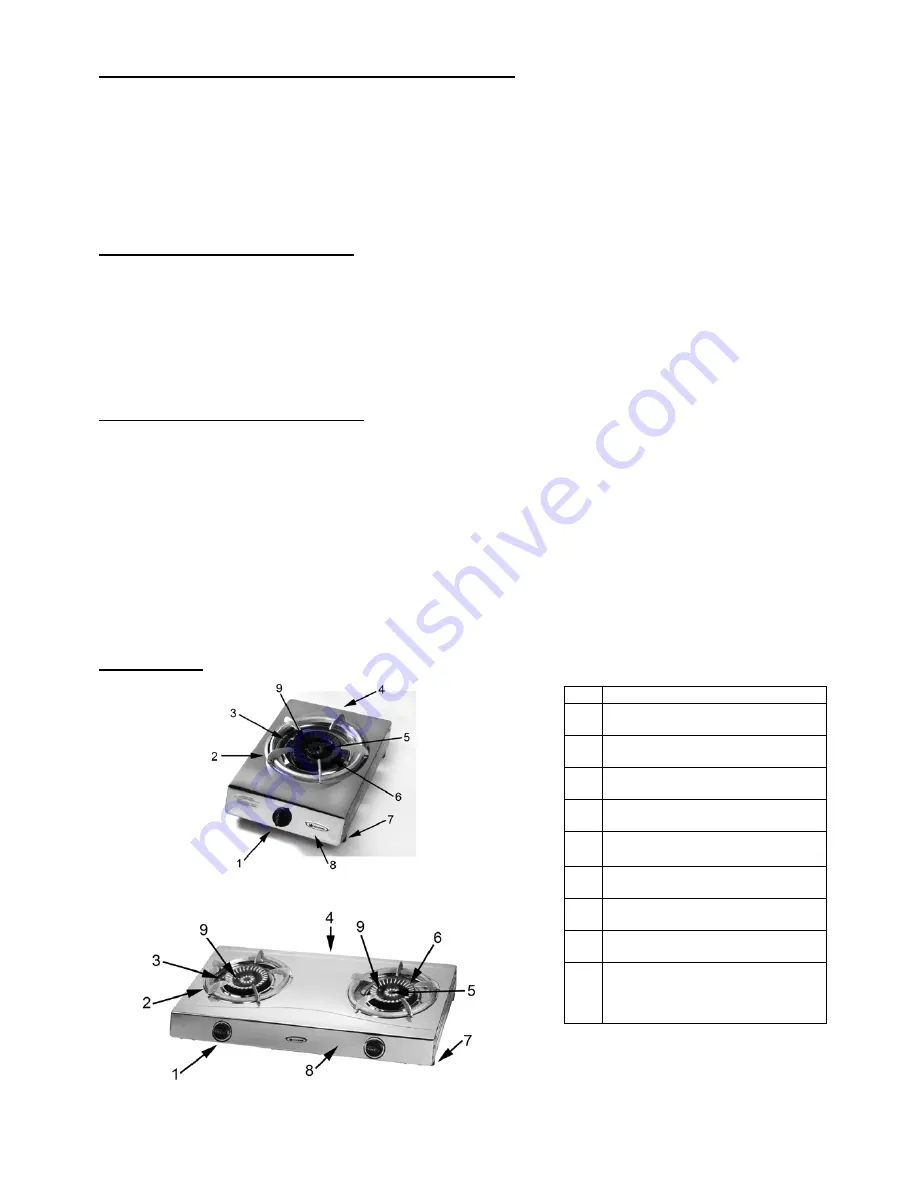
PARTS INDEX
3012PG-B, 3012NG, S3012PG & 3012NG
7012PG-B, 7012NG, S7012PG & S7012NG
No:
Part Name
1 Control
Knob
2 Trivet
3 Tray
4 Gas
Inlet
5 Inner
Burner
6 Outer
Burner
7 Leg
8 Body
9
Safety Device
(S3012PG, S3012NG, S7012PG
& S7012NG only)
Summary of Contents for 3012NG
Page 11: ...AUSCROWN www auscrown com ...


